
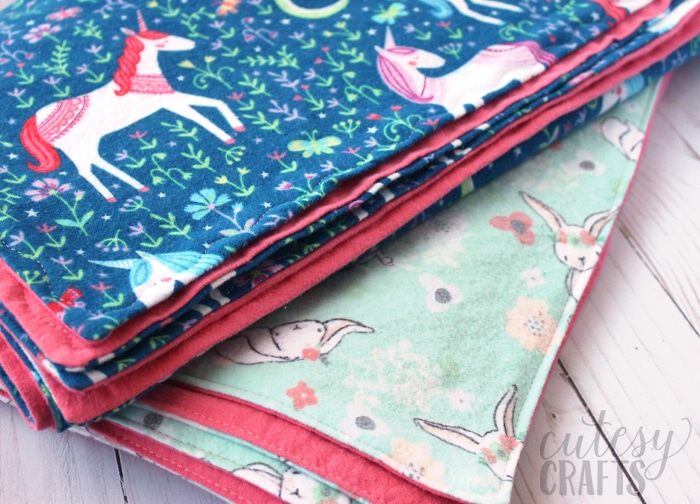
How to Make a Blanket for a Baby
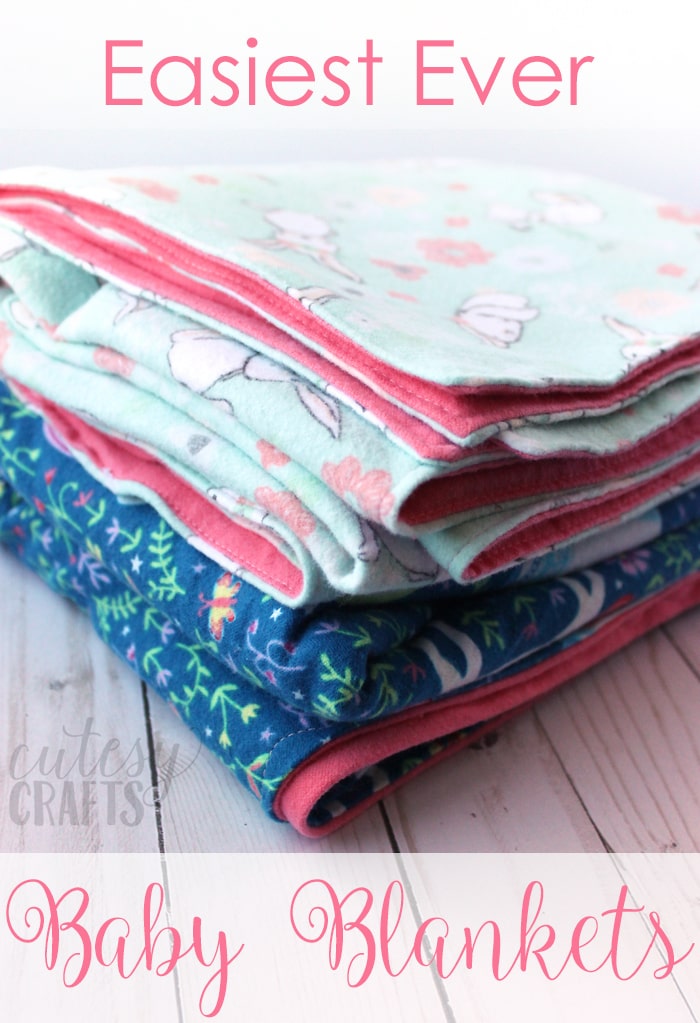
Are you always jealous of that person at the baby shower that brings the cutest homemade gifts? Maybe it’s just me. As crafty as I am, I always just default to buying something because I don’t have time. Well, I’m trying to get ahead of the game by stocking up on some easy, homemade baby shower gifts. I thought I would show you how to make a blanket for a baby that is super duper easy. All you need are a couple yards of flannel, which comes in some of the cutest nursery prints! Coordinate this with some cute matching burp cloths or hair bows, and you will be the one that everyone is jealous of. Here’s my tutorial for how to make a baby blanket from flannel. Also take a look at these other easy homemade blanket tutorials.
(This post may contain affiliate links, which means I may receive a commission, at no extra cost to you, if you click a link and purchase something that I have recommended.)
To make a baby blanket, you’ll need:
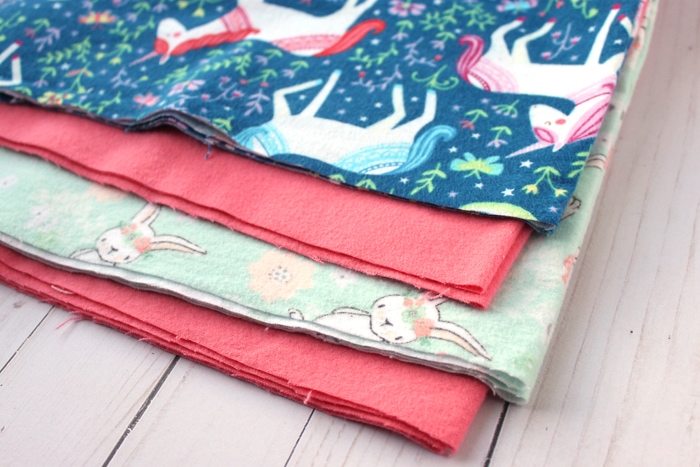
- Two pieces of flannel – At least 1 yard each. I used 1-1/4 yard pieces to make them a little bigger.
- Coordinating thread – One to match the top and one to match the bottom.
- Cutting mat and rotary cutter (optional)
- Sewing machine
- Chopstick or crochet hook
- Iron
Watch the video!
After you’re done reading the post, if you still need more help, I filmed a step-by-step tutorial that shows you exactly how to make a baby blanket. You can watch it in this post.
How to Make a Blanket
First thing you need to do is lay out your flannel and straighten up all of the edges. Make sure the two pieces of flannel you use are the same size. Use a rotary cutter and cutting mat to make it easier to cut your edges straight. Pin the two pieces right-sides-together (with the print on the inside).
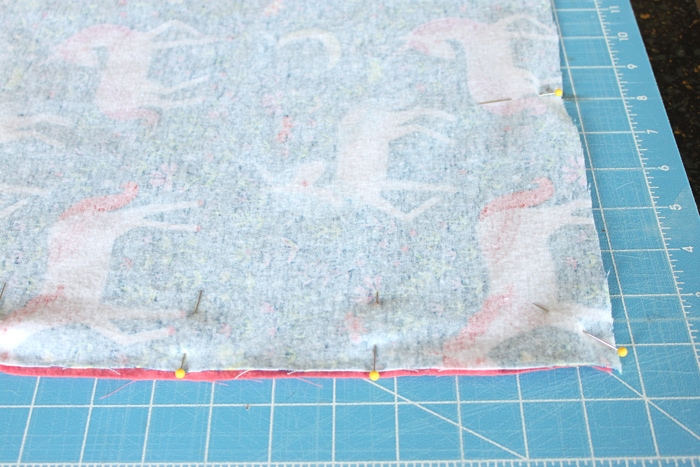
Sew a 1/2-inch seam all around the outside of the blanket. Remove the pins as you go.
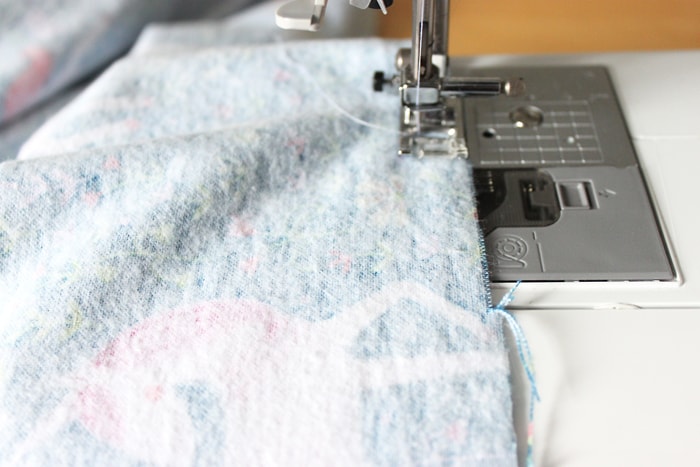
Leave about 8 inches unsewn.

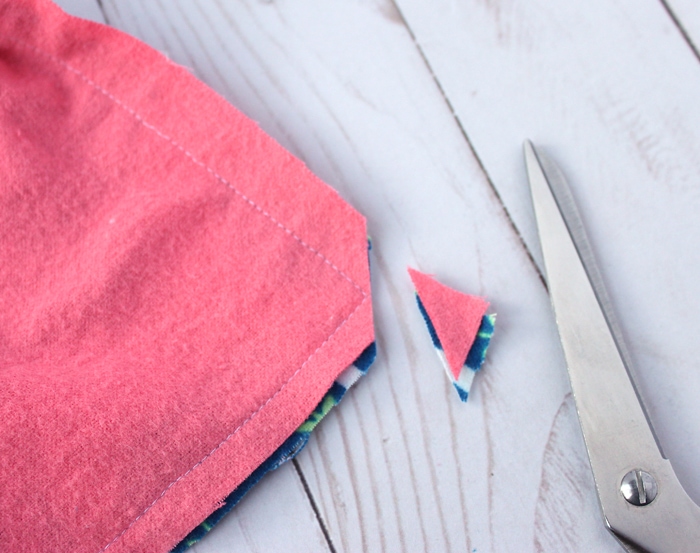
Cut off each of the four corners, being careful not to cut through the thread.
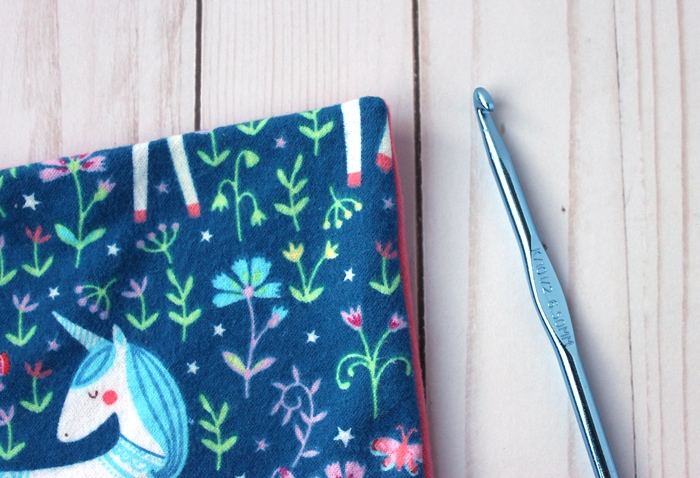
Turn the blanket right-side-out by pushing the fabric through the gap in your stitching.

Use a chopstick or crochet hook inside of the blanket to poke out each of the corners.
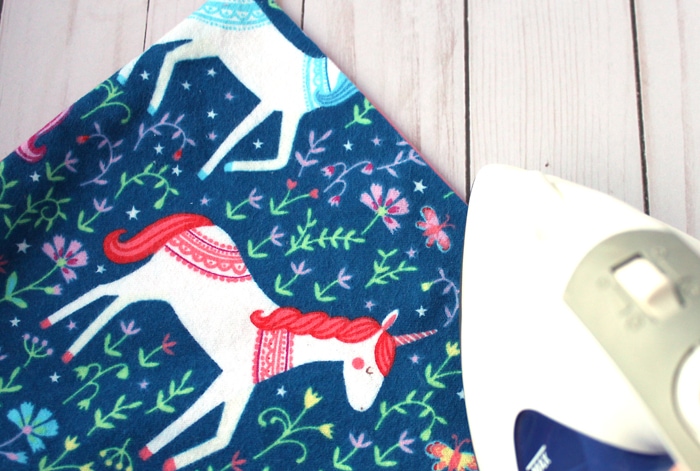
Iron the sides of the blanket to get a nice, crisp edge.
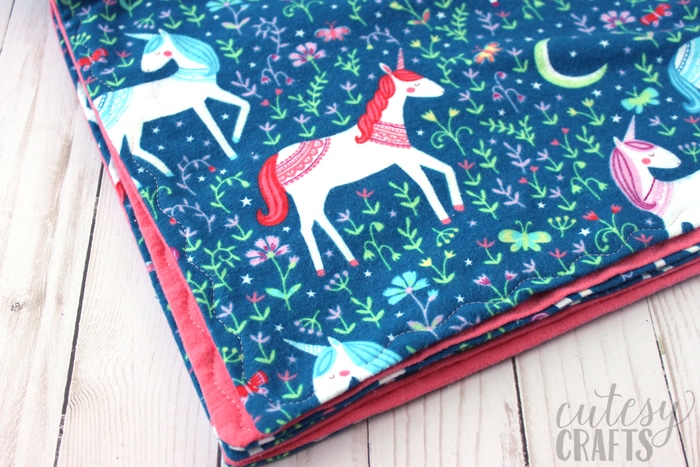
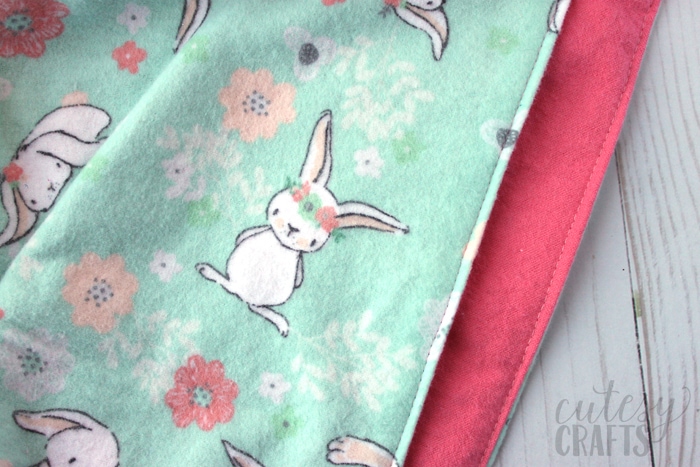
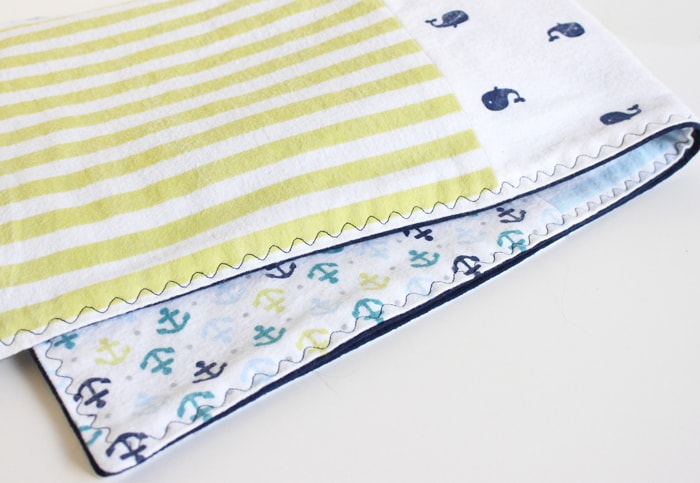
Stitch around the edge of your blanket using a straight or decorative stitch. If you use a decorative stitch, you should hand stitch the opening of your blanket closed first.
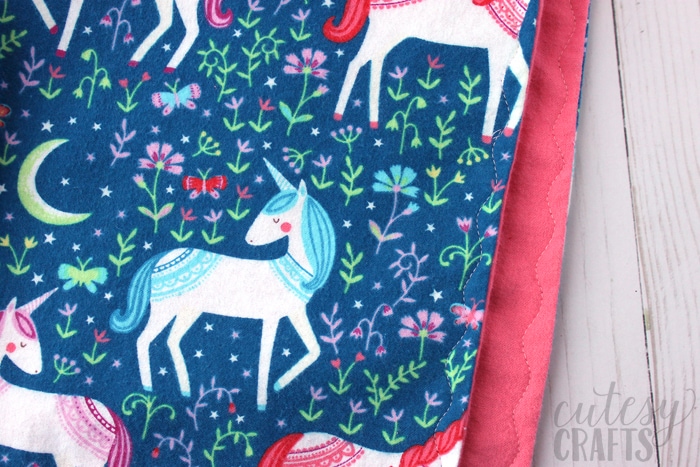
If you use a straight stitch, you can just sew the opening shut when you sew around the blanket. If you are a beginner, I recommend just doing the straight stitch. The decorative stitches can be hard to line back up if you run out of thread or make a mistake.
To ensure the blanket keeps its form in the wash, I like to sew little spots on the blanket using a tight zig-zag stitch. This is the reason that a lot of people “tie” blankets with yarn, but I like this look better. In the photo below, you can hardly see it! I didn’t care very much about being accurate, so I just folded the blanket in thirds and then in thirds again. I marked the four corners of the folds with pins, and that’s where I sewed. I changed my top thread to match the top of my blanket and the bobbin thread to match the bottom. The zig-zag stitch length on my machine was set to .5, and stitched about 8 stitches forward and 8 stitches back. Easier than it sounds, I promise!
That’s it! Hopefully you now know how to make a blanket so you can make cute baby shower gifts. These are so easy to make, I stitched up a few in new time. Now someone just needs to have a baby girl so I can give her some blankets.
Be sure to check out these other baby crafts.
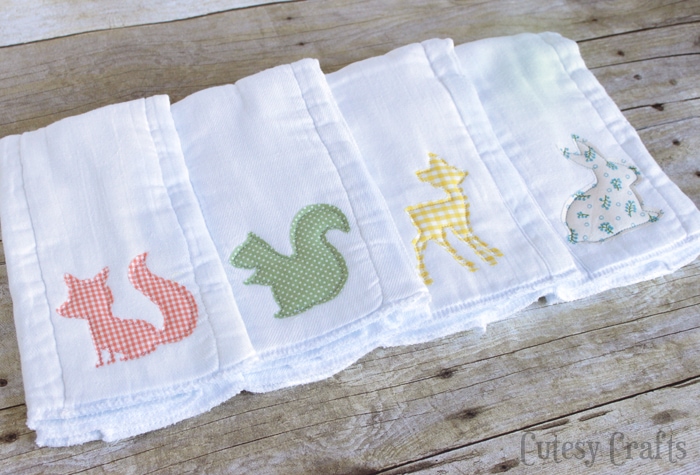
DIY Burp Cloths with Appliqués
Easy Baby Quilt from Receiving Blankets
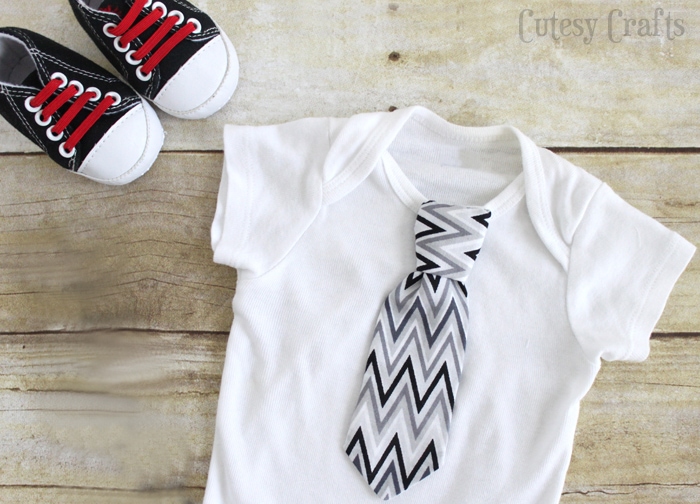
Necktie Onesie with Baby Tie Pattern
How to Make No-Sew Fleece Blankets with a Braided Edge

How to Make a No-Sew Baby Blanket with Minky Fabric
If you like making baby blankets, also check out this easy strip quilt pattern from Woodberry Way.
Cutesy Crafts is a participant in the Amazon Services LLC Associates Program, an affiliate advertising program designed to provide a means for sites to earn advertising fees by advertising and linking to amazon.com. This post contains affiliate links.
You’ll Also Like:


Hello, just curious as to what type of sewing machine you’re using. I’m looking for a new one. I’m a beginner so I don’t need anything too fancy. Thank you.
I started with a Brother cs6000i, but it has been discontinued. I think the closest to it is the cs7000i, but I can’t believe how expensive everything is now. I got my first one for $200, but I guess that’s inflation. If you don’t need all of the computerized and quilting stuff, the CS7000X might be good. If you decide you like sewing a lot, it’s definitely worth upgrading as it’s a much better sewing experience. I love my Babylock Soprano soooo much, but they are very pricey.
So my question is after feeding material through open you left you said that you use zig zag stitch to close blanket. Do you go all the way around the blanket again or just the open that you left to feed material through. I will probably use the straight t stitch, need to know if I am to just do that section or do I go around the whole blanket again?
Yes, I top stitch around the whole edge again. It helps keep the edge from rolling and makes it look cute.
I can’t seem to get the edges even when I press. It is like either the front or back laps over. What is am easy way to keep them from doing thst
I luv easy patterns
Being my first baby blanket, I didn’t understand what it meant but sewing 8 inches forward and 8 inches back. Could you explain a little more? Thanks. Mrs. B.
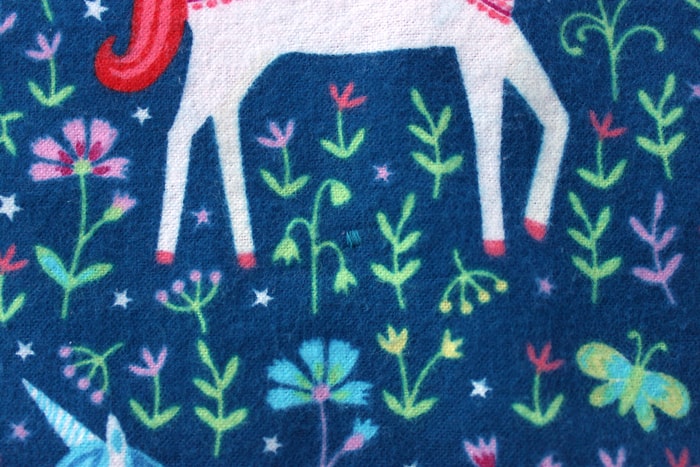
A zig zag stitch would normally show up as a zig zag that you can see. Like triangles without the bottoms and connected. When you change the stitch length, it makes the zig zags super close together, so the needle still travels up and down, but it looks more like straight lines all next to each other. So when you go 8 stitches forward, you are just letting the needle go down about 8 times. The thread will travel forward slightly, and you’ll end up with a little square shape of stitches like under the unicorn in the photo. Then you stitch backwards over the same stitches just to make sure all of your stitches stay in place. I hope that makes sense!
The directions are for 8 STITCHES not INCHES. Does that help?
Oh, good call! I didn’t catch that she said inches. I also just put a video in the post that shows each step. That should help a lot!
Kim not understanding about the folding in thirds.
The folding is just so you can measure where to sew the darts. I put 4 darts in it. So if you imagine folding a piece of paper in thirds, one way (2 fold lines to make 3 equal sections), then fold in thirds the other way, the darts would go in the 4 spots that the folds intersect. So when you fold the blanket, you mark those spots with pins, and then sew the darts in those locations. You could also measure to find the 4 spots, but the folding seemed faster to me.
This will be my first baby blanket! I have a question about the zigzag stitch. I’m confused as to how you’re doing this. I’m just not getting it. Please help!
All your other instructions I get. Thank you in advance!
You just want to make little “tacks” to keep the fabric in place. Set your machine to the zig-zag stitch (I think most machines have that as an option). Make the stitch length really short so the zig-zags are close together. Then you just go back and forth a bit. Get a piece of scrap fabric to practice on so you can make sure it looks right.
I made a blanket using your instructions, my first blanket ever! It only took me about 30 minutes and came out way better than I imagined! I’m new to sewing and your instructions were so easy to follow! I will be making many more!!! Thank you so much!!!
Thank you so much for posting this tutorial! I just finished my first blanket for a baby shower… so soft! I used the scalloped stitching and tacked it as you said. I wish I could post a picture for you! I would like to make a bigger one for adults, but I am not for sure how I would do that.
Same way, just more fabric? Although the fabric would need to be pretty wide. You could also get a couple flannel sheets and sew them together. 🙂
Why did you fold blankets in thirds to sew corners?
Just so I know where to sew the tacks. That way I don’t have to measure.
Hi, I have lots of fleece scraps from a non-sewing group that makes blankets for less fortunate Mexican babies in Mexico. I live about 40 miles from the border. Wondering if I can make these blankets in other sizes and measurements with fleece on one side and flannel or another smooth material on the other. Love the idea of the decorative stitch on the border!
Such a wonderful cause! Yes, you can definitely use different measurements and fabric! Fleece is pretty thick, so the seams will be a bit bulkier, but it should still work. If you have smaller fleece scraps, I also have a tutorial for a way to piece them together to make blankets. You can find a link to that near the bottom of this post: https://cutesycrafts.com/2017/03/things-make-fleece-scraps.html
I like the idea of the baby blankets that I made two for my first great grand expecting to arrive in July.
Oh that makes me so happy to hear! Glad you liked the idea. Congratulations on your great grand baby. That is so exciting!
Jessica, I loved the idea of cute baby blankets. I also prefer to give a gift that I made myself, but we do not always have the time. I think I’m going to take your advice and make some assemblies ready. Thank you for sharing.
Thanks Lilian! These are so easy to make, and there are so many cute flannel fabrics to choose from. So glad this idea was helpful to you!
So clever. The decorative stitch takes it to the next level and the zigzags are such a good idea. I can’t wait for someone around me to have a baby.