
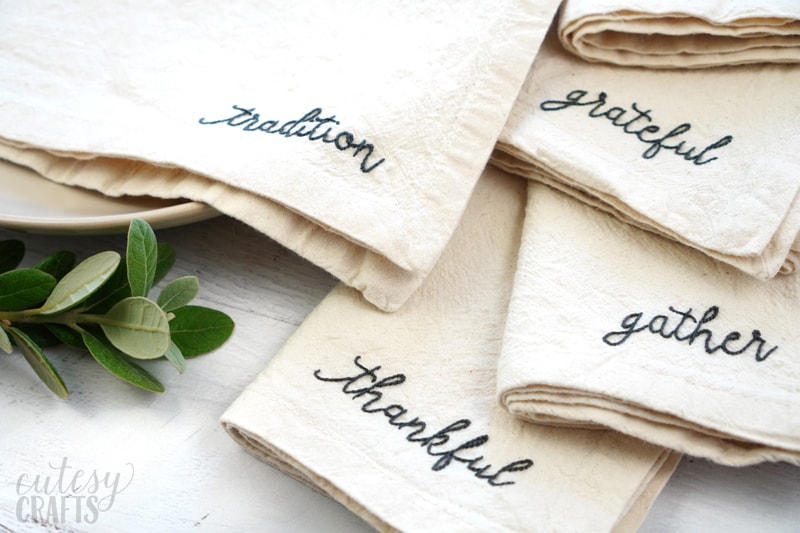
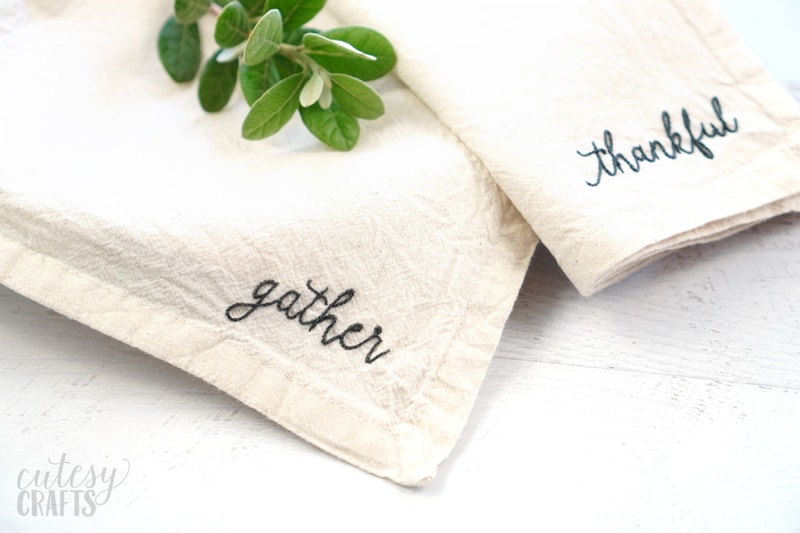
How to Embroider Words on Thanksgiving Napkins
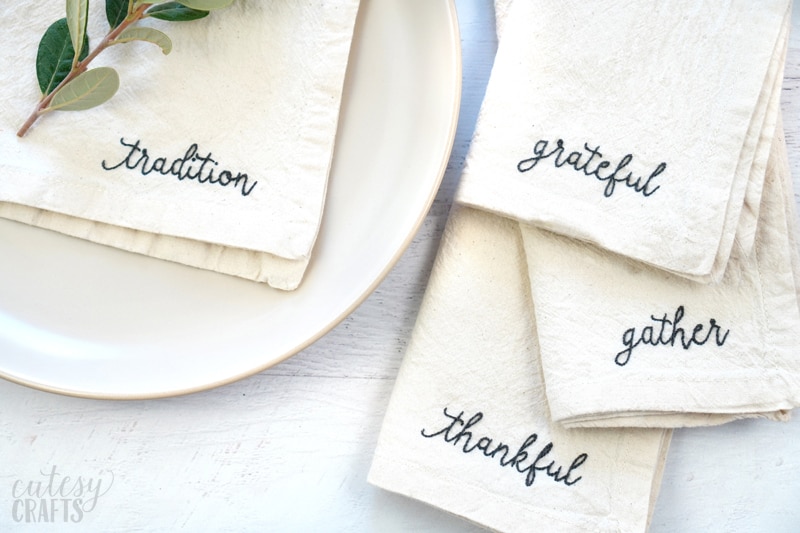
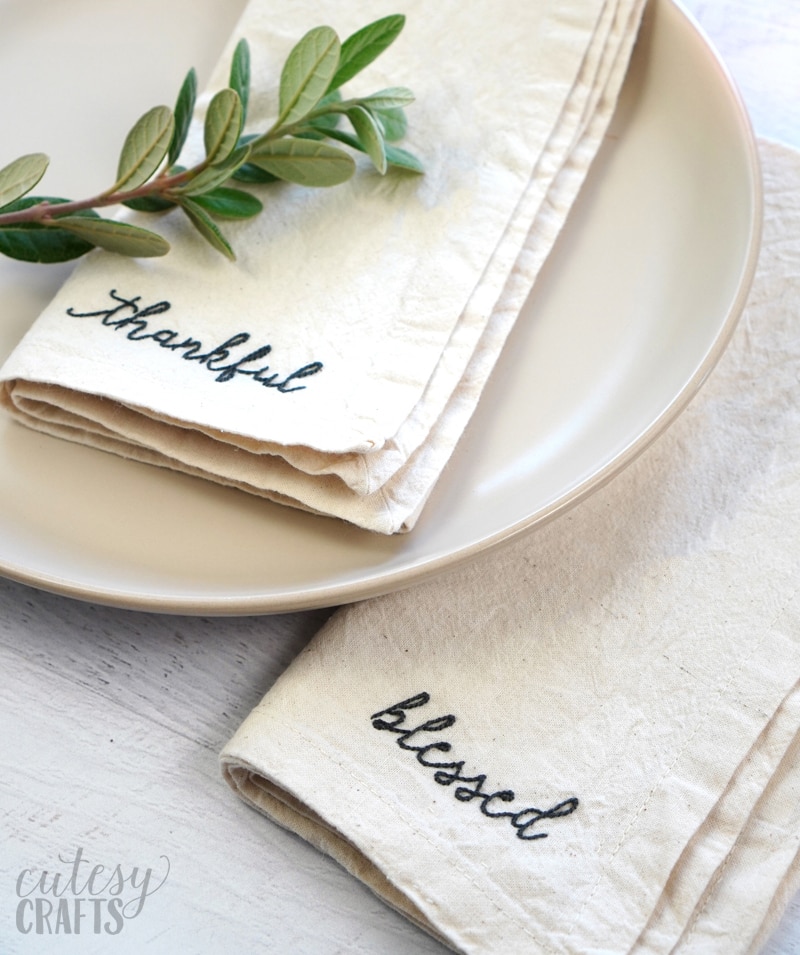
When I think of Thanksgiving, lots of words come to mind. Most of those words focus around tradition, family, and being thankful. Since Thanksgiving also focuses a lot on the food, I thought it would be fun to embroider some of those words on cloth napkins. So I’ve got a free Thanksgiving embroidery pattern today, and a step-by-step video that shows you how to embroider words on these DIY Thanksgiving napkins.
I honestly don’t know what I’m going to do with these napkins. Normally we are at my mom’s with at least 20 people, and I don’t think I’ll have the motivation to embroider that many. I imagine that one day, someone will find these in a drawer and remember that grandma embroidered them for no particular reason. I’ll put them next to my embroidered tea towels. Haha!
(This post may contain affiliate links, which means I may receive a commission, at no extra cost to you, if you click a link and purchase something that I have recommended. As an Amazon Associate I earn from qualifying purchases.)
To make these embroidered napkins, you’ll need:
- free thanksgiving words embroidery pattern (instructions to download are at the bottom of this post)
- cloth napkins
- dark gray embroidery floss (color used listed on the pattern)
- size 9 embroidery needle
- 6 inch embroidery hoop
- FriXion pen
- light table
- font download (optional, if you want to choose your own words)
Watch the video tutorial!
I created an in depth video that will show you exactly how to embroider words on these napkins. Watch it below.
How to Embroider Words on Thanksgiving Napkins
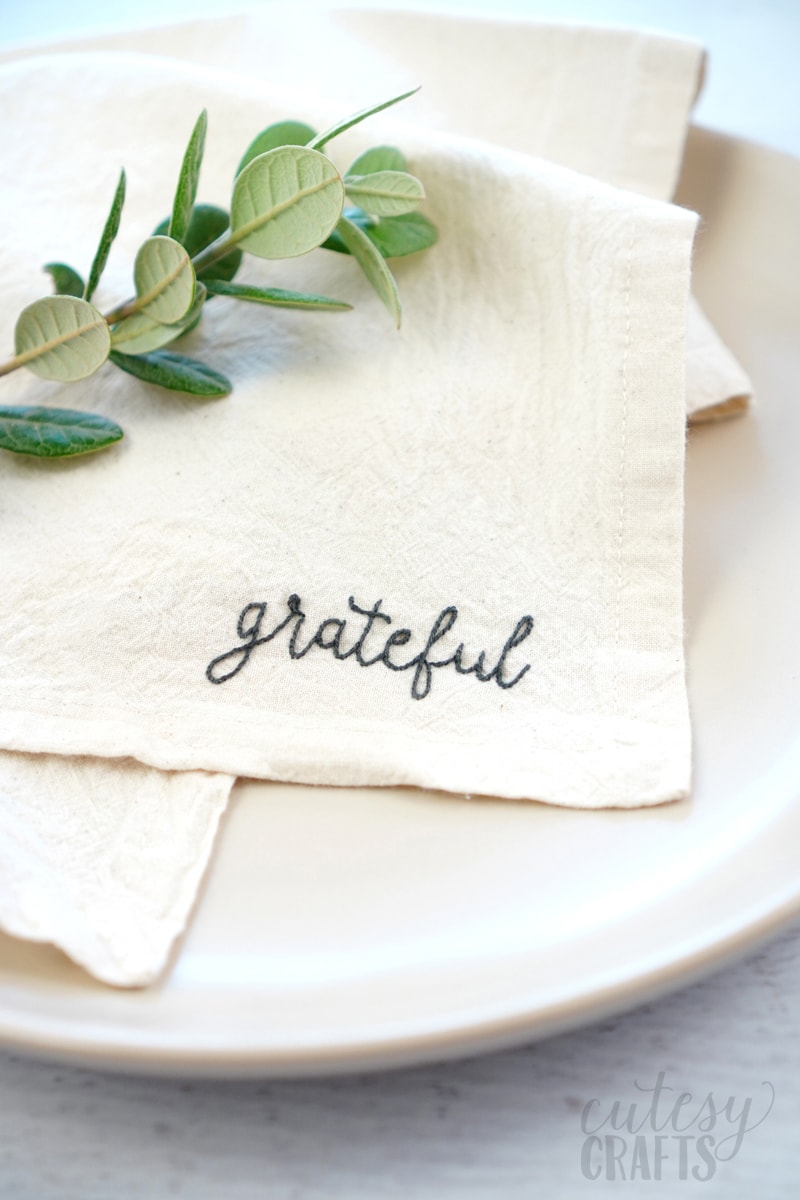
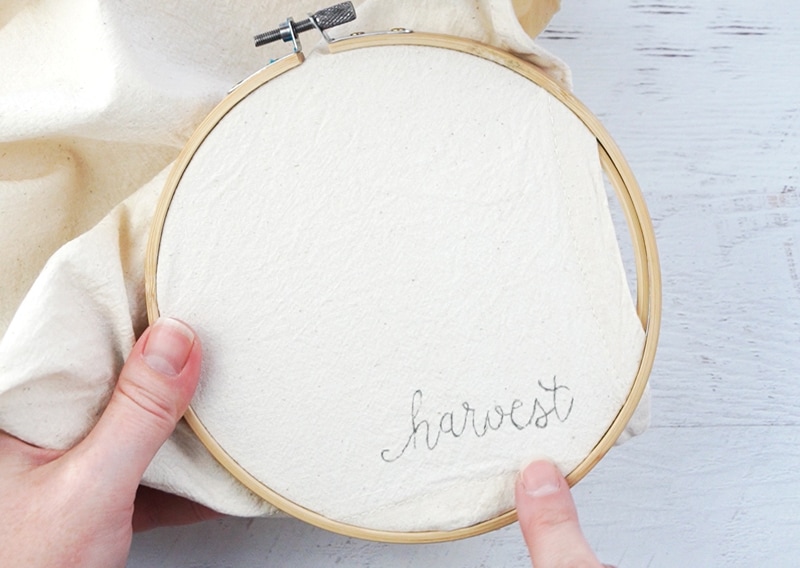
First, transfer the design onto your napkin. I placed mine 1 inch from the side and 1 inch from the bottom. Use a light table or sunny window to trace the word onto the napkin. I like to use a FriXion pen, but you can use other methods found in my post on how to transfer and embroidery pattern.
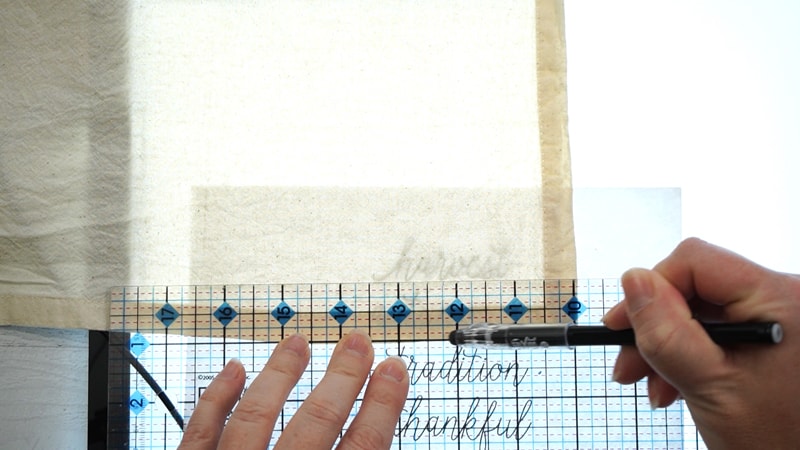
Put the napkin in a 6 inch embroidery hoop. Make sure the word isn’t too close to the edges of the hoop. To do that, you might not be able to have all of the edges of the fabric inside the hoop. That’s okay, just make sure the fabric is tight, and your word doesn’t get distorted.
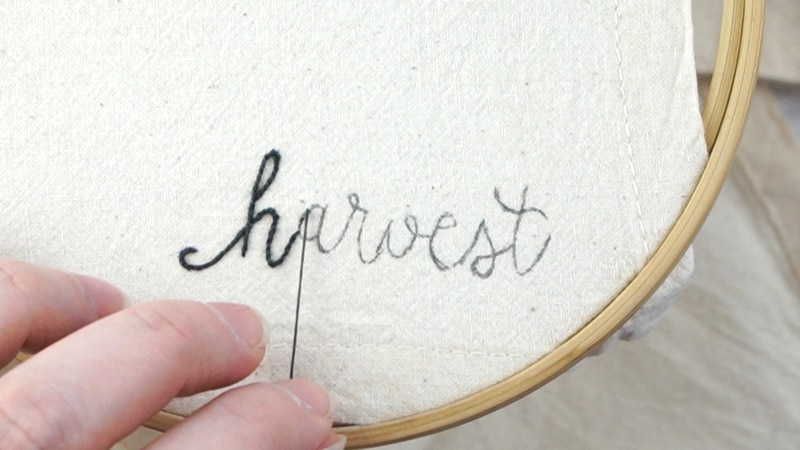
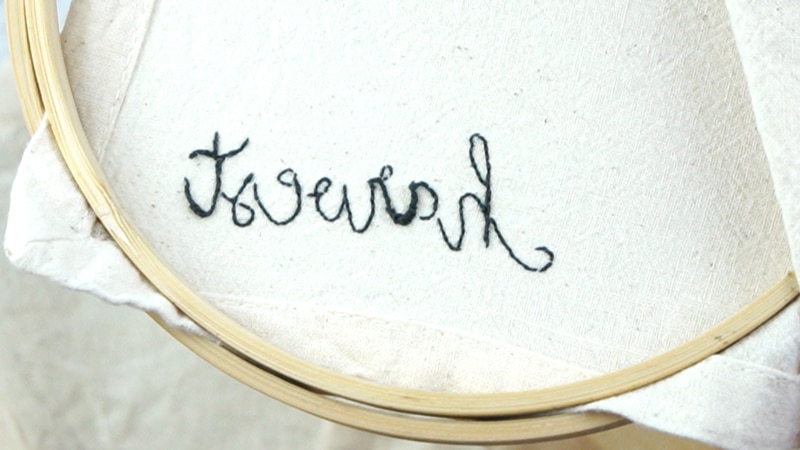
Next, stitch the design using two strands of floss and a stem stitch. Since the back of your napkin will be uncovered, pay extra attention to how it looks. Don’t use knots, and don’t have big lines of floss going from one area to another on the back. If you watch the video above, you’ll see several tricks on how to accomplish this. I also have another video on how to start and stop embroidery without knots. These are the same techniques you would use when learning how to embroider tea towels.
The back should look nice and tidy.
I made a total of 8 napkins, and I can’t decide which one is my favorite!
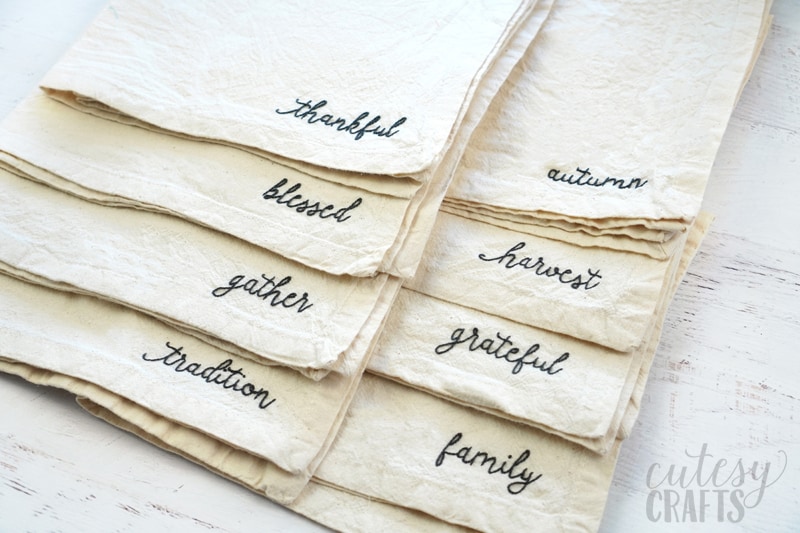
Which one would you want at your place setting?
Get the free Thanksgiving napkin embroidery pattern!
To get the password, enter your information in the form below to sign up for my free email newsletter. You will get an email with the password. Already subscribed but forgot the password? No need to subscribe again! Every email newsletter I send has the password in it, so check the latest one.

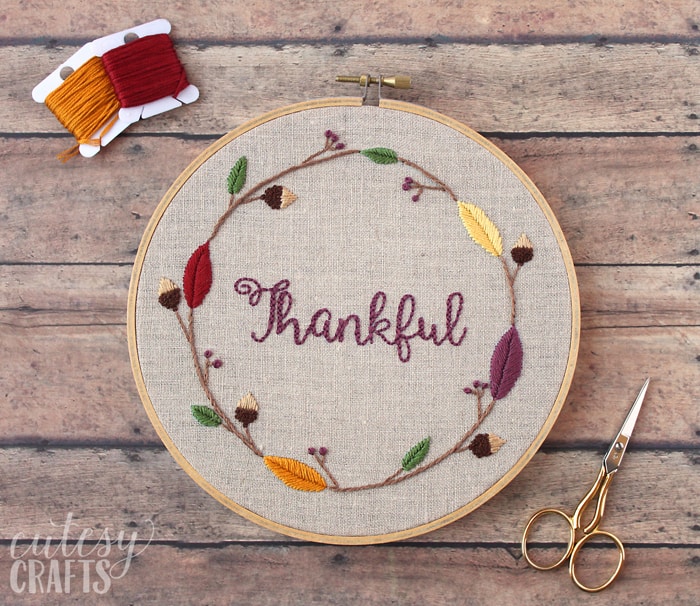
You might also like this free Thanksgiving embroidery pattern.


Hi!
I just found this post on Pinterest and I am definitely going to try the FriXion pens! The water soluble ones don’t give me the fines lines I’m looking for when embroidering!
Can you tell me where you got the measuring tool from? I totally need this to make my life easier when lining up my designs!
Thank you!
Sorry for the super late reply. The ruler is just a rotary cutting ruler. I love it because it’s clear.
Love love love these!! I am absolutely making them! Thanks for the great tutorial! One question: how do I make the dot on the “i” as neat as the other letters?
Thank you for this wonderful tutorial! Hoping to finish these up as a “gift” or family hosting this year! 🙂
After I’ve download the font to my computer and typed the words in Word, what size should the font be?
I used size 91 of the Isabella Monoline Script
Ok I seriously feel like I learned so much from this video! My son uses cloth napkins so I wanted to make him some with his name, in rainbow his favorite color! (He’s only 5)lol I know he will love this! Thanks for sharing!
Oh, that’s adorable that he uses cloth napkins! So glad the tutorial was helpful!
These are wonderful for anytime! Many years ago I got some linen on sale, embroidered them with simple outlines. When friends come over I have 2 baskets in the bathroom , one of small hand towels, the other for soiled towels instead of everyone using the same towel. Use the “good” stuff for the people you love most – your family!
Oh, that’s such a smart idea! I always get grossed out a little when there’s only one towel. Haha!
Thank you! I am looking forward to making these! Exactly what I had in mind! I also appreciate your instructions on not having knots, a skill that has confused me thus far….hence my backs never look nice. A “nice looking backside” isy new goal.
Question though: what is name of font? I could not find thst in the comments. Thanks.
“Nice looking backside” haha! I just added the link to the font. It’s Isabella Script Monoline.