
Fall Leaf Free Embroidery Pattern
I can’t let this season get away without sneaking a fall craft in. After all, fall is my favorite! I’ve been itching to do some more hand embroidery designs, and a fall leaf seemed like the perfect subject. I really love the way this turned out with all of the patterns and colors, and it was a lot of fun to create. Today I’m sharing this as a free embroidery pattern so you can make a leaf yourself! If you need help with any of the stitches, I have video guides on my embroidery stitches guide page.
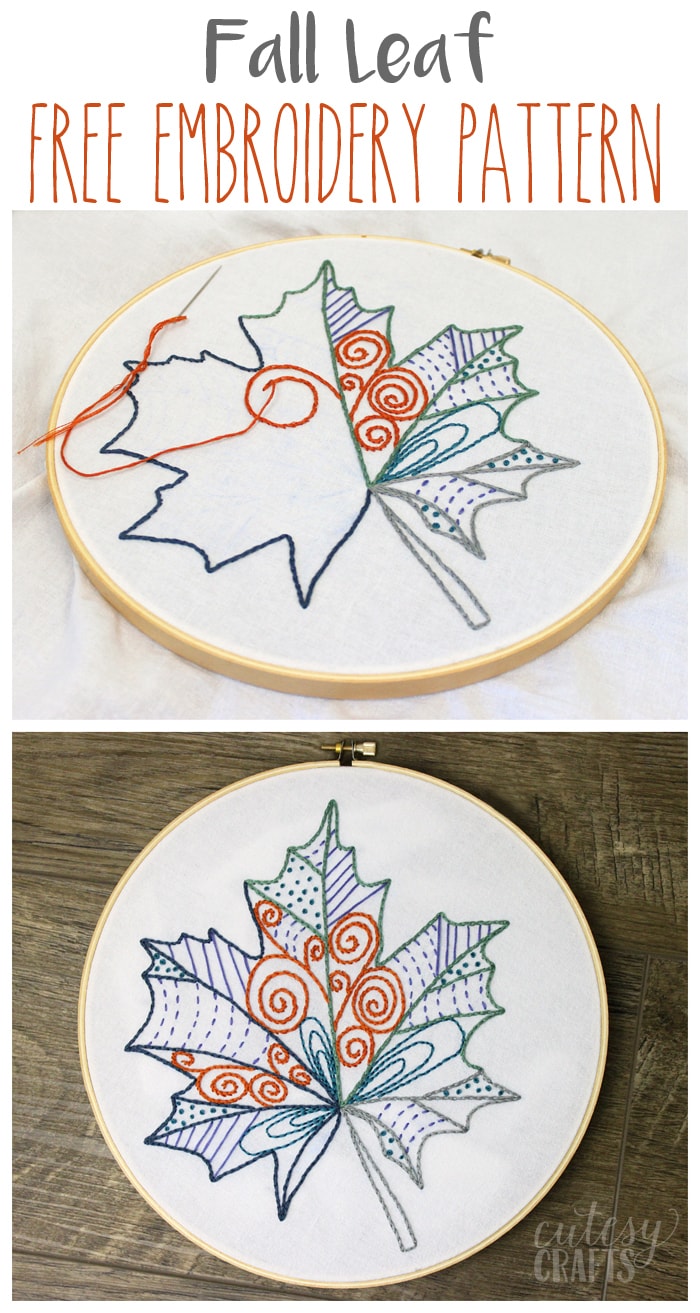
I was inspired by the adult coloring trend to add all of the swirls and lines. The great thing about it is that you can play around with the embroidery stitches and colors to make so many different possibilities. I went colorful with this one, but I think it would also look great as a solid color or maybe even all white on a darker linen background. I loved having the creative freedom to experiment with all of the different colors!
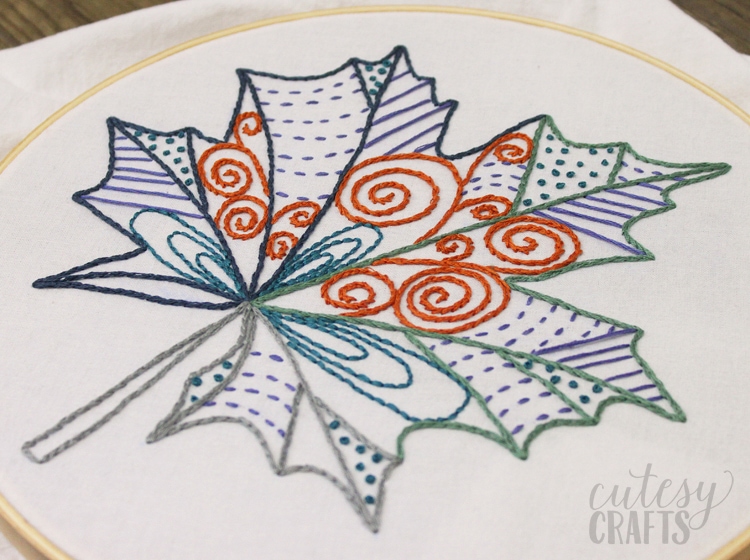
I did the embroidery on a scrap from a flour sack towel that I had sitting around. I used a full strand of embroidery floss for everything except the french knots. I used three strands of floss for those. I used a split stitch for the outline, veins and swirls. For the straight lines, I used a straight stitch, for the curved lines, I did a running stitch, and for the loops, I did a back stitch. Like I said though, you can use whatever combination of stitches you want!
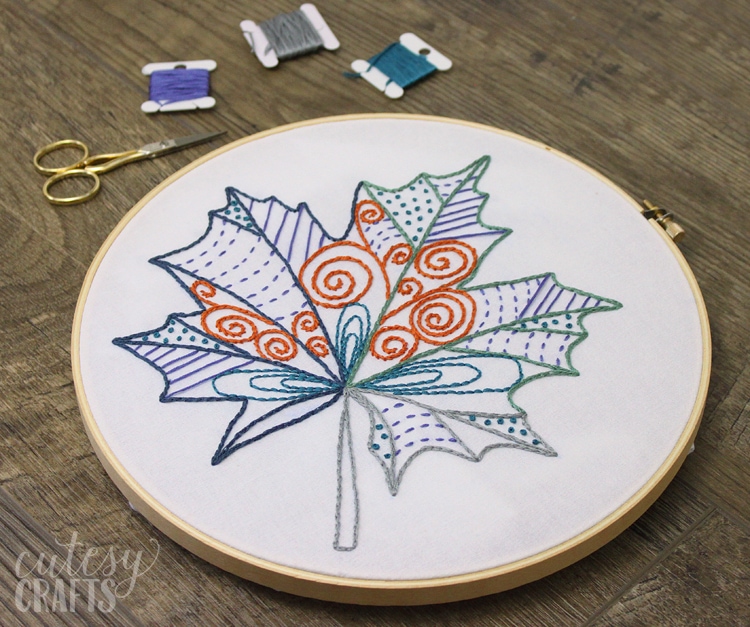
I’m not sure if I’m going to leave this one in the hoop or what. I toyed around with the idea of putting it on the front of a pillow. What do you think?
If you like embroidery, be sure to check out all of my other hand embroidery designs.
Get the free pattern!
To get the password, enter your information in the form below to sign up for my free email newsletter. You will get an email with the password. Already subscribed but forgot the password? No need to subscribe again! Every email newsletter I send has the password in it, so check the latest one.


Can you tell me what size hoop I need for this design? I am new to embroidery. 🙂
Looks like it’s probably a 9 inch hoop to frame it. Usually I use 1 size bigger for the actual embroidery part so it doesn’t get in the way. I have a set of nice hoops I use for stitching, and I use cheaper ones for framing.
Been waiting for fall all year!
thank you will stitch up the leaf very unique for my fall stitching. Thank
I love the look of this with the blue and orange. What colors did you use?
I don’t know. Did I not put them on the pattern? Sorry, that was one of my first patterns, and I didn’t know what I was doing yet. Haha!
I AM TRYING TO DOWNLOAD THIS PATTERN. SUBSCRIBED TWICE AS REQUESTED AND STILL NO PATTERN
Send me an email at jessica@cutesycrafts.com
Hey
What size of hoop did you use for this one?
Ooh, sorry I didn’t include that. Looking at the pattern, I think a 10 inch hoop.
I love this!
Thank you!
I want to see the hoop butt! Lol. This is my first project. I don’t know what I’m doing! I feel like i have a lot of stops and starts. Amd I am terrible at tying of the strand at the end.
Haha! The back of my embroidery is usually a mess! You will get the hang of it. It’s okay to have a lot of stops and starts, you just don’t want a big line of thread going across the back that might show through in the front. There are some good YouTube videos that show easy ways to tie knots. I watched one the other day where she did a quilter’s knot that looked pretty easy.
Im looking forward to trying this out, such a pretty idea, thank you. One way to avoid having huge knots at the back that I have found, is to start with half the number of strands but double the length of thread. Then fold them in half so you have all the ends threaded through your needle. When you begin don’t quite pull the thread all the way through and you’ll have a small loop, put your needle through it before your next stitch and it will be held securely with no knot.
I’ve never heard of this method! I’m totally going to try it. Thank you!
Hi Jessica. What a lovely embroidery pattern for fall. We’ve included your post in our latest ideas for fall roundup. https://craftylikegranny.com/fall-craft-ideas/ Cheers Emily 🙂
Thank you!