
How to Back an Embroidery Hoop with Felt
Since I’ve been stitching up so many embroidery hoops, I thought I’d share a little video on how to back them with felt when you’re done. I’ve tried a few different methods, and this is the one I like best. There’s no messy glue, and it turns out so nice. If you find this post useful, make sure to take a look at my How to Embroider for Beginners series.
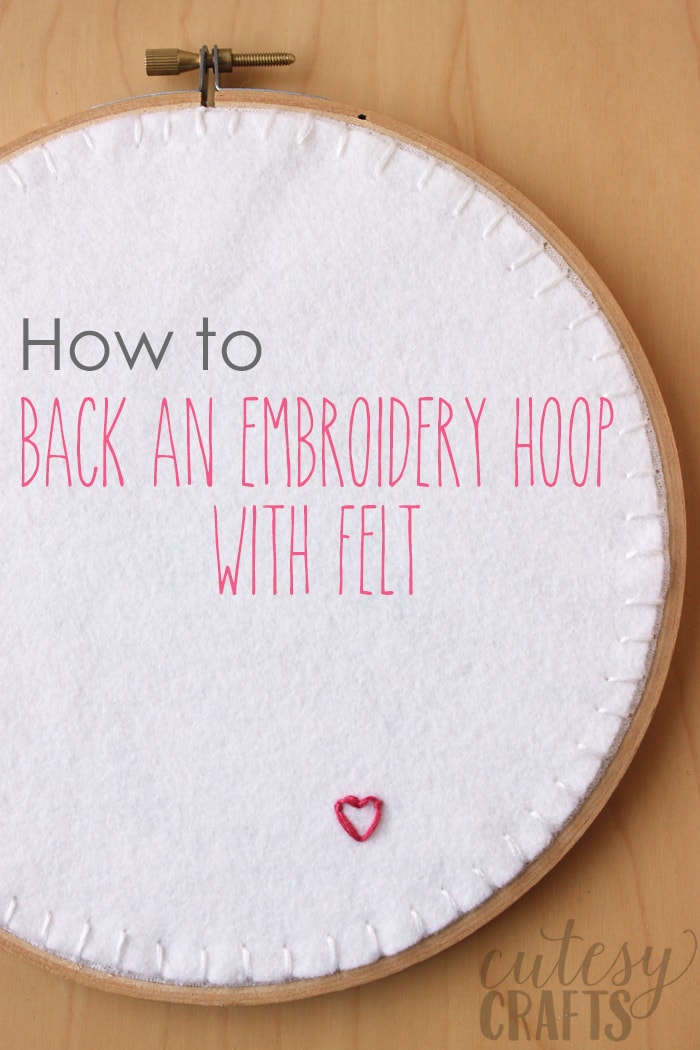
The video says it all, so here you go. If you can’t get it to play below, you can also watch it on my YouTube channel here. Enjoy!
If you are using an ad blocker, you may need to disable it to see the video.
Take a look at these other great posts!


Floral Unicorn Embroidery Pattern


I have just started embroidery after a break of at least 4 decades!!! Loving it!!! I am a creative person – musician, composer, performer, photographer, sketcher and it is so lovely to be working with needles and coloured threads again. Question please – what do I put on the back of my materials to hide my backing threads? I’m making serviettes with my embroidery ideas – Kia Ora from New Zealand
How fun! So many creative outlets! This post here should give you more info: https://cutesycrafts.com/2020/07/the-best-backing-for-embroidery.html.
This was an amazing idea! Thank You! I’ve never really though of putting felt on the back, but it makes sense. I started since I was little and now this would have made a gift for my aunt look so much better!
Thank you so much for this tutorial! I started embroidering recently, and I cross stitch and do other crafts. I have always framed the finished product, but I was wishing for a different way to do so. I have now done two birthday gifts this way, and they were loved by everyone. Thank you again!
Hello. This is a great tutorial. I have just completed my first ever embroidery, as I usually cross stitch, work with clay, etc. i have never done straight up embroidery. I was wondering how much thread you use to stitch your fabric to the fabric from the project? I have an 8” embroidery hoop that I am using, and I know you said multiple times to make sure you have thread that’s long enough. I was just wondering if you had an idea on How long is the ideal length. Thank you so much, and I love seeing your projects.
I think I measure around the hoop 2.5 times and use that amount of thread for the part where you stitch the felt on.
Hello, thank you SO much for the instructions? I was just wondering, how tightly should your fabric be in the hoop, both WHILE stitching, and once you’re ready to add a felt backing and put it on display? I can’t really find a clear answer on this! Thanks so much. =)
I like mine as tight as possible without distorting my pattern and stitches.
Thanks so much for all your tutorials! I’ve tried this with some random felt in had in my cafe drawer BUT everytime, even when I’ve carefully measured it there’s too much stretch and there’s excess material left over and then it gaps etc etc…. so I’m wondering is there a specific felt you use when backing and if so what is it?
I use a wool/rayon blend made by National Nonwovens. It’s my favorite felt for everything. Joann Fabric sells it, and there are also several online retailers.
This is so brilliant and easy and looks so nice! I started embroidering when I was 4 and I’m now 72. This is the best idea I have ever seen. I always wished there was a good way to make the back look as nice as the front! Thank you!!!!
So glad you like it, and I’m impressed that someone had patience to teach you embroidery at age 4! I’m having a hard enough time with my 7 and 10 year olds. Haha!
Hi. Excellent tutorial. One question/comment. To me one benefit of gluing excess fabric onto the frame instead and leaving the back open is that when you hang it on a wall you can’t see the nail you have hung it on. Of course a ribbon can be added to the top to hang it from but this can look a bit froo froo. I do agree a hoop finished like this looks more professional if it will be sold. I was thinking of putting the felt inside the frame back to hide the stitches but not attaching it to the frame. What are your thoughts?
Yes, that would work to just put it on the inside. I just hang mine on nails through the metal parts on the top. You might also try sewing a loop or something on the felt itself for hanging. I’ve never tried it, but it could work.
Thanks for the idea.
This is the best and most “beautiful” backing I have seen! Thanks for the idea !
Thanks Monica! It’s definitely my favorite way to do it. 🙂
Thank you!
You’re welcome! 😀