
DIY Wall Art for the Bathroom
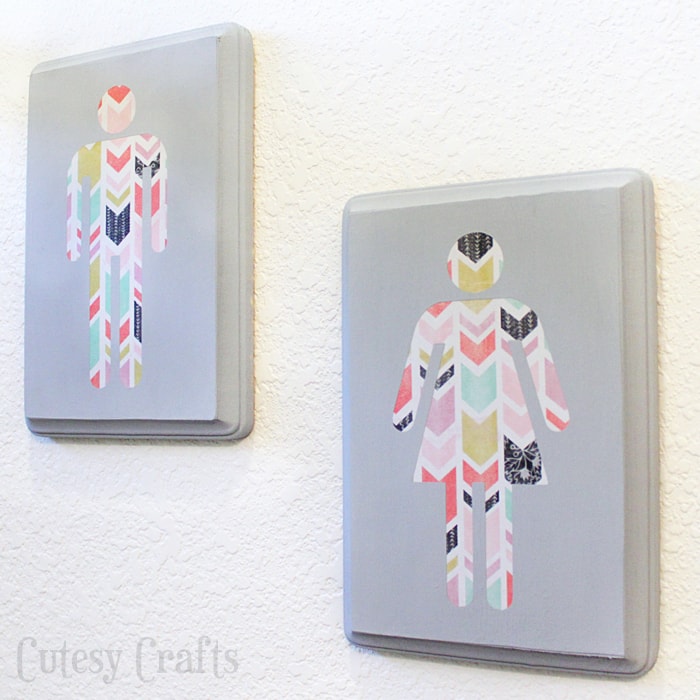
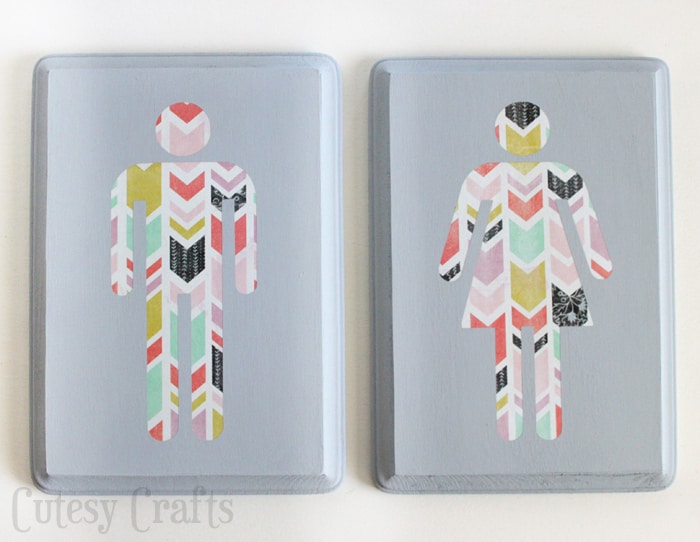
I’ve been wanting to make some DIY wall art for the kids’ bathroom for a while now. I made this printable over a year ago, and I still haven’t added anything to it. I think these bathroom sign plaques go great with it, and the kids love them! The pattern on the people is scrapbook paper, so the possibilities are endless, and they can be made to match any decor.
Supplies needed:
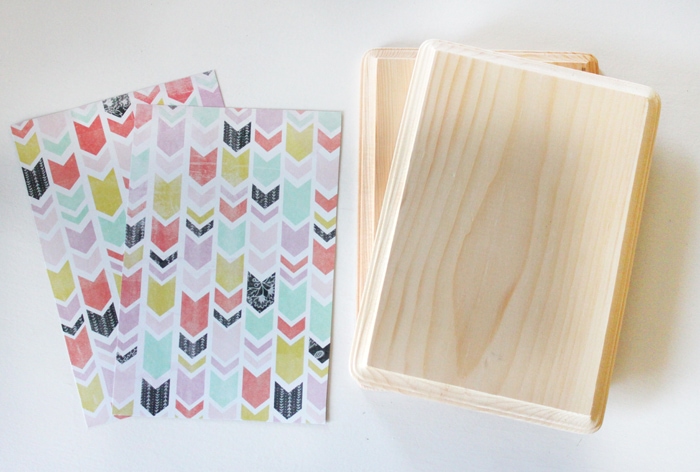
- 2 wooden plaques
- scrapbook paper
- Mod Podge
- paint
- sand paper
- vinyl or contact paper
- vinyl cutter
- free bathroom sign cut file/templates
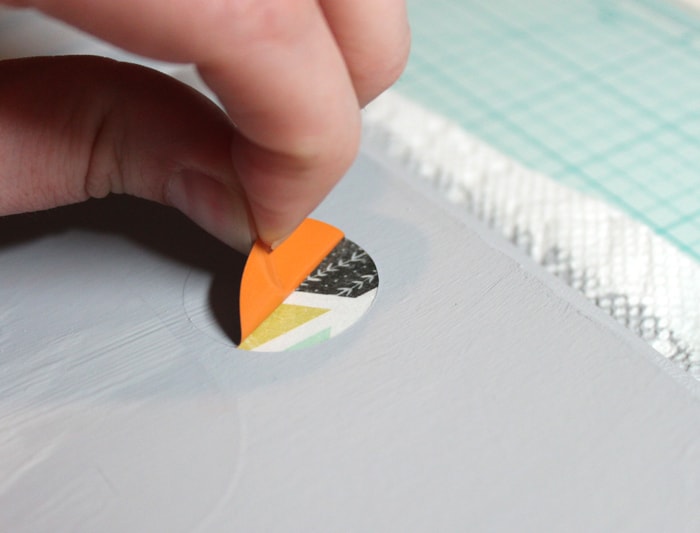
Cut the scrapbook paper to the same size as the front of your plaque. It’s ok if it hangs over a little, but make sure it’s not smaller than the plaque.
Mod Podge the paper onto the front of the plaques. Once it’s dry, sand the edges of the paper so they are even with the edges of the plaque.

Cut the vinyl and transfer it to the plaque. I used my Silhouette CAMEO to cut the vinyl. You might be able to get away with cutting it by hand since it’s a simple design, and you can probably use contact paper instead of vinyl.
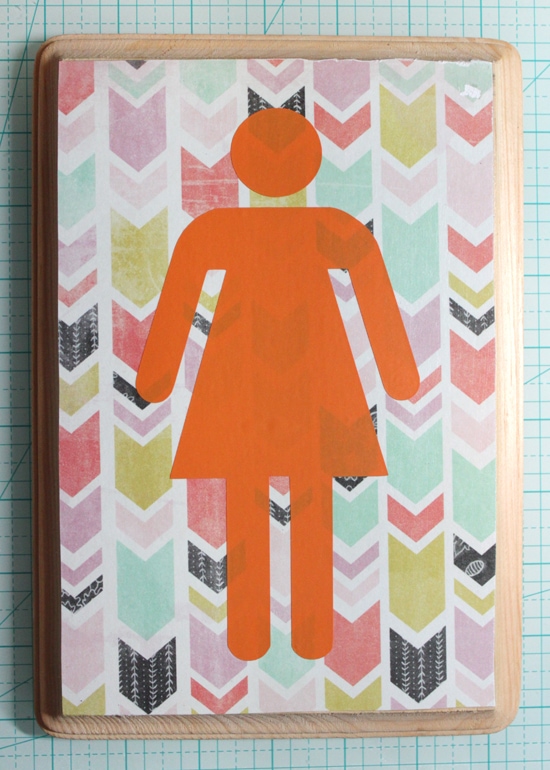
Add another layer of Mod Podge to seal the edges of the vinyl stencil.
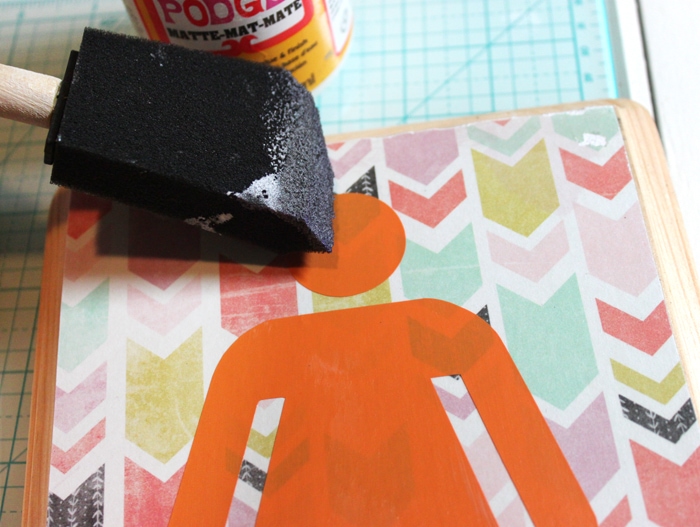
Once the Mod Podge is dry, paint a couple coats of paint all over the whole thing.
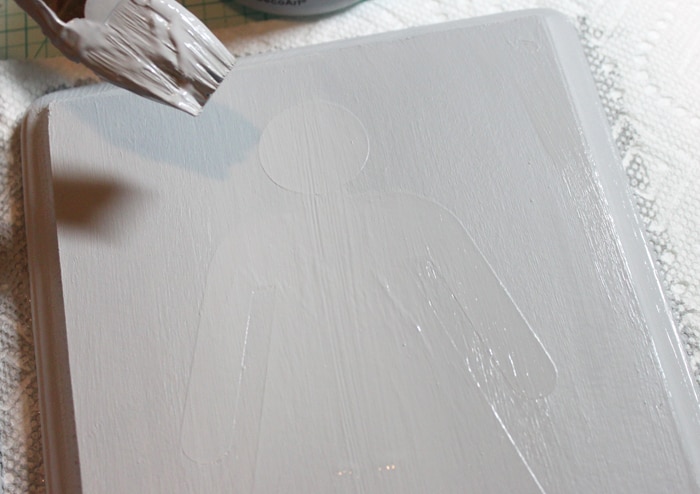
Let the paint dry and peel up your stencil.
And you’re done!
Want to Check Out More Silhouette Projects?
My Silhouette Challenge buddies and I are all sharing projects on our blogs today, so peruse the projects below for a wealth of Silhouette inspiration!

1. The Moberg Family // 2. Sandpaper and Glue // 3. American Honey // 4. Weekend Craft // 5. Grey Luster Girl // 6. From Wine to Whine // 7. Cutesy Crafts // 8. Practically Functional // 9. Home At Eight // 10. McCall Manor // 11. Dragonfly & Lily Pads // 12. Adventures in All Things Food // 13. Create it. Go! // 14. Please Excuse My Craftermath… // 15. The Outlandish Momma // 16. The Sensory Emporium // 17. My Paper Craze // 18. unOriginal Mom // 19. My Favorite Finds // 20. Architecture of a Mom // 21. Black and White Obsession
Also check out the printable that we have hanging in the same bathroom:


This is absolutely brilliant, love the idea!
Super cute signs for the bathrooms! I love your paper choice and adore the printable that you offer! Cute stuff!
Those are SO cute! I love the colors, yet they are very simple. I am sure they look cute in the bathroom!
I love this!! What a cute idea for the kids’ bathroom!
oh I really like the paper choice- what a great pattern!
Love this! Can’t believe the vinyl didn’t pull up the paper. Great job!
Jessica,
I love the art work for the kids bathroom. You really nailed the cuteness factor on this project.
Happy Creating,
Karen Marie
Dragonfly & Lily Pads
I agree with Alisha, it’s neat how they look inset…I like that you decided to do a reverse stencil like that instead of just applying the cut out paper to the painted plaque. Such a neat print on that paper too! I’m jealous that you are on to bathroom decor…I feel like it will be YEARS until I get around to hanging anything in the bathroom, we moved in 10 months ago and still have nothing on our walls!
These are great! We have some similar signs on our bathroom door – but I love the sense of permanence these have. Love it!
SO Cute!I like that it kind of looks like an inset on the wood and not just that you painted over. Awesome project. 🙂
Very cute! I love this idea–maybe I can make one for my house