
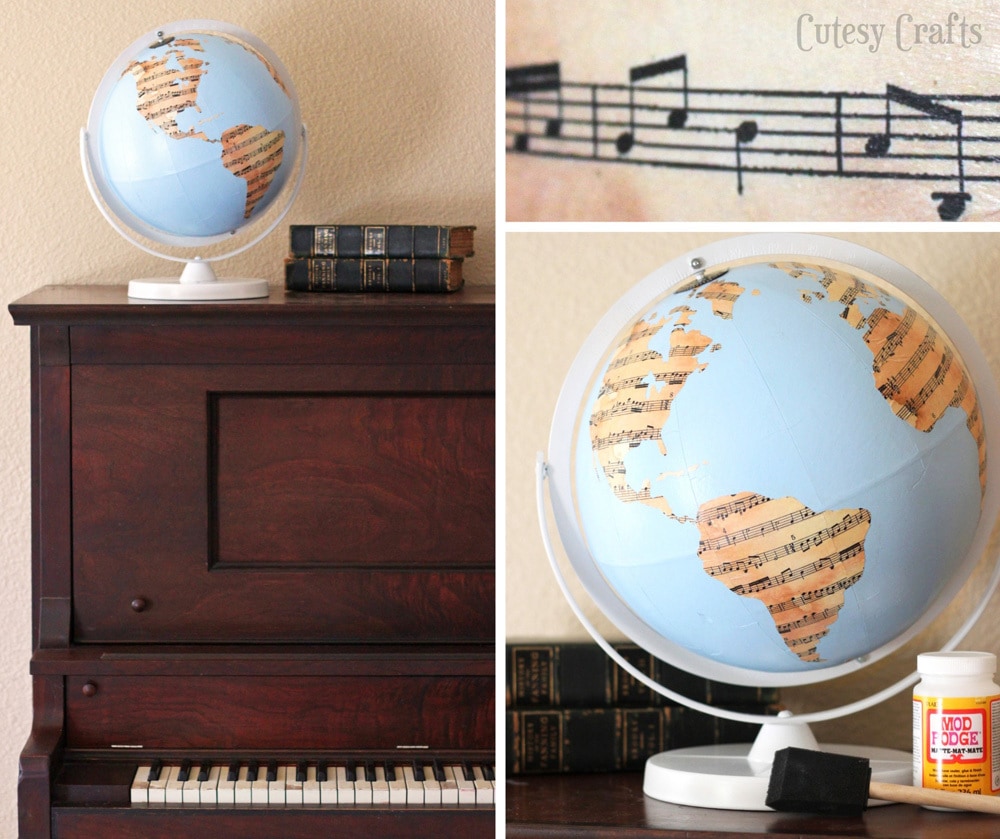
Sheet Music Globe
Bet you didn’t guess that this project was mine! Well, I got 2nd place on SYTYC for “Around the World” week with my Sheet Music Globe!

When I saw the theme for this week, I knew I needed to makeover this old globe. I got it at a garage sale for a dollar a few months ago, and my husband thought I had finally lost it! I had no idea what I was going to do with the thing until we got this old piano. A piano calls for sheet music art, of course, so the sheet music globe was born. I don’t know where the previous owners were keeping this thing, but it was filthy! Neon and dust and dirt! OH MY! Doesn’t it look a million times better? (And yes, for some reason I had an urge to draw a happy face in the dust.)

Let me tell you, this thing was more difficult than it looks to pull off! Mod Podging paper onto a round surface wasn’t so easy, and it took several coats of spray paint to cover up that horrible neon! All worth it in the end though because, once again, I have proven to my husband that I am not as crazy as he thinks. 😉
I ran into a few dilemmas when trying to give this globe a makeover, and I will do my best to explain the process. First, take your globe apart (or have your stepdad do it for you because the bolts needed to be drilled out).
Ok… now what? Well, you need a way to remember where all of the countries were before you paint over it. Solution: page reinforcement stickers! Make sure to put one every so often and at least two on each continent. Cut one of the stickers in half, so you can orient the whole globe from there. My globe also had all of these vertical lines/sections on it where it was pieced together, so I went over all of those with a sharpie to help me see them while tracing.

Next, take some tissue paper and tape it on a section of the globe that you want to trace. Trace the outline of the land, all of the page reinforcements, the vertical black lines, and a horizontal (latitude) line.
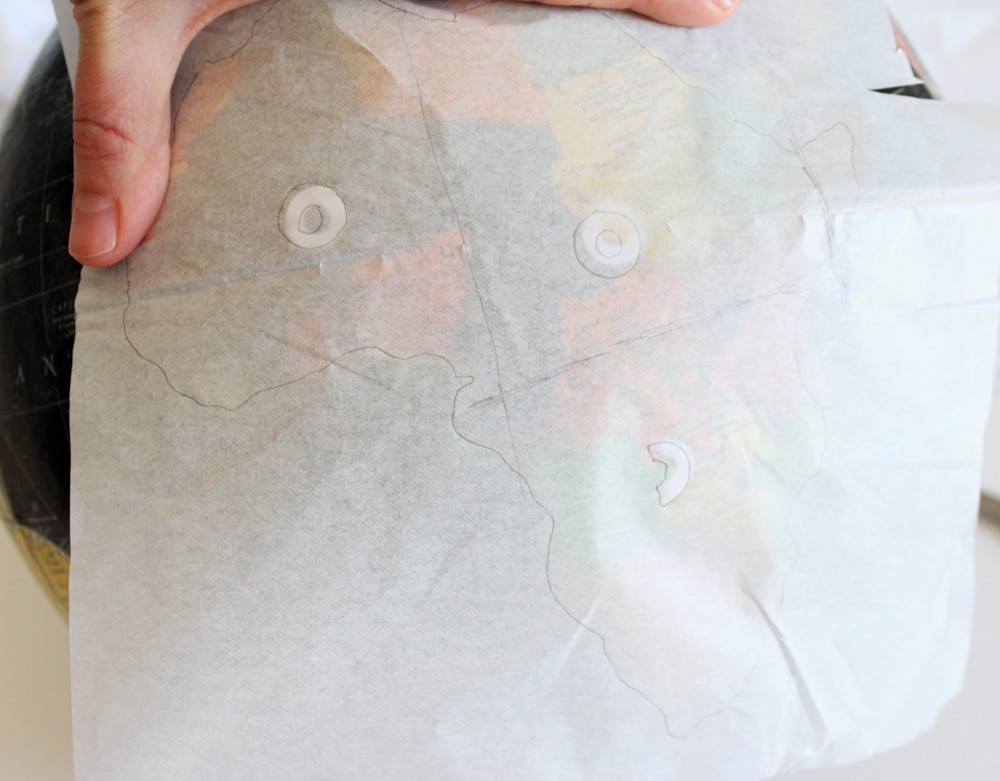
Don’t try to do too much at once. I had to break up Europe and Asia into several pieces. You will be cutting the paper into sections between the black lines, so use those to gauge where to stop tracing.
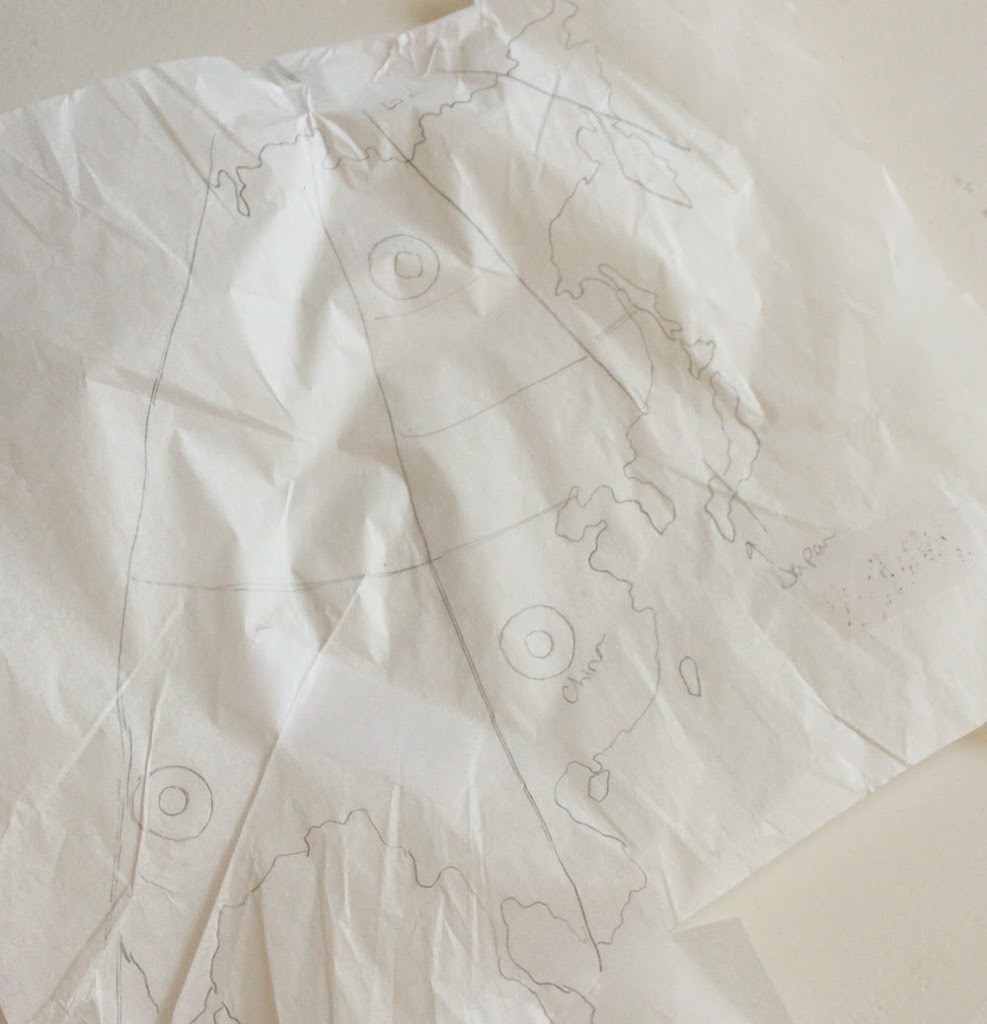
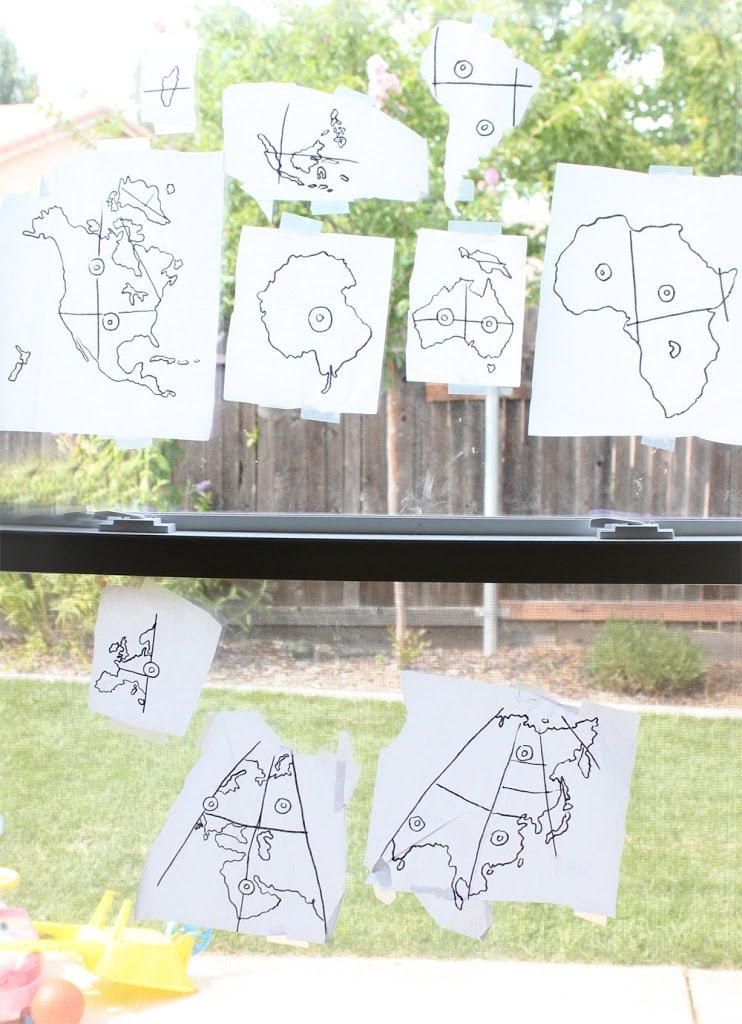
Now go over all of your tracing with your black sharpie and hang them up in the window.
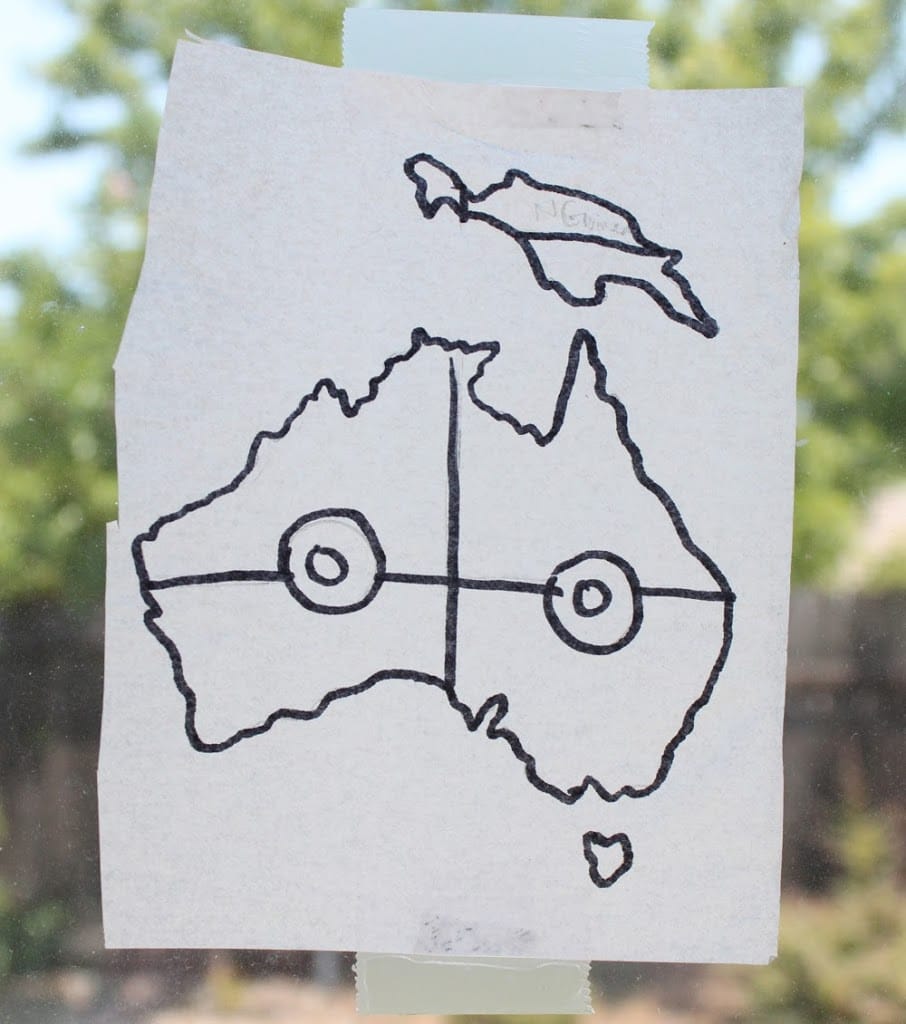
This is how my window looked for a few days. 🙂
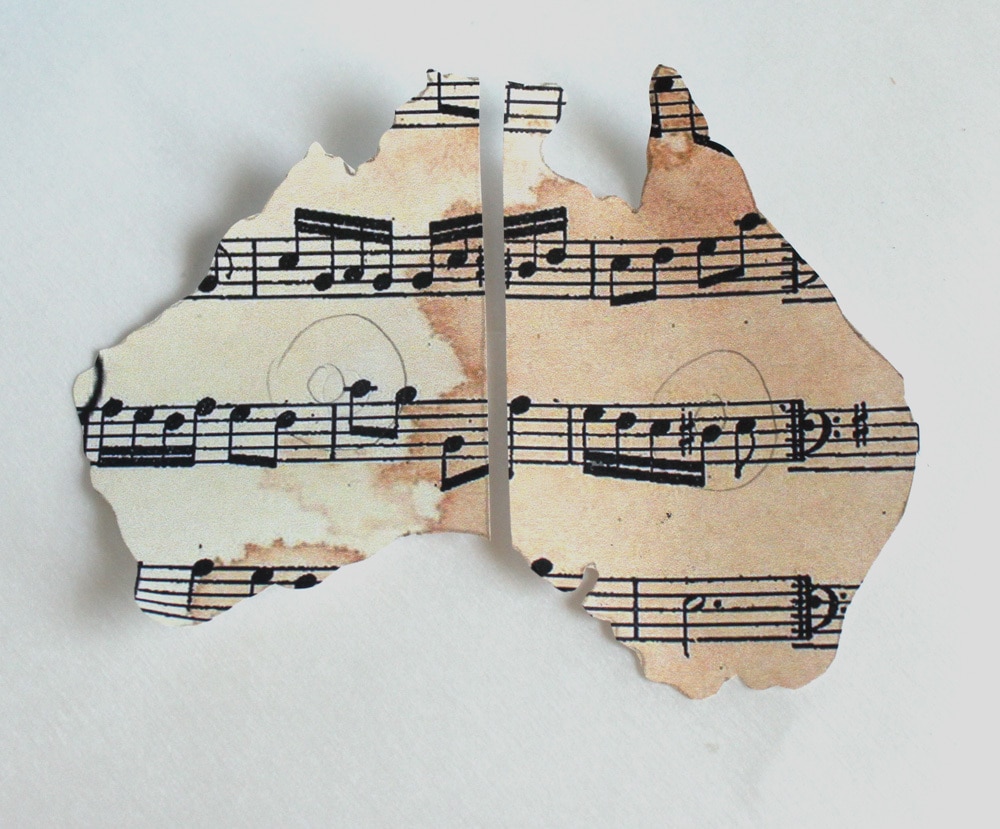
This “sheet music” is actually a free download of digital scrapbook paper that I got here at Free Vintage Digital Stamps. I just printed it out on some regular computer paper! Use the light from the window to trace each section onto your sheet music. Line up the horizontal line with the lines of music. LIGHTLY trace the page reinforcements in pencil! Australia was small so I traced the whole thing and then cut it down the vertical line. You have to make these cuts so that the paper will lie flat on the globe later. For Europe and Asia just do your best to line up the bars of music when you have to start on a new section. I know… it’s hard to explain.
Now you finally get to paint! The next challenge… how to keep the globe off the ground while painting. I forgot to take a photo, but basically I just took a few wooden skewers, stuck them in each end, and balanced them on some buckets. A thin wooden dowel probably would have worked better. Think of a rotisserie grill. Just spray and turn. The spray paint I used was a paint and primer in one. It took several thin coats to cover up that dark globe. Once the paint is dry, peel off your stickers.

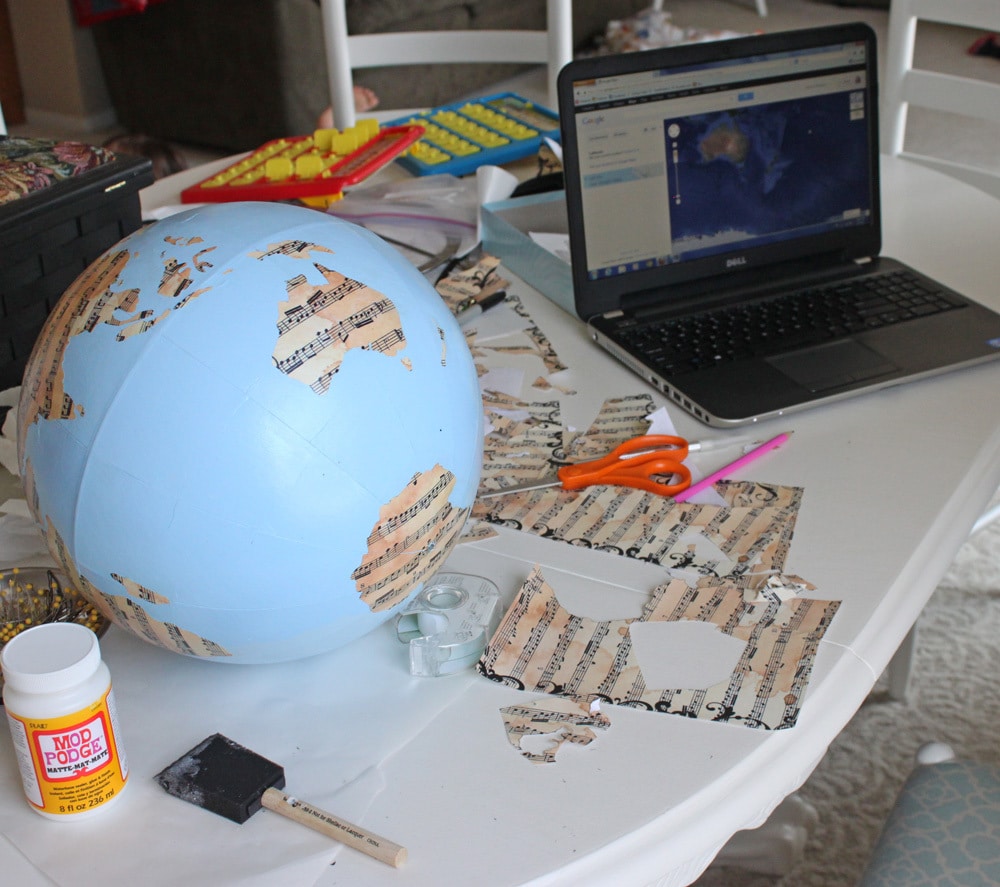
Use the circles to line up your paper and then erase them. Put a thin coat of Mod Podge on the back of each piece and then go back over the top with another coat.

It’s not going to look perfect, and no, I didn’t include every little island, but it’s more of an art piece than a functioning globe. I did pull up a world map just to make sure I was getting some of those islands in the right place. If your work area looks like this, you are doing it right! (Yes, that’s Guess Who in the background… and a foot.)
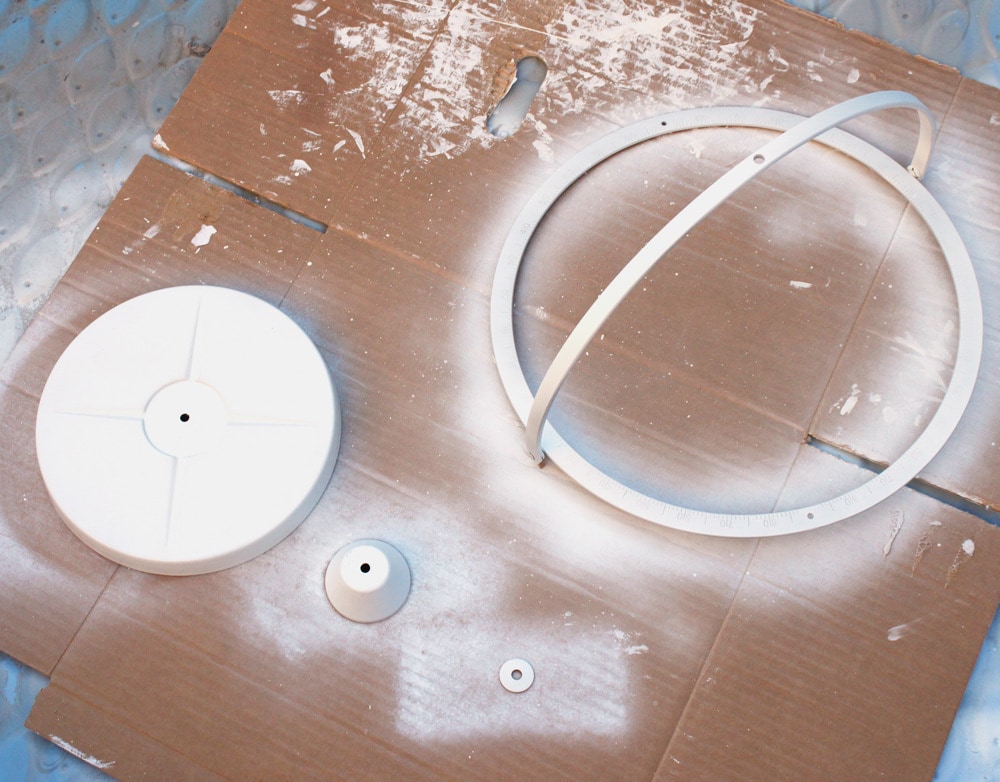
You also want to prime and spray paint the base. Again, just several light coats.
Once that is dry, you can reassemble your globe and put another layer of Mod Podge over the whole ball portion. A little tip: I got some smudges and fingerprints on it while adding the paper, so I sprayed some paint into a paper cup and then painted back over the spots before doing that final layer of Mod Podge. Just use a brush that you don’t mind throwing away.

That’s it! Next week’s theme is ruffles. Man am I getting crafted out!!!


I love this tutorial! I’ve featured it over on the FaveCraftsBlog! 🙂
http://www.favecrafts.com/blog/fc/diy-globe/
Very cool! thanks for the tutorial 🙂
Thanks Heather!
Awesome project! I will try this sometime in the future….
Thanks, Mitzi!
Thanks for all the details on making this thing. I have and old globe and I’d love to sheet music it but, wow, it’s lots of work. Great job. Jo @ Let’s Face the Music
Totally worth it! 🙂
I really love this. Thank you so much for linking it up on Homemade Ginger. I featured it today!
This is beautiful! Your tutorial is really easy to follow. Using the dots to keep it all lined up was a really great idea.
~Kelsy
http://looseendscraftblog.com
Thanks, Kelsy!
Wow! I am LOVING this! Using the sheet music is a beautiful touch. 🙂
Thanks for linking up with us at Much Ado About Monday. See ya next week!
~Emily
http://www.huckleberrylove.com
wow, this looks great. and like it was a lot of work!
Wow! That looks like a lot of work, but what a beautiful end product. I don’t know if I’d have the patience to finish it, but I think I will pick up a globe if I see it at a yard sale this year! Very cool. My brother is really into music, so I bet he would appreciate this. Visiting from Ginger’s Link up!
Lindsey @ Growing Kids Ministry
I love this!! I’ve been wanting to re-vamp some old globes and this is the perfect idea! Pinning! Would love it if you would link this up to Give Me The Goods Monday: 1 Party, 4 Blogs! http://rainonatinroof.com/2013/07/give-me-the-goods-monday-17/
Oh how cute! I love how you used the sheet music, what a fun idea and great craft! It turned out great!
What a beautiful globe! You did an awesome job creating a unique and lovely decoration.
This is awesome!! Thanks so much for sharing!
Thanks, Allison!
I love this project. I collect globes. My house is saturated in them and over the years i have gotten a few that are of no value. I may try this on one of those. It would definitely be a unique addition.
thanks for sharing.