
How to Make a Diamond Friendship Bracelet
So you’ve mastered the basic candy stripe and chevron bracelets, and you’re looking for more of a challenge. This diamond friendship bracelet uses all 4 basic friendship bracelet knots, and is just what you need. I’ve made several of these diamond friendship bracelets now, and they are so easy once you get the rhythm down. I’ll show you step-by-step how to make one yourself!

Supplies:
- 4 colors of embroidery floss. (two 72 inch pieces and two 90 inch pieces)
- masking tape, a clipboard, or safety pin to hold it down
- scissors
How to Make a Diamond Friendship Bracelet
Before you start, make sure you know how to make the 4 basic friendship bracelet knots. If you need a refresher, go to my post on how to make friendship bracelets.
- Fold your thread in half and tie a knot to make a loop at the top.

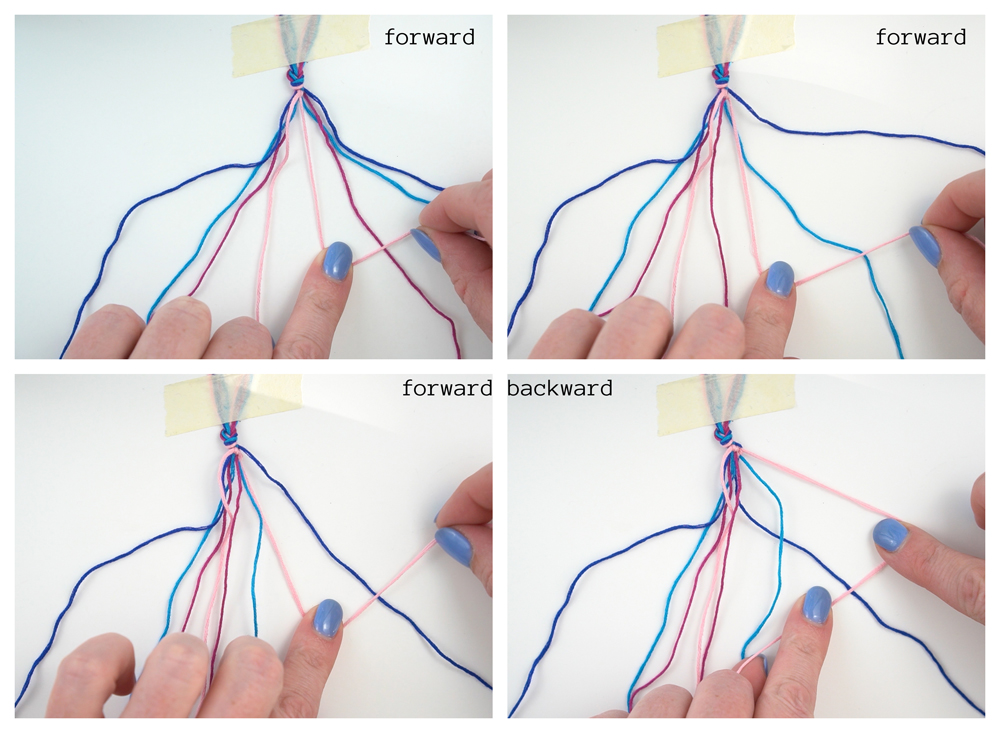
2. Secure the loop to a table, clipboard, or your pant leg. Separate the thread out so the colors mirror each other. The longer two pieces will make the outer diamond (light pink) and the X (dark blue).

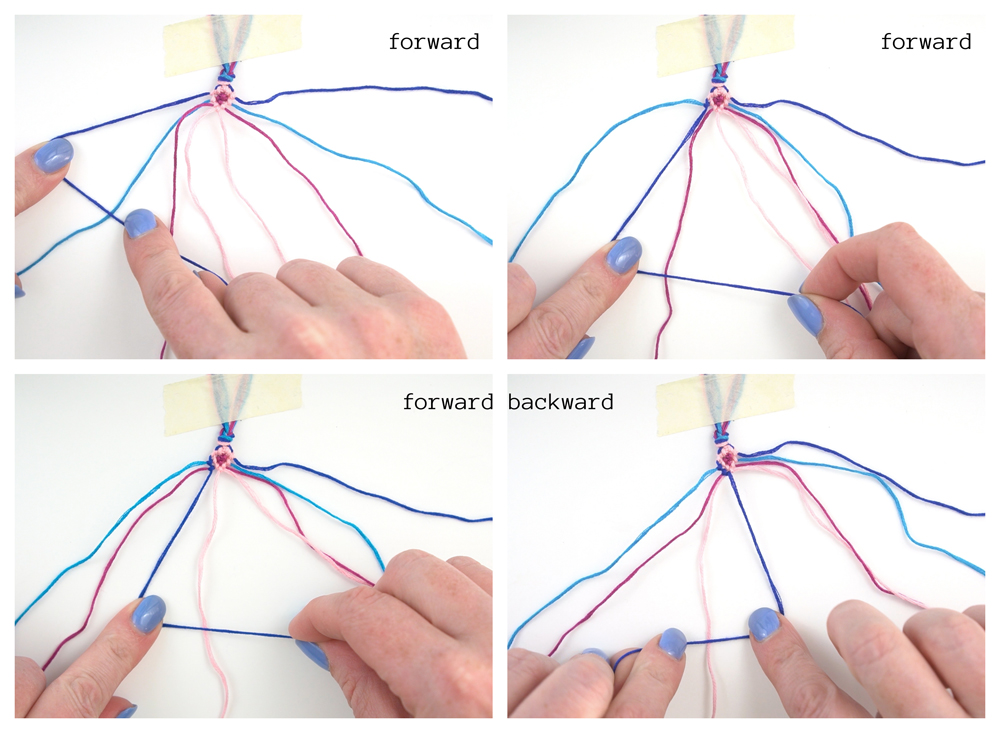
3. Make a backward knot with the two middle strings (light pink).

4. Travel the light pink string on the right to the right, making a forward knot, forward knot, and forward backward knot.
5. Travel the light pink string on the left to the left making a backward knot, backward knot, and backward forward knot.
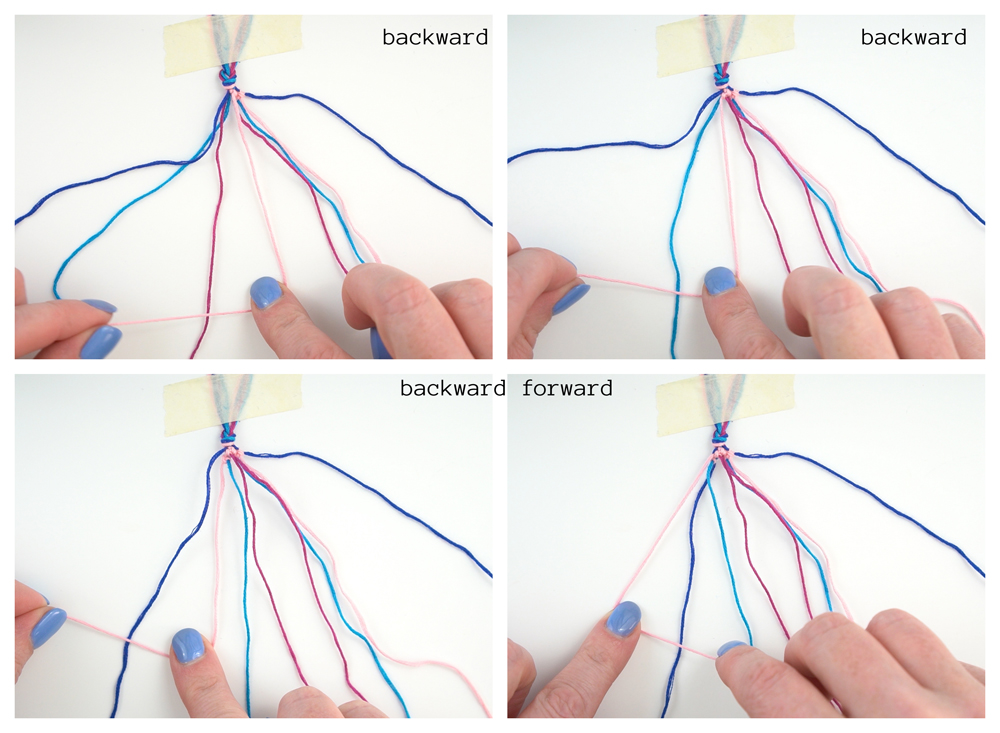
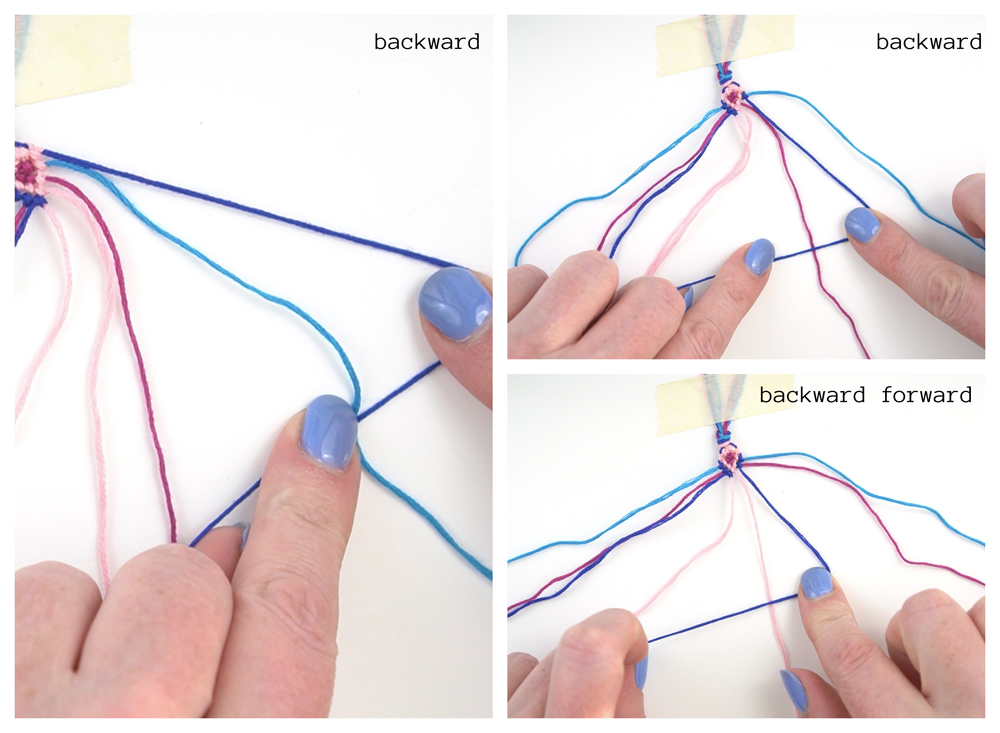
6. Take the two strings in the middle (hot pink) and join them with a backward knot.

7. Take the hot pink string on the right and make a forward backward knot on the light blue string on the right. Take the hot pink string on the left and make a backward forward knot on the light blue string on the left.
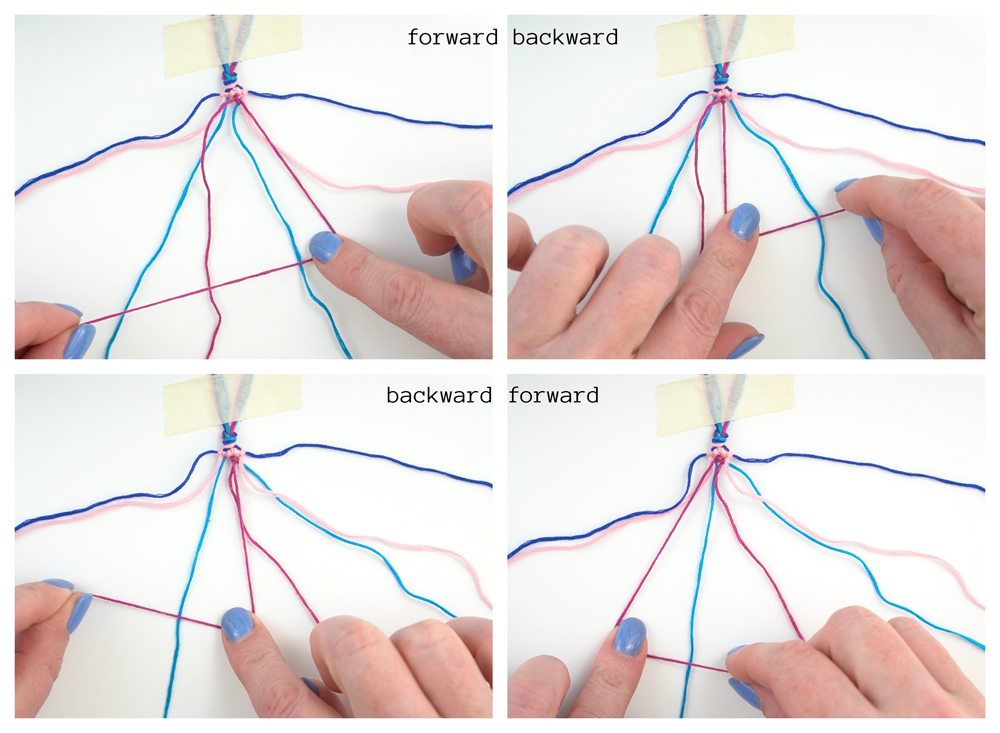
8. Take the two hot pink strings in the middle and join them with a backward knot again.

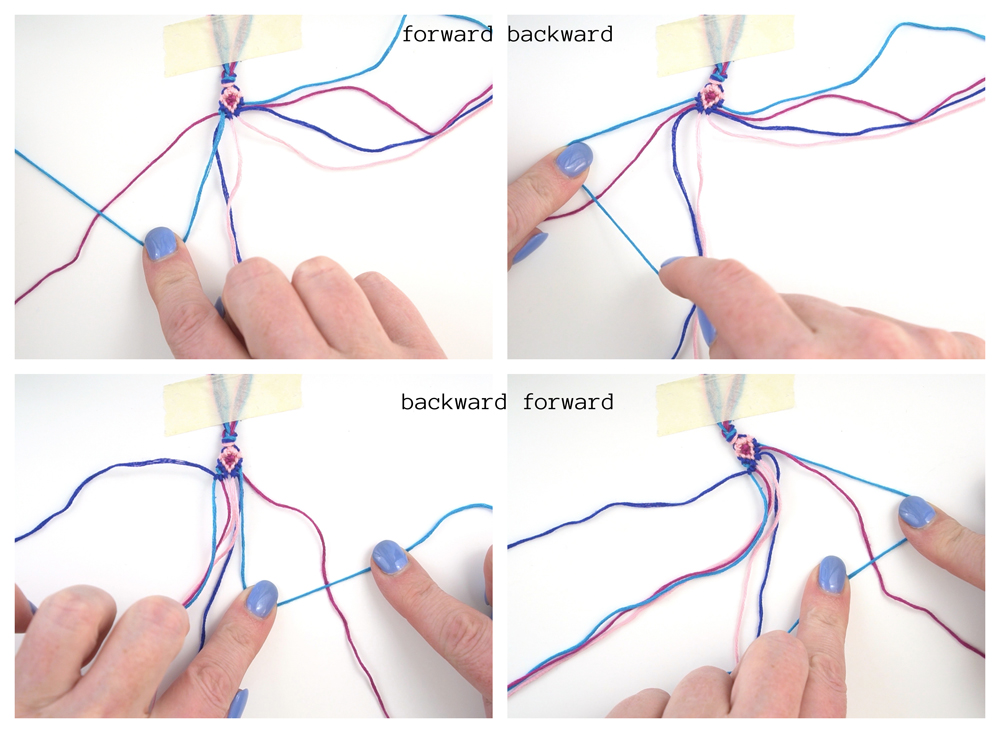
9. Travel the light pink string on the right back to the middle by making a backward knot and a backward knot. Travel the light pink string on the left back to the middle by making a forward knot and a forward knot.
10. Take the two light pink strings in the middle and join them together with a backward knot.

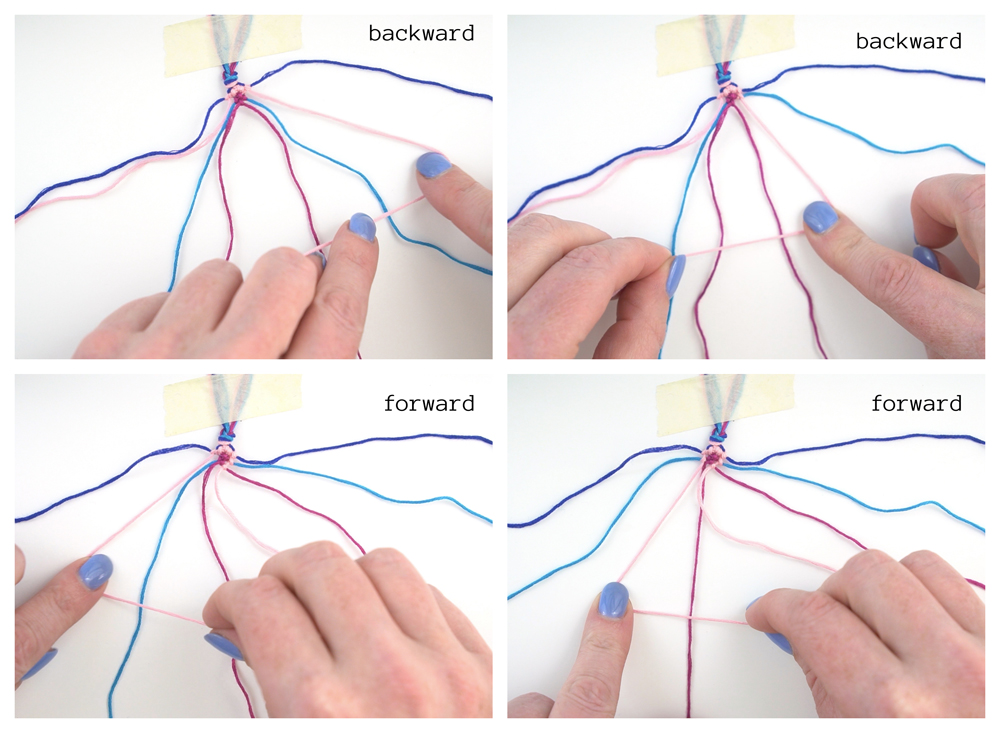
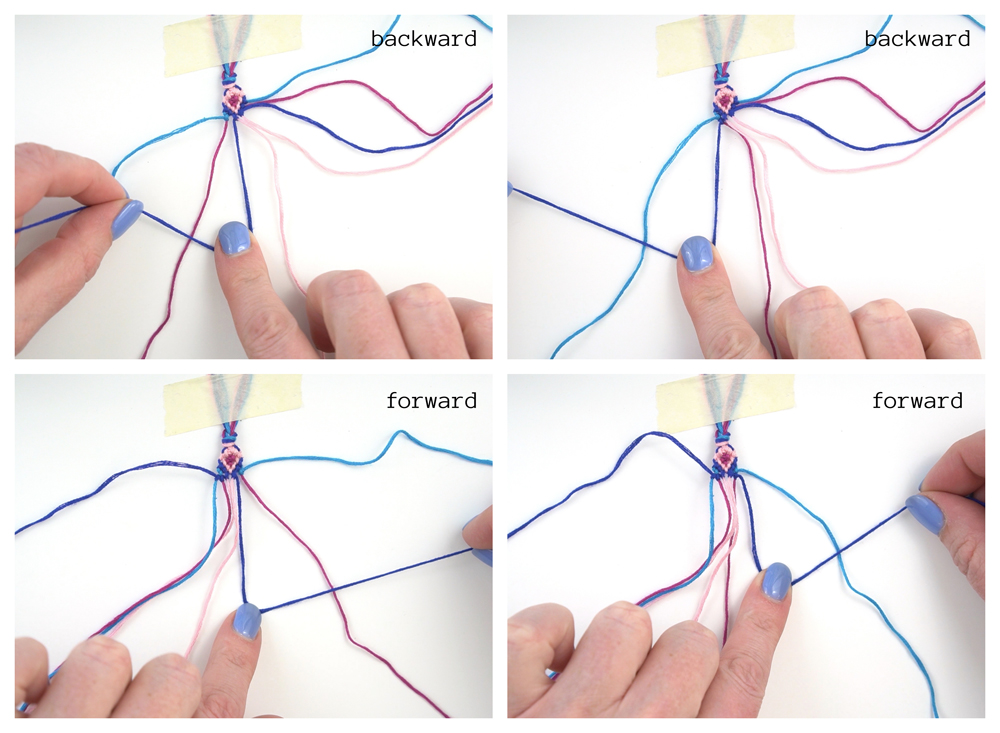
11. Travel the dark blue string on the left to the center by making a forward knot, forward knot, and a forward backward knot.
12. Travel the dark blue string on the right to the center by making a backward knot, backward knot, and a backward forward knot.
13. Take the light blue string on the left and make a forward backward knot on the hot pink string next to it. Take the light blue string on the right and make a backward forward knot on the hot pink string next to it.
14. Travel the dark blue string on the left back to the left side by making a backward knot and a backward knot. Travel the dark blue string on the right back to the right side by making a forward knot and a forward knot.
15. This completes your first set. Repeat over and over again until the bracelet reaches your desired length. Tie a knot at the end and trim off the excess, leaving a tail to tie the bracelet on.


Watch the video!
If you’re more of a video learner, I created a step-by-step video tutorial on how to make friendship bracelets. You can watch it below. (If you are using an ad blocker, you may need to turn it off to see the video.)


i love this idea.i needed a gift for my friend circle and this is perfect.I tryed it and it looked so good and my friends love it.
THANK YOU sooo much for this awesome idea!!!!