
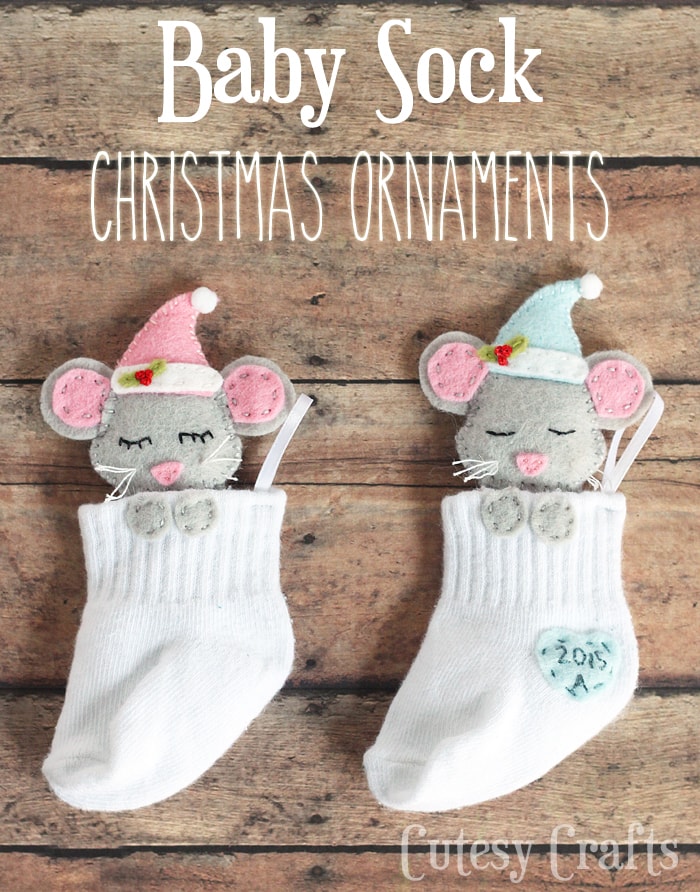
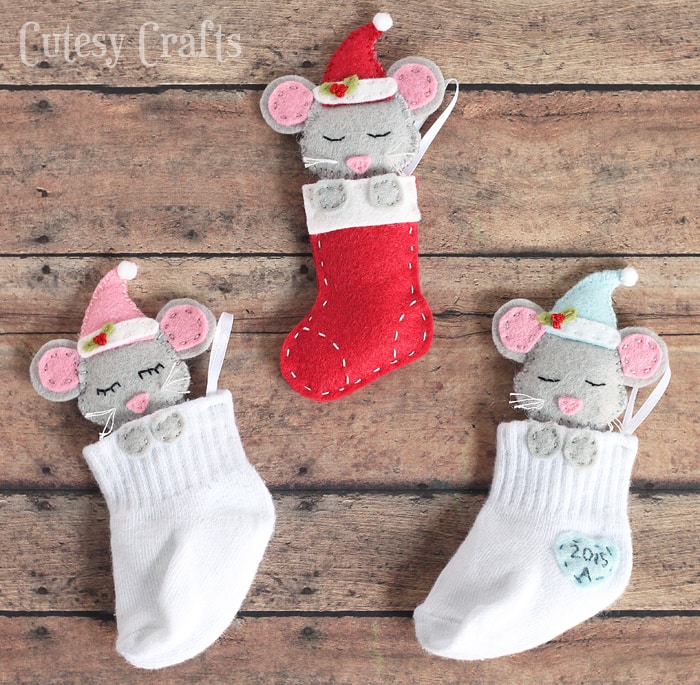
Baby Sock DIY Christmas Ornaments
I hope you like all of the DIY Christmas ornaments that I’ve been sharing because I’ve got another cute one for you today! It’s Austin’s first Christmas, so I had an idea to make an ornament out of one of his tiny little socks. Sounds weird, I know, but it turned out so nice! I’m really wishing that I saved all of the other kids’ socks now! Do you think they would find out if I bought new socks to make some for them?
Watch the Video!
Here’s a video to show you step-by-step how to make the ornament. It’s a little long, but you can just skip to the parts that you need help with.
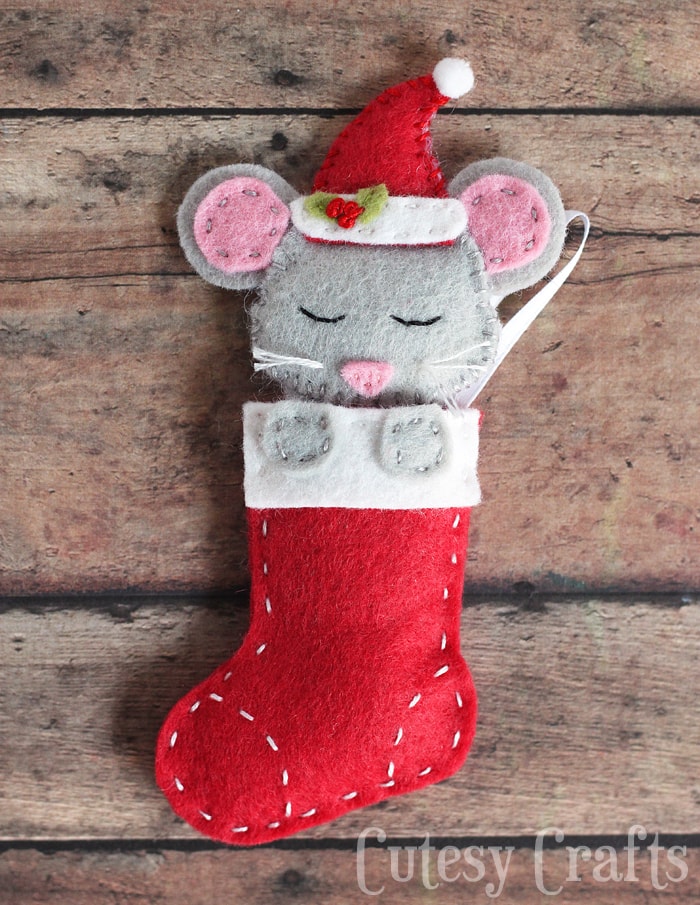
I provided a pattern for a little stocking to put the mouse in if you don’t have a baby sock sitting around. You can make it pink or blue for a baby or another color just as a cute mouse ornament.
Supplies needed:
- free ornament pattern – Instructions to download are at the bottom of this post.
- felt (colors and type used are listed on the pattern)
- embroidery floss (white, gray, pink, blue, red, green, and black)
- fiberfill stuffing
- baby sock (optional)
- 5 mm pom-pom (optional)
- ribbon
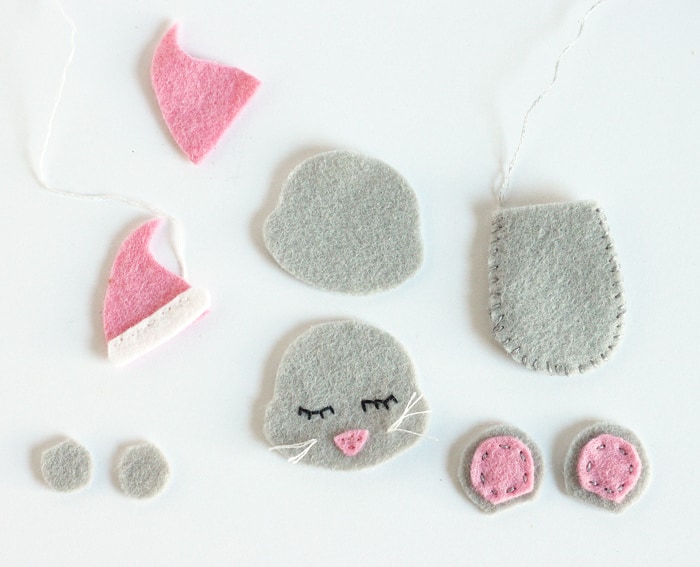
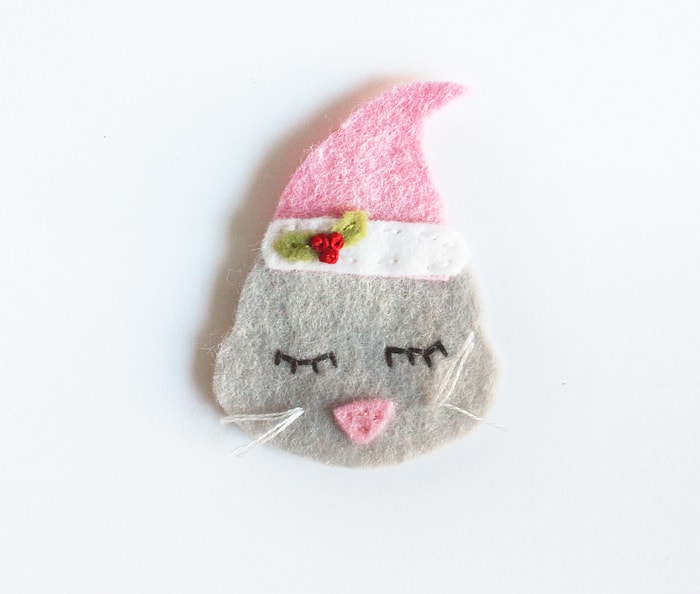
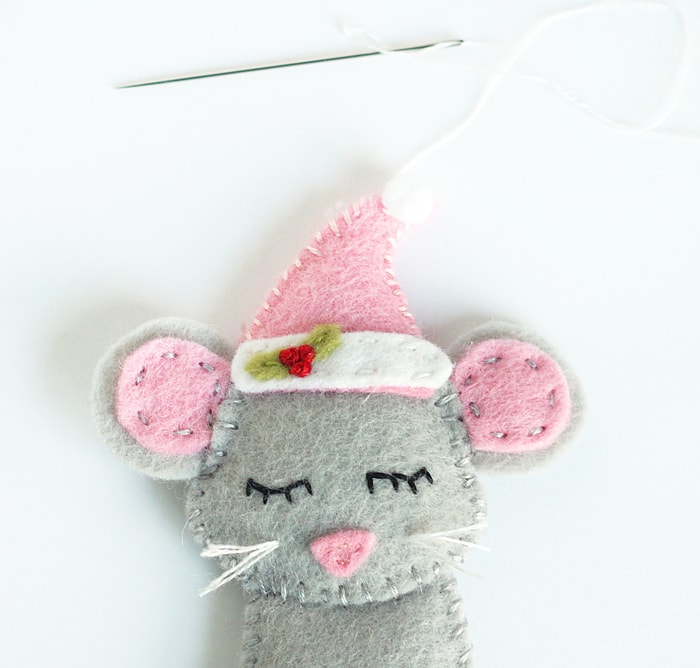
Cut out all of the pattern pieces. Embroider the mouse’s face and sew on the nose. Use a running stitch to sew on the inside of the ears. Sew a whip stitch around the body pieces to attach them together, leaving the top open. Put the white cuff piece on top of a hat piece and sew a running stitch across the top only, using two strands of floss.
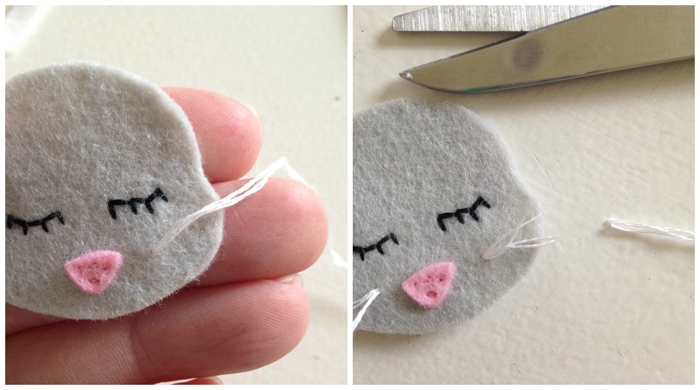
To make the whiskers, tie a knot at the end of four strands of floss, and bring it through to the front. Trim them to the length that you want.
Sew around the rest of the white cuff while attaching the hat to the mouse’s head. Sew the leaves on the hat. Add the berries by making french knots with four strands of embroidery floss.
Sandwich the ears in between the front and back of the head. Whip stitch around the mouse’s head, leaving enough space to attach the body later.

Stuff the head and body with some fiberfill.
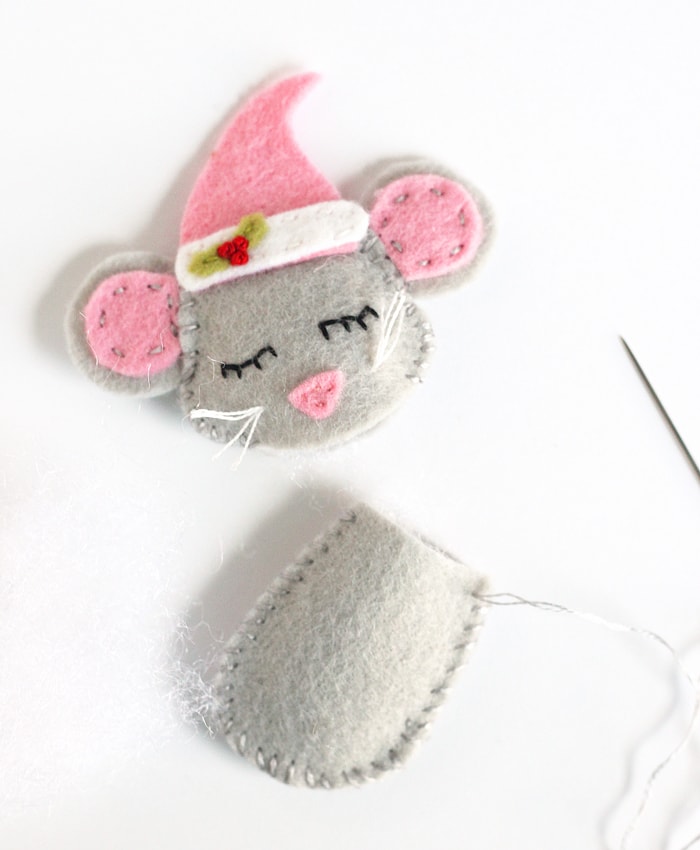
Tuck the body into the head and sew them together.
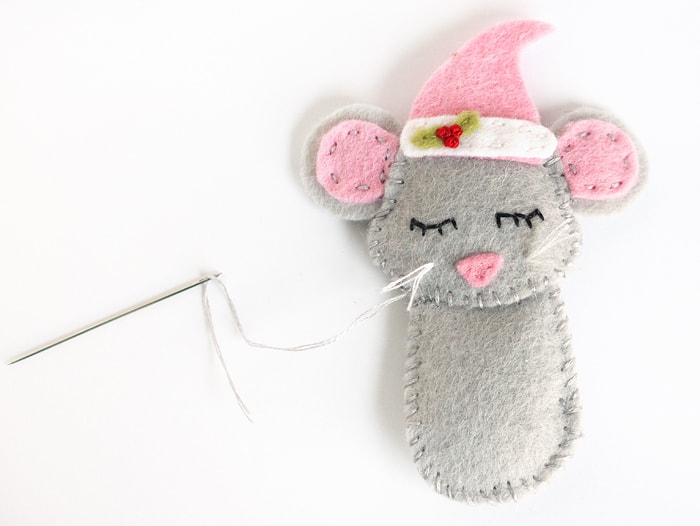
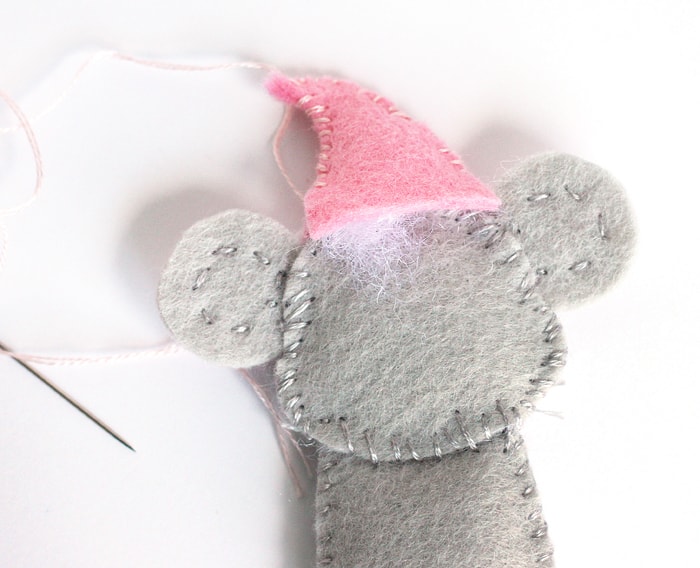
Sew the back piece of the hat on and stuff with a little more fiberfill.
Sew a pom-pom to the top of the hat. The pattern also has a little circle if you’d rather cut one out of felt.
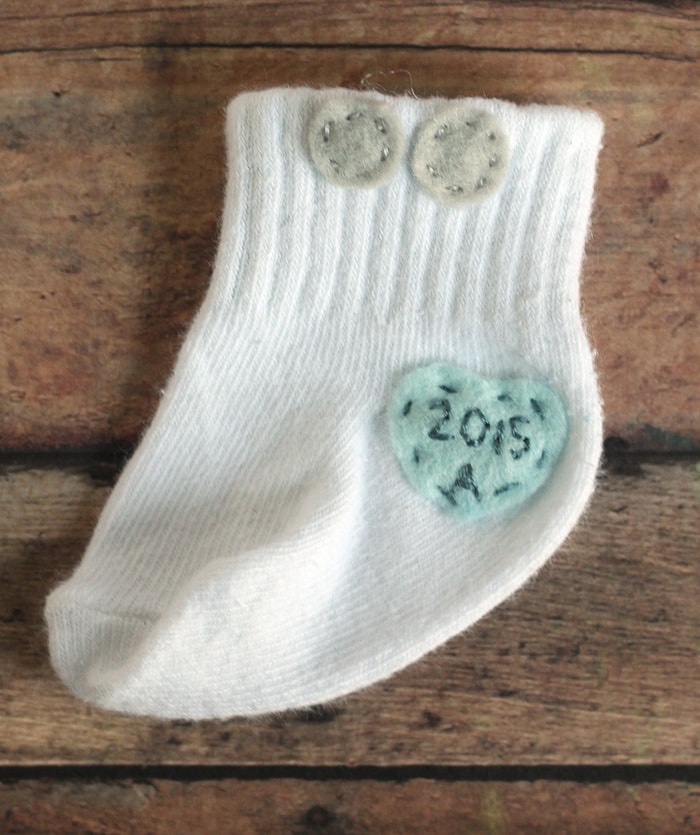
Sew the little hands to the top of the sock. I cut a little heart out of felt and embroidered the year and an “A” for Austin on it. Much easier to stitch the heart on rather than embroider directly onto the sock.
Sew a loop of ribbon to the top of the sock for hanging. I used my sewing machine to make sure it was secure. Add just a little bit of stuffing to the inside of the sock to keep it from being too floppy, and put the little mouse inside.
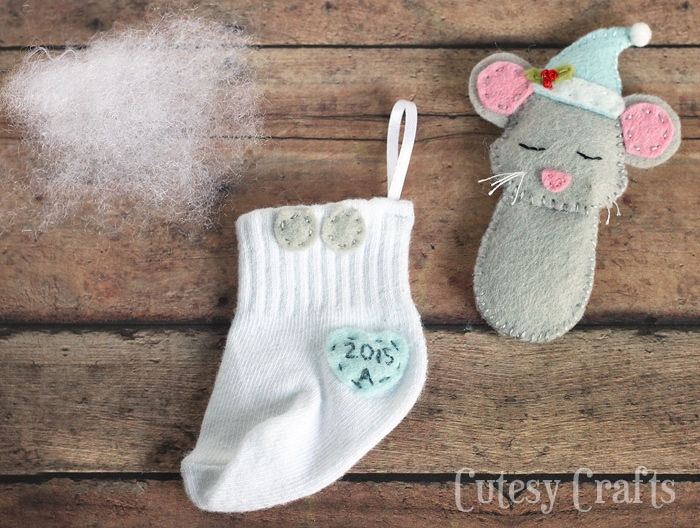
Add a few stitches to secure the mouse in the sock, and you’re done!
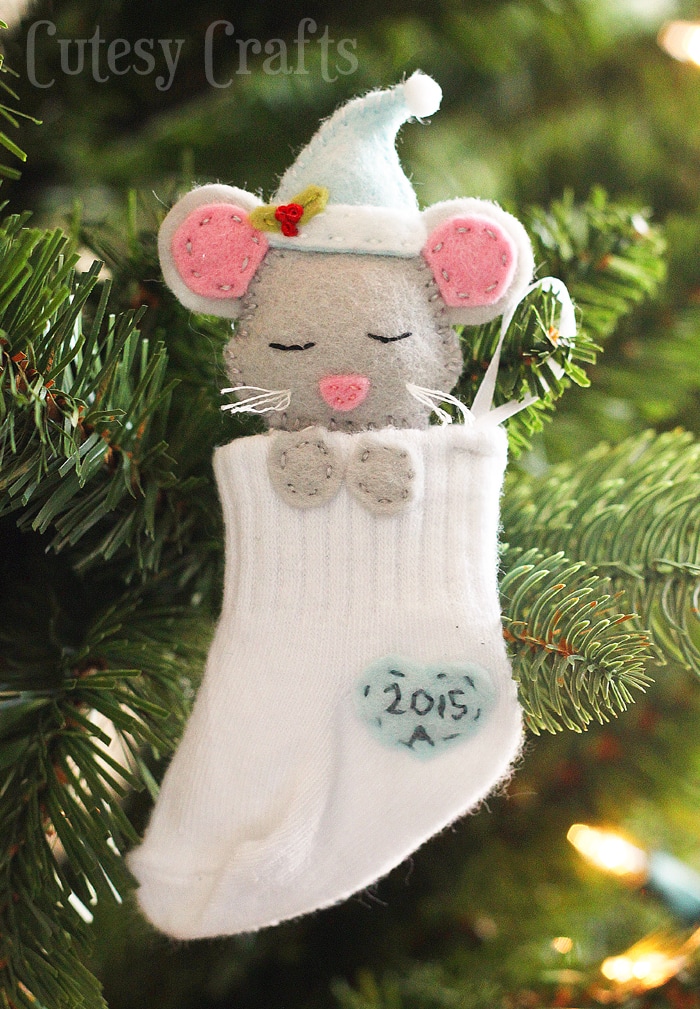
Aren’t the sleepy little mice so cute? I kind of love them!
Also make sure to take a look at all of my other homemade Christmas ornament tutorials and free felt Christmas ornament patterns.
To get the password, enter your information in the form below to sign up for my free email newsletter. You will get an email with the password. Already subscribed but forgot the password? No need to subscribe again! Every email newsletter I send has the password in it, so check the latest one.


love this, I have a new greatgrandson…this is oerfect
the baby sock mice are the cutest Thank you gayle
I haven’t received the email with the passcode for the baby sick mouse pattern. I have checked all the folders.
Such cute patterns. Thank you for your generosity
Please send me your pattern for this. So cute
Hello, I really like this mouse ornament! I haven’t gotten my password yet in my e-mail, how long does it usually take?
Email me at jessica@cutesycrafts.com if you still didn’t get it.
Cute
Lovely
Very cute!
Love all your ideas xx
I LOVE the cute little mouse ornaments!
I am interested in your DIY Christmas ornament patterns – please add me to your mailing list
I can’t add you myself, but you can go to https://cutesycrafts.com/subscribe and fill out the form.
I got the link in my email but don’t see where I can download the pattern with the video.
Send me an email at jessica@cutesycrafts.com
Thank you so much….looking forward to the mouse baby sock felt ornament pattern
I love all your felt crafts
What a lovely craft for my grandkids. I know the older ones will enjoy them just as much, with date that they were born. Thank you so much.
I would like to make the mouse in the sock, however I can not get the pattern, I subscribed. what do I do now?
You should have gotten an email after you confirmed with a link to the download page. Send me and email at cutesycrafts@hotmail.com if you didn’t get it.
sooo cute!!!
Thank you!
Thank you for such a cute pattern. This is perfect for my friends new little ones first Christmas.
So glad you like it! I’m publishing a step-by-step video tomorrow if you need a little help assembling it. 🙂
i WOULD LOVE TO HAVE A COPY OF THE BABY SOCK/MOUSE. i WILL DEFINITELY FOLLOW YOU. i THINK MY FRANDDAUGHTERS WOULD LIKE THESE CRAFTS’
So glad you like the ornament! Were you able to download the pattern from the link? If not, send me an email, and I can get it to you.
This looks so sweet! Do you have a paper template for the felt pieces?
Never mind I found it, and I subscribed to your monthly newsletter 🙂 Thank you!
Glad you found it! Thanks for subscribing!
I’m going to make this for my granddaughters first Christmas
Aw! So glad you are able to use the idea. So special to have a handmade ornament from grandma. 🙂
I love this . But I am a first timer. When printing off the pattern is it at a certain size? Thank you Tracy
They should be the correct size already. Just make sure that when you go to print, the option is checked to “print actual size” or something similar to that.
I am going to be a grandma soon and have already started this making little treasure. I will also be making this for some soon-to-be grandma friends of mine. Thank you for this sweet idea.
Awe! I love that you are making it for your grandchild! I’m sure it will be treasured for years to come. So glad you like it!
Jessica, My granddaughter is a NICU nurse and I would love to make the baby sock with the mouse for those babies
that are in the NICU over Christmas. Thank you, you are so talented. P. Mulcahy
Oh, what a good idea! It must be a really hard time for all of those parents! My first baby was in the NICU for only three days, and it was hard enough for me to deal with. I can’t even imagine what others must go through!
What a lovely idea, thank you for sharing:)
Thank you! Glad you like them. 🙂