
PVC Puppet Theater Tutorial
Ok, it’s PVC Puppet Theater Tutorial time! Just to remind you what we’re making, I’ll show you everything again.

We’ve got curtains that open and close, revealing a felt backdrop.

There are two backdrops that slide back and forth on shower curtain rings.
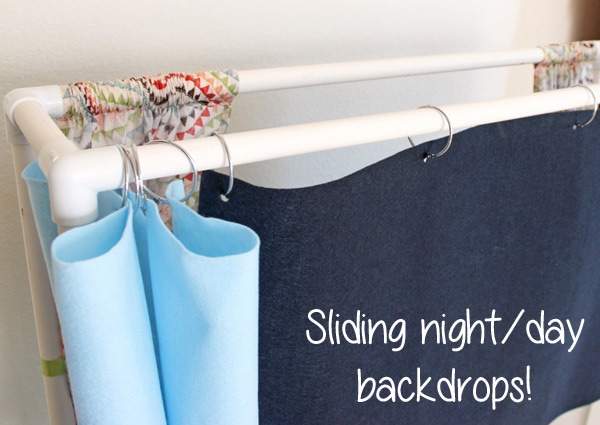
Velcro scenery that sticks to the backdrops and cute little puppets!

So fun for the kids to set up in different ways!

First off, I always like to give credit where credit is due. The idea to make a PVC puppet theater came from Tammy at She Wears Flowers. Go check out her theater tutorial as an alternative to this one. I actually used it to make a different theater for my niece. To make my puppet theater you will need 3/4 inch pvc pipe. I got four 10 foot pipes and then cut them down from there. So fun to see the guys at the hardware store wondering what the heck a girl is doing with all that pipe!
Here’s your hardware store shopping list:
- Four 10 foot 3/4 inch pvc pipes cut to the following lengths:
- 46 inches x 2
- 36 inches x 4
- 23 inches x 2
- 19 inches x 2
- 12 inches x 4
- 6 inches x 4
- 1.5 inches x 2 (You can’t see these in the photo, but they are between the two tee joints on the bottom.)
- 8 tee joints
- 4 side out elbow joints
- 4 end caps
- PVC pipe cutter
I worked up a couple diagrams to show you how everything fits together. Here is a printable diagram so you can remember where everything goes after it’s been put away. I’ll be labeling all of my pipe pieces with letters. Here is a photo with the lengths labeled. Not as confusing as it looks, I promise!

Here are all of the joints. Make sure to get ones that are not threaded.

To make the rest of the theater, you will need:
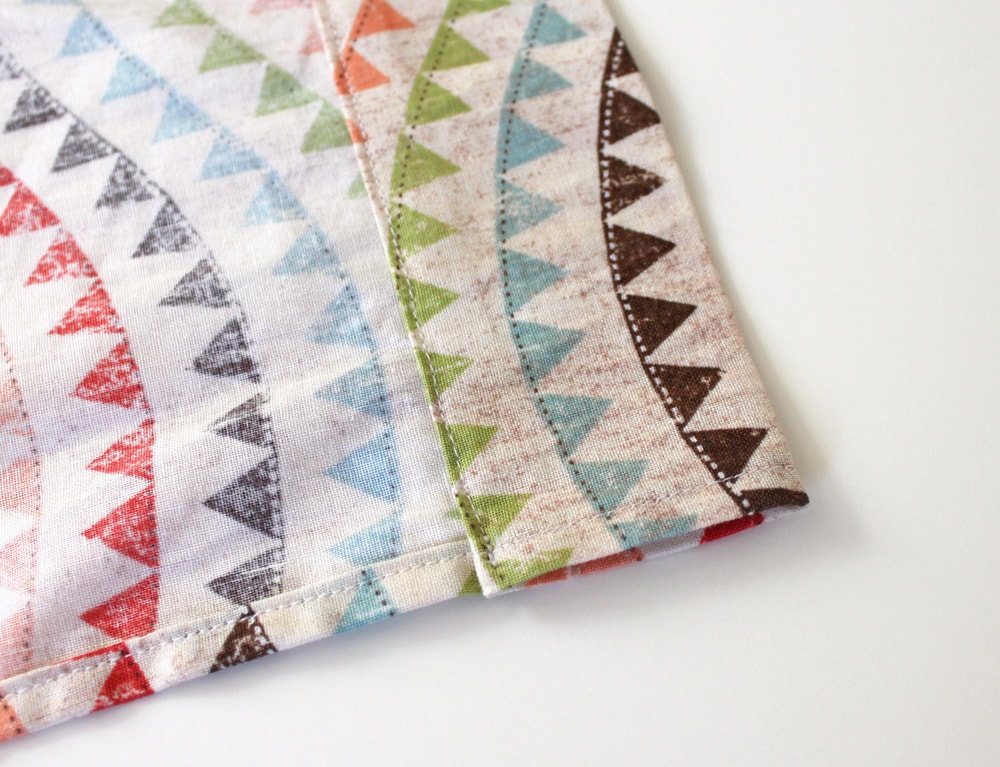
- 1 yard curtain fabric
- 1 yard bottom fabric
- 2 feet ribbon
- velcro
- 1 yard dark blue or black acrylic felt
- 1 yard light blue acrylic felt
- 8 shower curtain rings
Cut your curtain fabric into two 21 x 27 inch rectangles. Hem one short side and both long sides on each curtain by folding over 1/4 inch and then 1/4 inch again. Iron both times and sew down the length of your fold. For the top, short side, iron down 1/2 inch and then another 2 inches and sew close to the bottom fold. This will make a casing to slide the curtains over the pole.
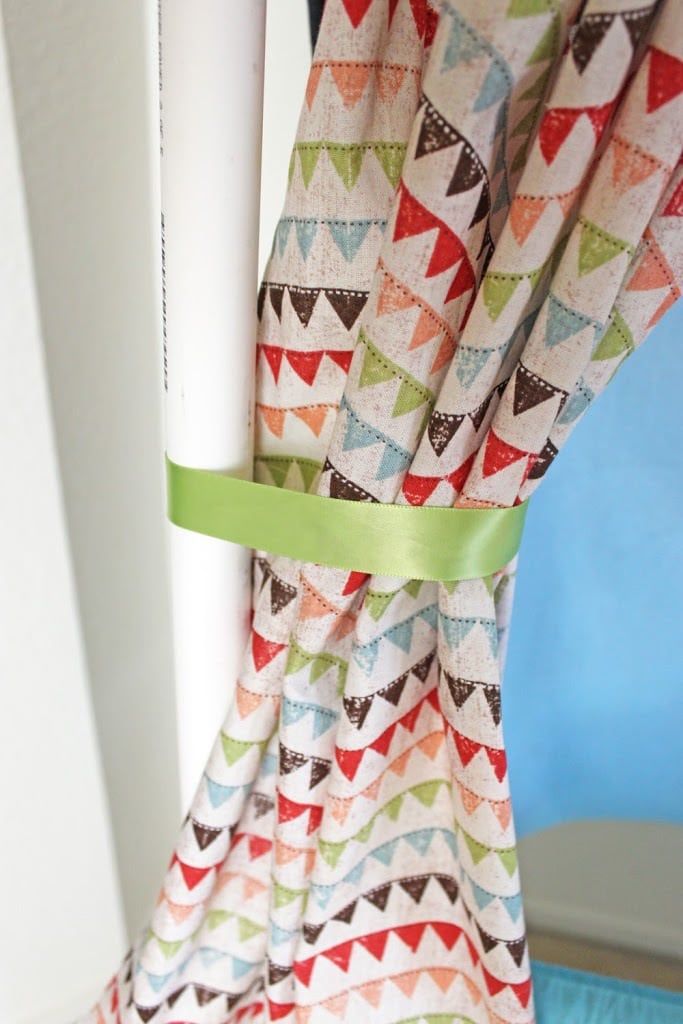
Cut your ribbon in half and fuse the ends to prevent fraying (I like to use a lighter). Sew the ribbon to the back of each curtain about 13 inches from top. Add a small piece of velcro to the part that you just sewed down and another to the other side of the ribbon.
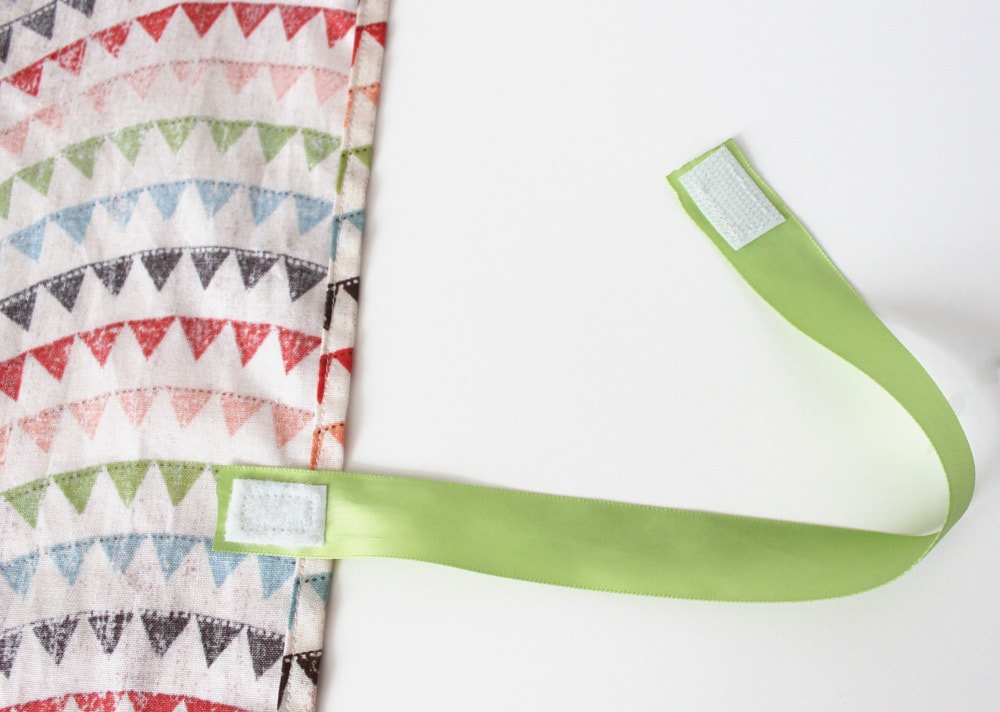
This makes it easy for the kids to tie back the curtains.
To make the bottom part of the show, cut a rectangle of fabric 36 x 32 inches. Hem both of the shorter sides folding over 1/4 inch twice. Make a casing on the longer sides by folding over 1/2 inch and another 2 inches.
Hold everything up to your puppet theater to make sure everything is going to fit right before you sew.

For the backdrops, cut your felt into 23 x 35 inch rectangles. I just took a hole punch and punched four holes into the felt. You will need to stitch around the holes to reinforce them. I didn’t want to do a lot to make the backdrops fancy because I know they are going to get messed up with all of that velcro going on and off of it. Using acrylic felt makes it cheap and easy to replace.

I’m still working on the patterns for the backdrop pieces and puppets, but I’ll get those up soon. Until then, get to work on your puppet theater! **edit: you can find the patterns for the scenery and puppets here.**


I’m glad I found your page. I could use this for different backgrounds and a puppet theatre! Thank you so much! Hope you have more ideas.
I just wanted to say thank you for the awesome tutorial, from exact measurements and cuts to how to sew the curtains. This was by far the easiest project I have ever done. I made mine for my Sunday school class. They are going to love this. I wish I knew how to attach a picture. Thank you again.
Patricia
Dude. This was awesome. Just made this today in 2022. It was so easy to put together and the kids love it. Thanks so much.
Oh, I’m so glad! My kids still love getting ours out and using it for different things.
I love this idea! I spent a lot of time looking for the perfect diy puppet theater for our son who turns 3 on Monday. He loves playing with the puppet theater at the library but I didn’t want a small tabletop one like theirs. Your plans were fantastic! They were also extremely clear which made buying supplies plus building really easy and stress free. The only change we made to the design was making the four 6″ pvc actually four 12″. This allowed our boys more room to move in between the backdrop and front. I also added two small side curtains to hide the boys while they put on a show. I can’t wait to look further into everything else you have posted on your site for ideas! Thank you for taking the time and effort to put together these great tutorials!
I’m so glad it was helpful, and I love your additions!
I love this idea! Have been looking at it for some time now. I think I want to use it as a double backdrop for prom, weddings and parties. What do you think??
You could, but you would probably have to make it much larger.
This is adorable! Totally making this for my niece!
Thank you! She’s going to love it!
This is fantastic! I was looking to make several of these for our church, as we didn’t want to make them out of wood (as another poster mentions – splinters mainly). We were going to build a different version from a plan we found online, but this might be better for us. Thanks for taking the time to put this together! We will put it to use.
You’re welcome! So glad that you are able to use it. I love the PVC pipe because you can take it apart and store it!
This is perfect! I was going to build one out of wood for my daughter for Christmas but this makes SO MUCH more sense. THANK YOU!!!
Yes, much easier than using wood! Glad you found it useful. 🙂
Thanks for the idea. I will be building this for the church that I pastor for our Vacation Bible School.
COST: The cost will be just over $25 plus tax from Lowes plus the cost of material, which can range from $1/yd to $5 or more just depending on what you want. I am actually making this 5 foot wide and making it 6 foot tall for use for at least two adults, which adds only an extra $3 for one more pipe.
I did have one pressing question, why the 1.5 in pieces at the bottom. I just can’t think why you would do that.
TIP: Also you don’t need a PVC pipe cutter. You can use a chop saw/miter saw, which gives the cleanest cuts, a hack saw, even a circular saw. That would save you $12-$15 on something you probably would not use again. If you have a miter box you could even use that too with a clamp for a clean cut.
Thanks so much for all of the tips! I’m sure those will be very helpful to someone. The 1.5 pieces served as a way to connect the two tee joints that are right there.
Actually, that is not what they were there for. There would be no need for the T-joints for you could make it go straight up. The reason for that bar is to hold the bottom part of the cloth. I was going to try and edit my comment when I figured it out, but couldn’t.
Would this be comfortable if a tall person got behind the curtains and put on the puppet show? I’m think of adding a extra foot to the measurements.
I’m not sure. You might want to add a little since these measurements were made for my kids. If you are using the backdrop, it’s pretty easy to hide behind though.
do you remember approximately how much this cost to make? I’d like to make it for Bible class. Thanks.
It’s been quite a while, but I think the pipe and cutter were like $40-50 and then the fabric on top of that.
Will this work for middle school students to use as a performance space?
I think it will work for middle school students to do a puppet show. We had some 11 year old scouts that used it just fine.
Hey! I work for a PVC supplier so I’m always looking at what creative things people can come up with. I LOVE how well documented and planned out your work is! Hope you don’t mind me sharing a link to your tutorial 🙂
-Amanda
I’d love for you to share a link! Thanks so much!
LOVE everything about your puppet theater! Where did you get the “pennant/banner” fabric – or do you know what brand/style it is?? THANKS!
Thank you! Yes, when I found that fabric I HAD to have it for my puppet theater! I bought it at Joann’s. It’s this one here: http://www.joann.com/premium-quilt-fabric-gentle-breeze-banners/zprd_11556792a/
This is adorable and so much FUN! Thanks for sharing! (Pinned 🙂
Thanks Alexis!
This is such an adorable idea! 🙂
Congrats on making it to the PVC week! When Missy asked for ideas, PVC was mine! I love what you came up with!! I would love it if you linked up with us this week! http://www.sowderingabout.com/2013/08/on-display-monday-14.html
This is adorable! I love this.. if only I had more hours in the day to do all the fun crafty projects I find. I’ll be tackling something like this in the future! Thank you for sharing!
Thank you! I had a lot of fun making it. 🙂
This is great! My girls would have so much fun having puppet shows with this. I would love for you to add it to our kids linky http://wemadethat.blogspot.com/2013/08/we-made-that-linky-51.html
Thanks for linking to Take-A-Look Tuesday over at Sugar Bee Crafts – you were featured today!
–Mandy, SugarBeeCrafts.com
Love this idea! Thanks for sharing it!
Thanks, Barbara!
This is so cool Jessica! My daughter would love it! I’ll be pinning this and putting it on our to-do list! Newest follower here and can’t wait to see the scenery part!
Corey from Tinysidekick.com
This is GREAT! I love the way you did the extra backdrops. So many great details here! Amazing!!