
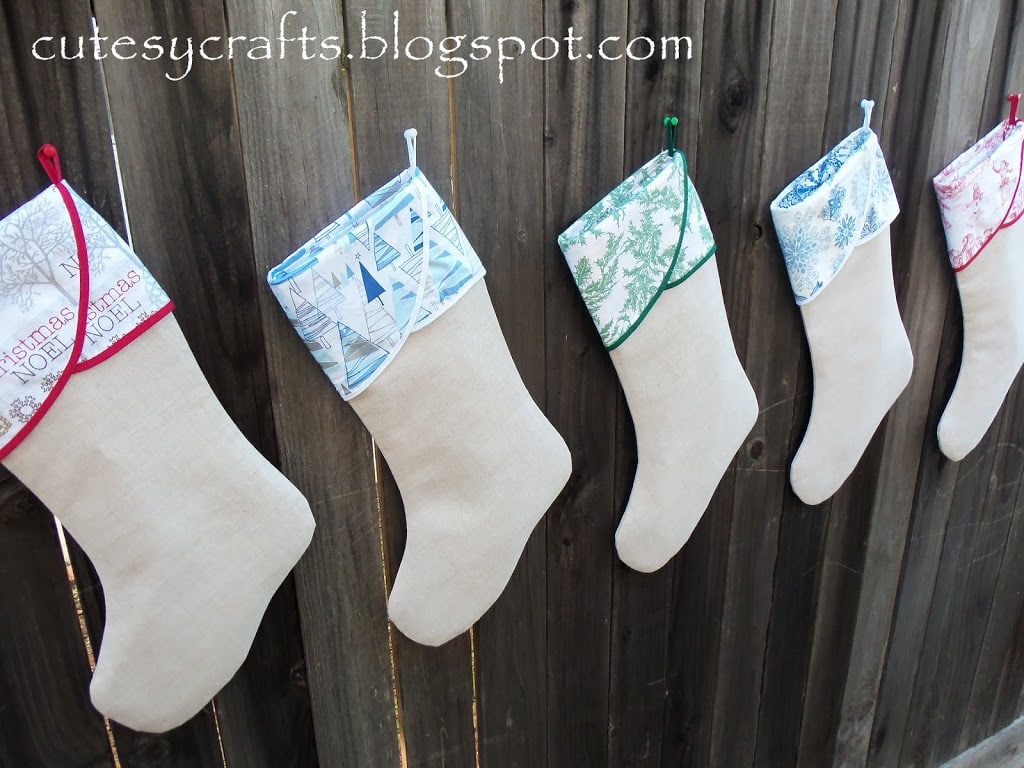
Linen Stockings
This is going to be Leah’s first Christmas, so naturally I needed to make her a stocking this year. I got out my burlap stash from when I made the other kids’ stockings and cringed. I know burlap is a big trend right now, and I love the rustic look that it has, but I just could not bring myself to work with it again. Sorry to all the burlap lovers out there, but I HATE it! It makes me itch, it sheds everywhere, and it’s not exactly screaming heirloom quality stocking. I took the stockings apart, and got to work on a new plan.
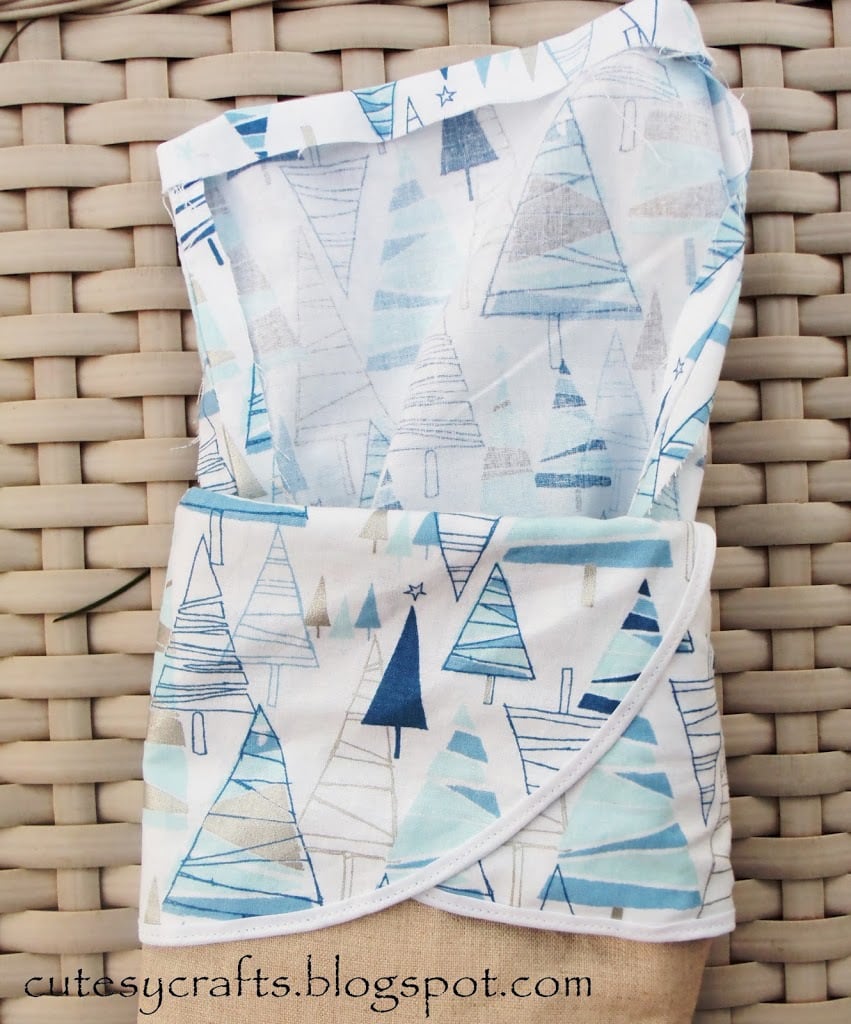
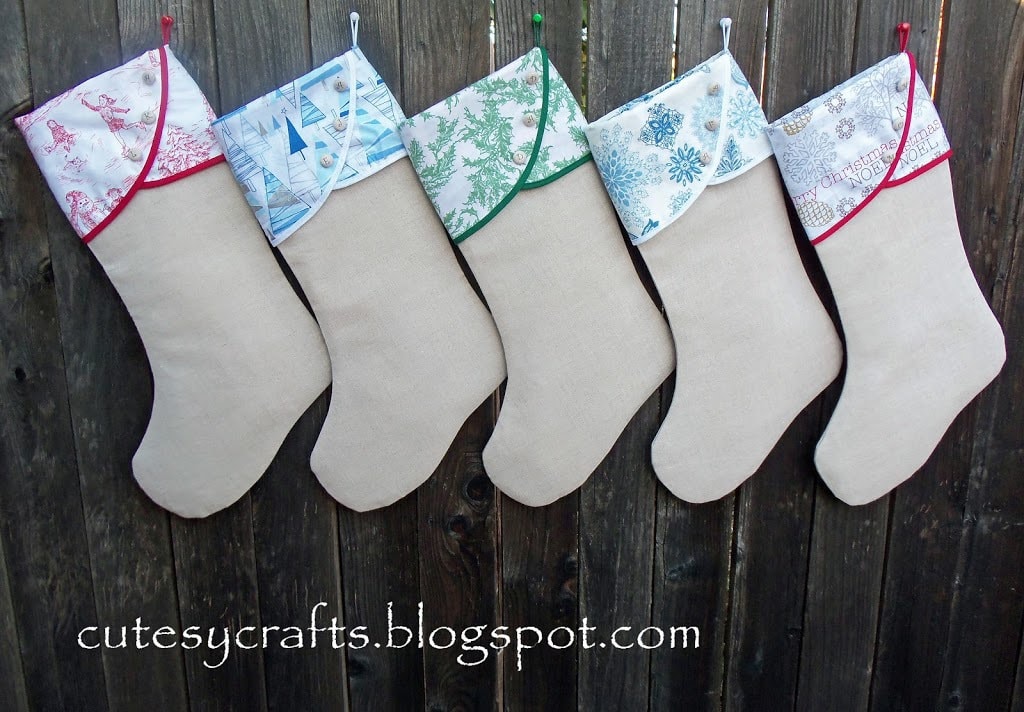
I still wanted the rustic look, so I decided to go with a nice 100% linen. It’s so much nicer to work with than the burlap, and I think it looks just as good (if not better). They are lined with a heavy weight interfacing to keep the stockings from flopping over when they are empty.
I stuck with the same design as my burlap stockings with a couple of modifications since I would be working with a different fabric and using interfacing. You can still use the other tutorial that I made, but I’ve learned a few new things since then that I will show you now.
Here’s what you are gonna need:
-Linen fabric
-Cotton fabric (1 yard should make 2 stockings depending on where you cut)
-Heavy or medium weight interfacing (get the sew on, not the iron on)
-1/4 inch double fold bias tape
–Stocking and cuff patterns – I made those free for you here. They will be printed out on different pages that you will need to tape together. If you use them, I’d love for you to please subscribe to my blog!
-All seams are 1/2″ unless stated otherwise.
First thing to do is cut your fabric. Use your stocking pattern and cut out two of the linen fabric. Tug at your linen fabric a bit to see which way the stretch is going. It should be the opposite way of the selvage (or finished) edge. You want the stretch of the fabric to run horizontal on your stocking . You want a stretchy opening, not a stretchy length. Using the same stocking pattern, cut out two of your cotton, and two of your interfacing. Make sure to flip your pattern over when cutting the second piece of cotton. Use your cuff pattern to cut out two of the cotton fabric. Make sure to flip this one over too for your second piece. I like to use this this purple disappearing marker to trace and cut out the templates.

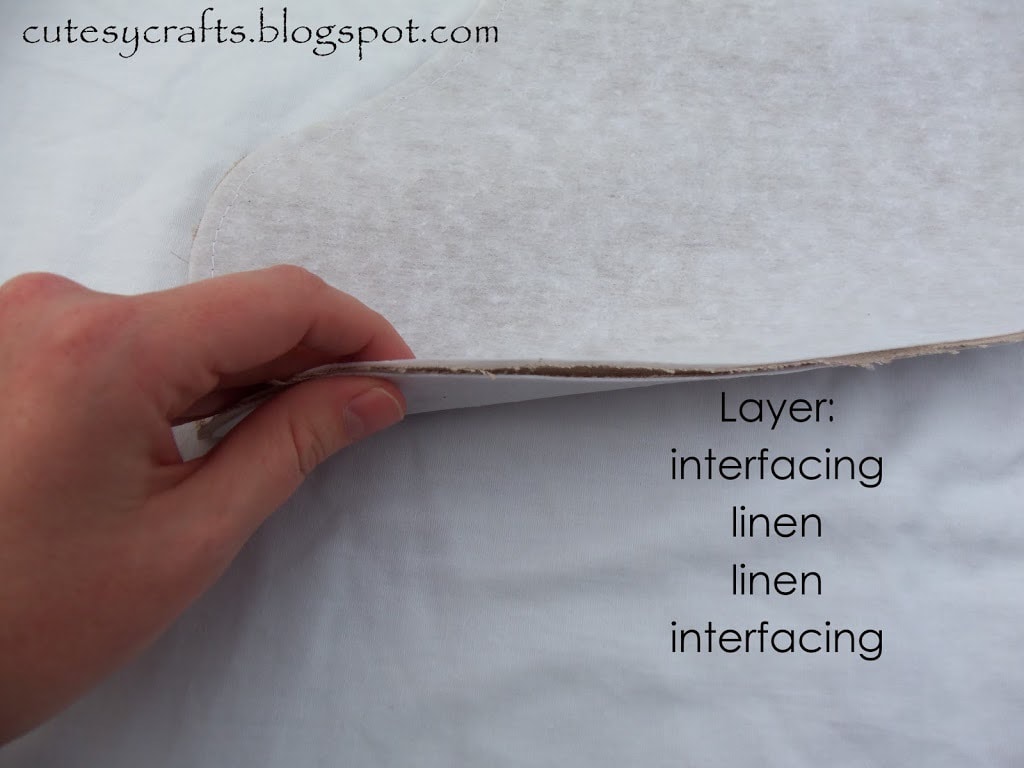
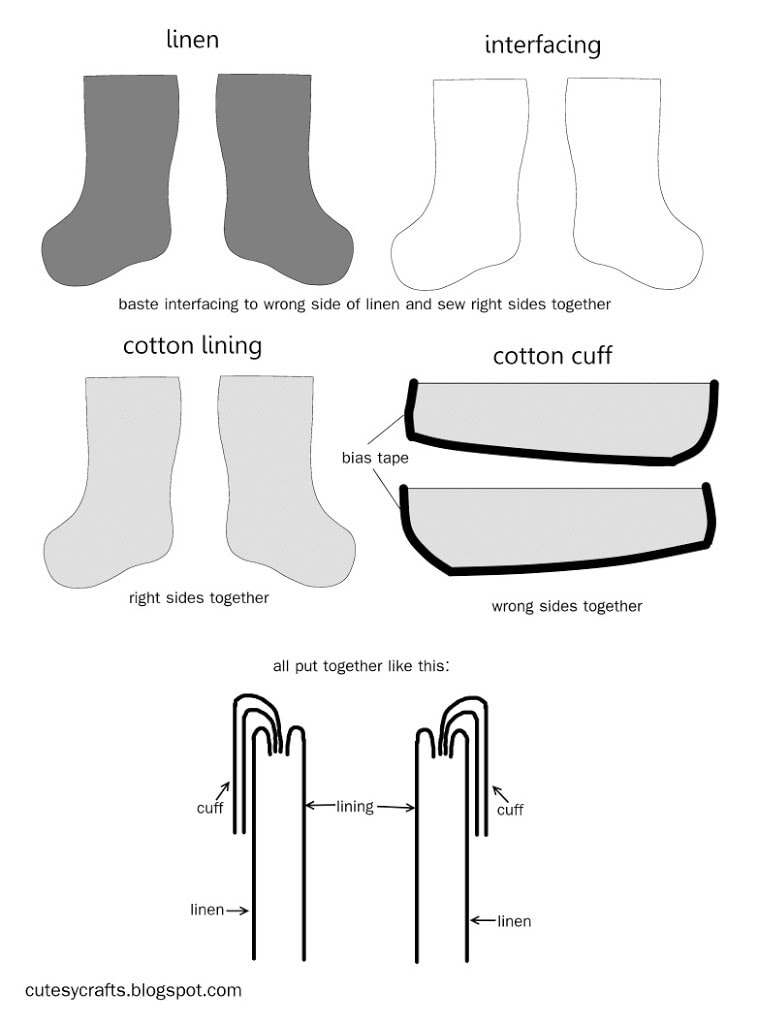
Next, you want to baste (or sew with a long stitch) the interfacing pieces onto the linen pieces of your stocking. Do about a 1/4″ seam around the entire stocking here so it will not show when you are done. This will make the linen stiffer so that it does not flop over when empty. Make sure the linen pieces are opposite each other like the photo below. The side with the interfacing now becomes the “wrong” side of the fabric.

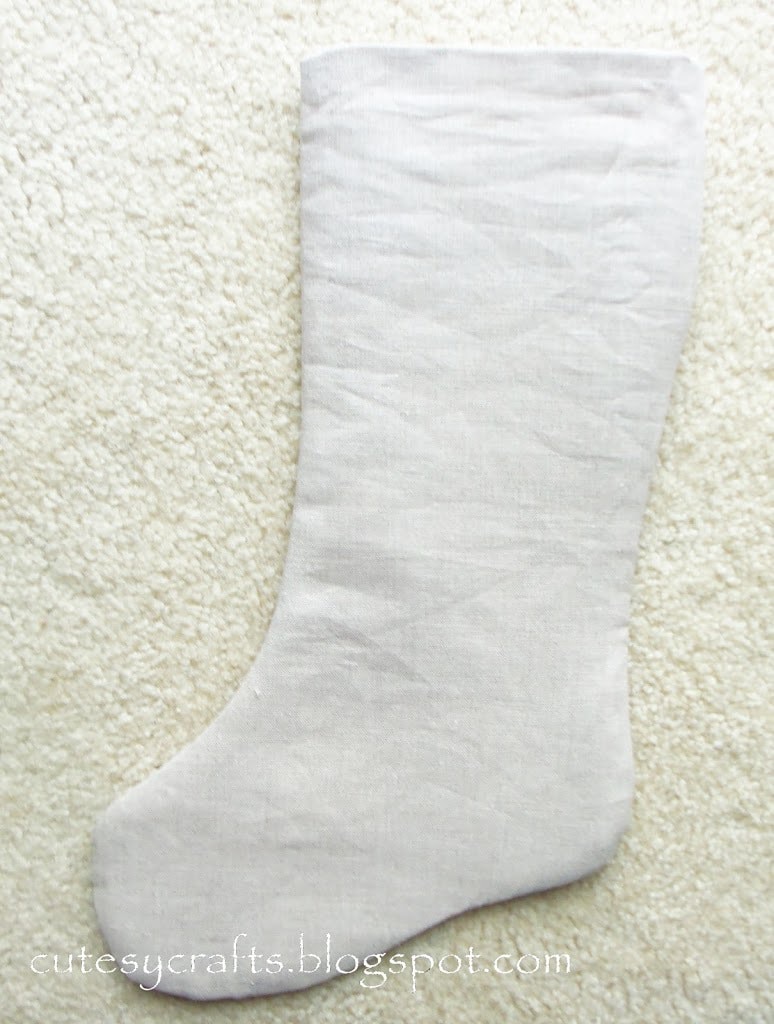
Take your linen pieces and pin them right sides (linen sides) together. Sew 1/2″ around the the stocking, leaving the top open. When you are done, your stocking pieces should be layered interfacing-linen-linen-interfacing.
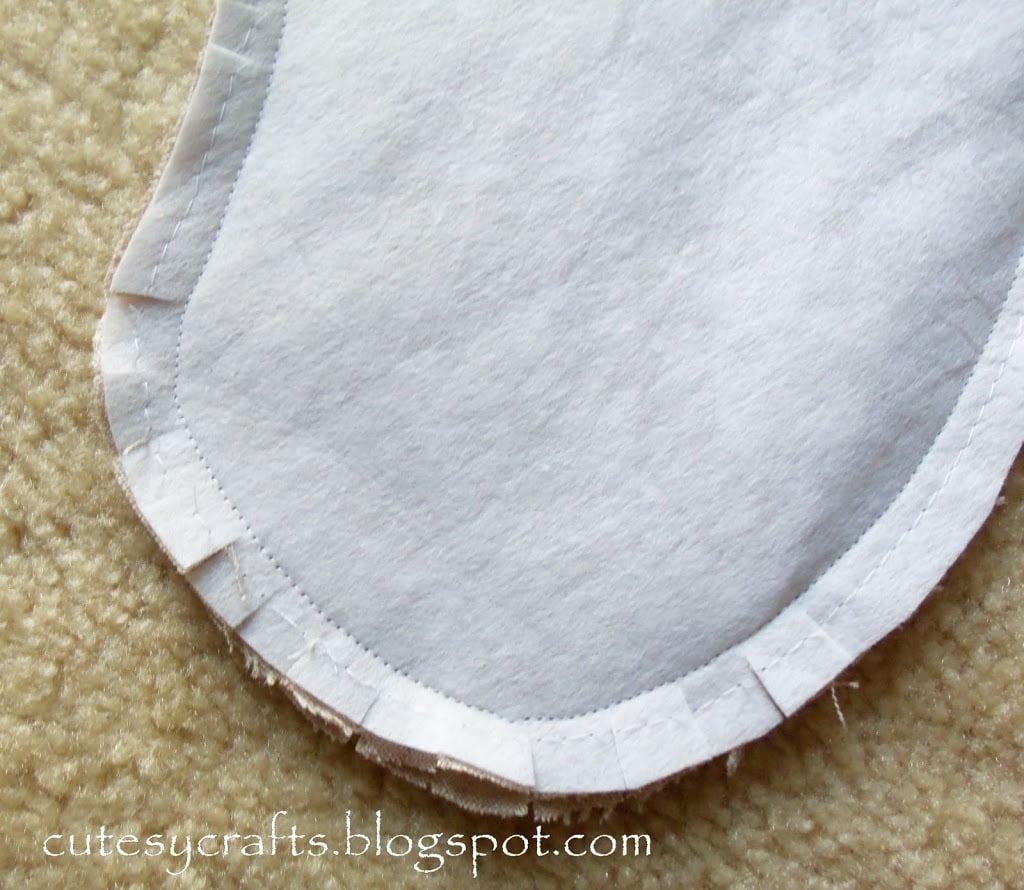
Clip the curves on your stocking and set this part aside. You can cut through the basting that you did earlier, but do not cut through your final stitches.
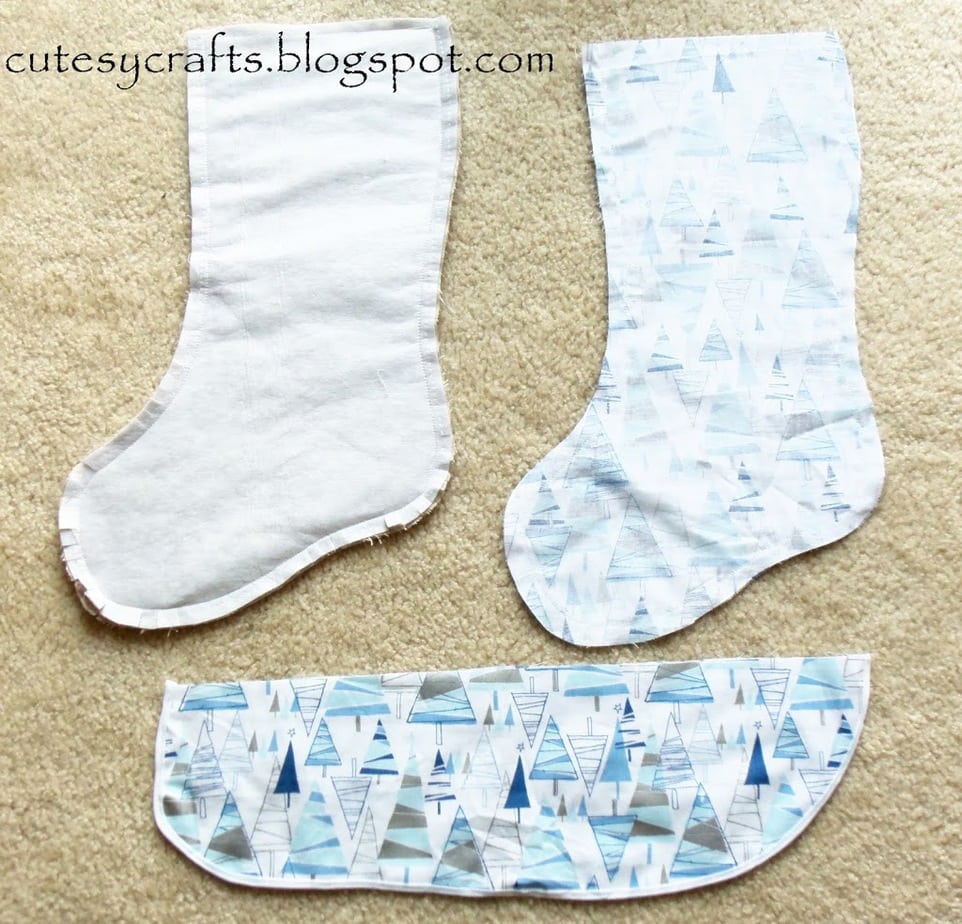
Now take your cotton stocking pieces and pin and sew them right sides together, leaving the top open. This will be your stocking lining. Clip the curves on this part of your stocking as well. You should have what you see in the photo below (minus the sewn cuff).
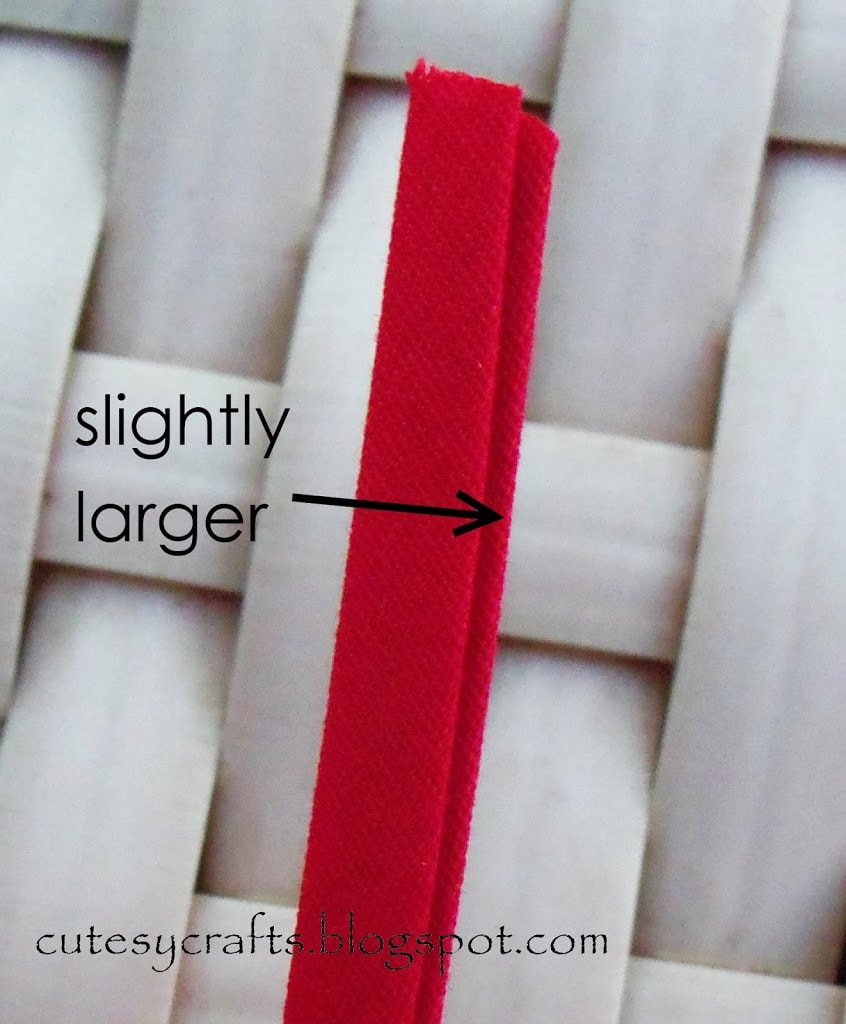
Now for the cuff. I learned, as I was sewing, that there is actually a correct way to attach bias tape. I remember my mom mentioning it before… lesson learned… listen to mom! I was using the short cut way before, and with this thin bias tape, it’s not a good idea. Stuff started falling apart. 🙁 I’ll show you on a different stocking, since I didn’t figure it out until later. First, put your two cuff pieces wrong sides together (print facing out). Look at your bias tape and notice that there is one side that is slightly wider than the other. This side should get sewn onto the back of your cuff.
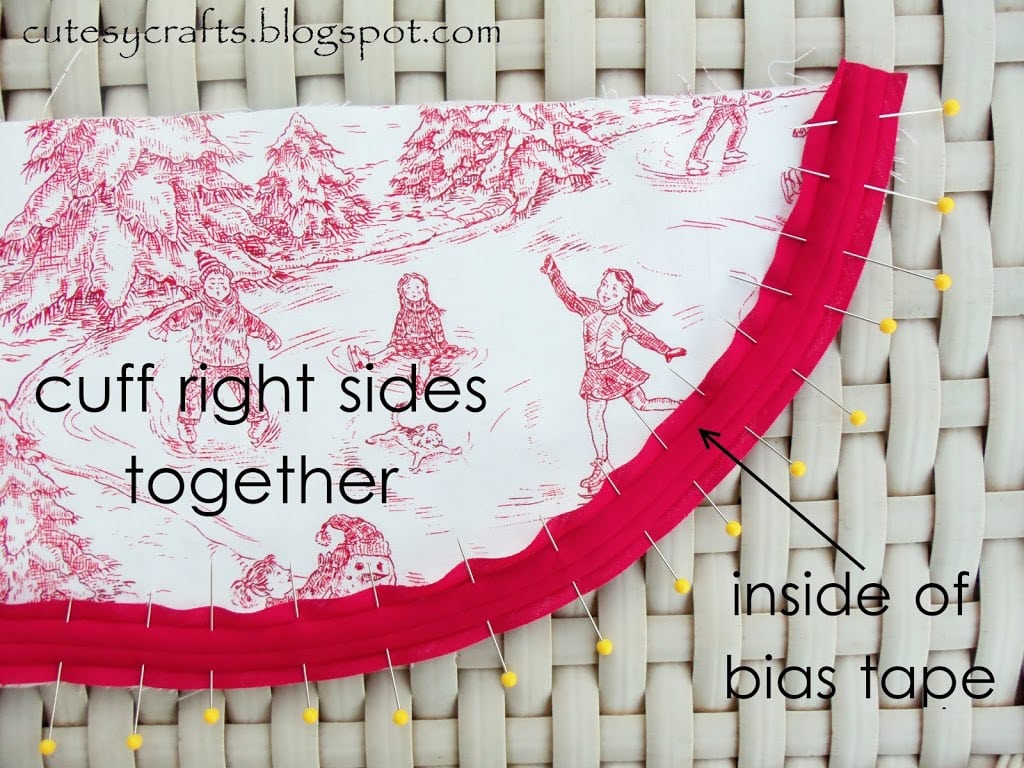
Open up your bias tape completely and pin it along the bottom edge of your cuff pieces. The inside of your bias tape will be facing up and the edge of it will follow the edge of your cuff pieces. Use lots of pins, especially along those curves.
Sew along the first fold in the bias tape, the one closest to the edge.
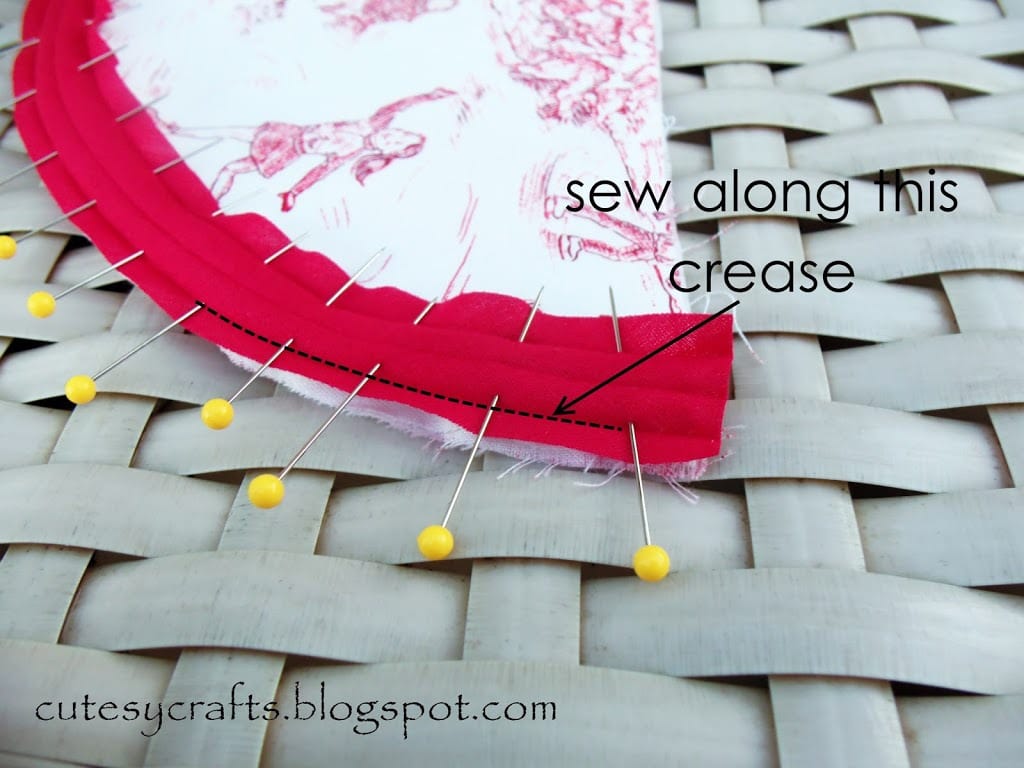
This will give you a nice 1/4″ seam through both pieces of your cuff and bias tape.
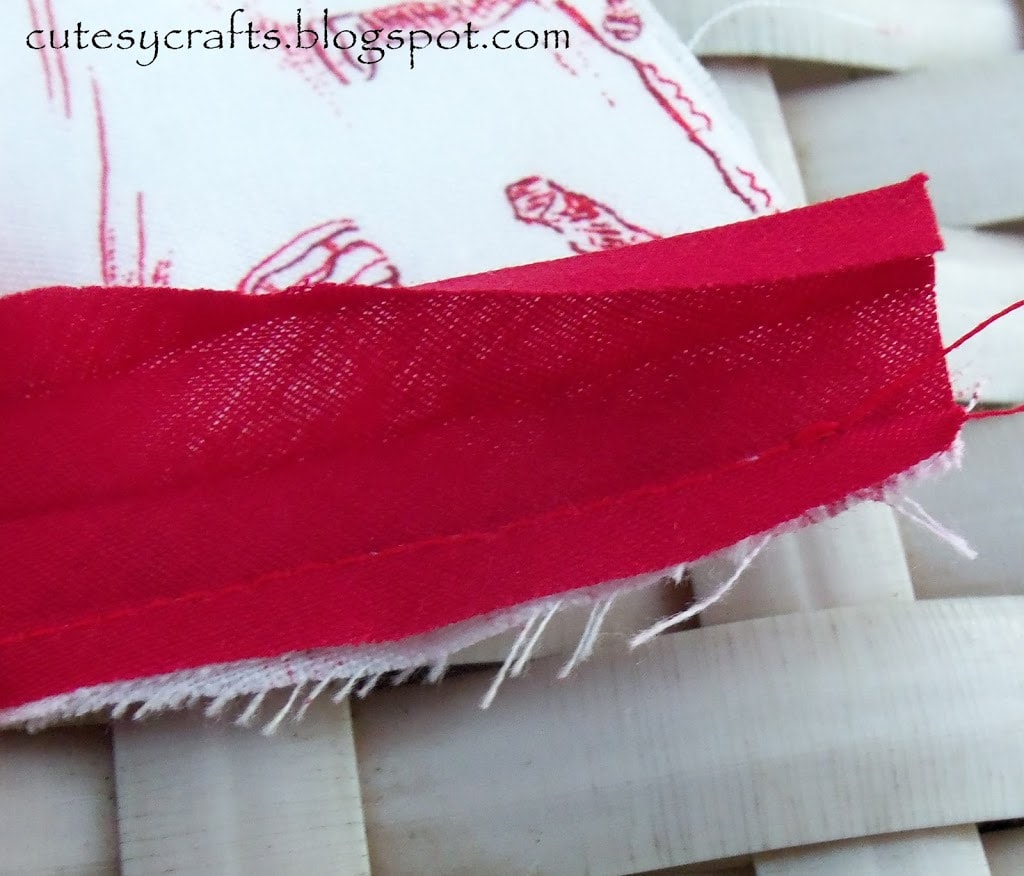
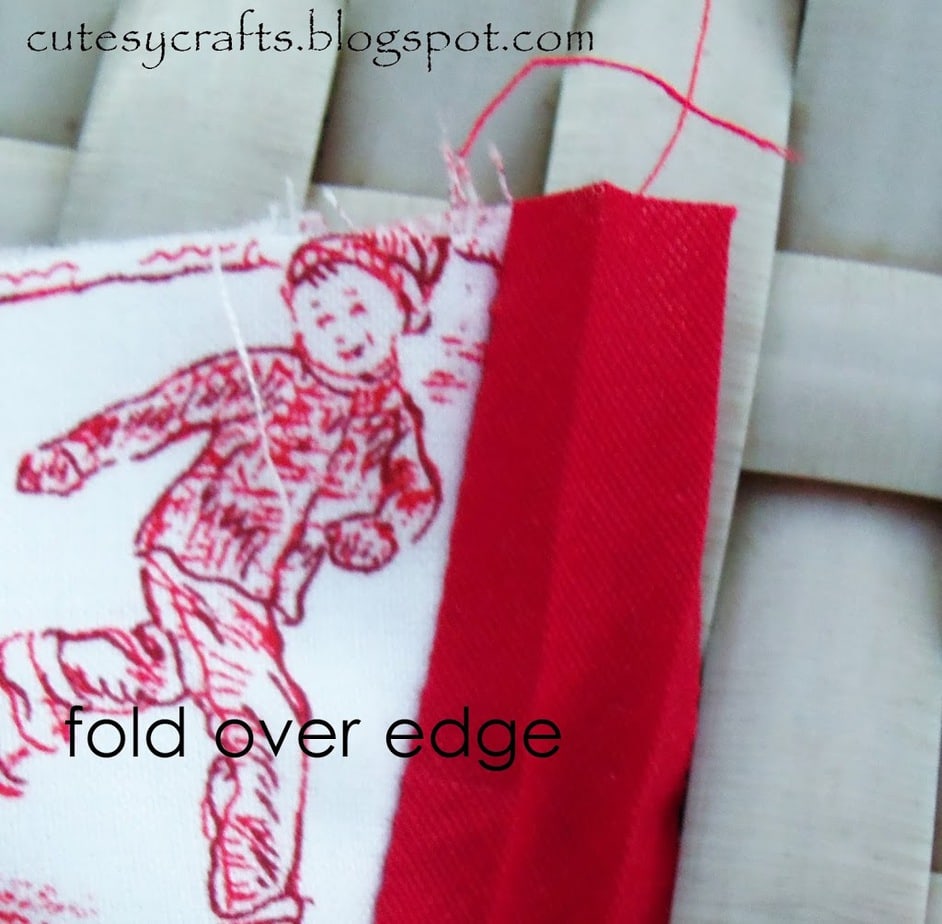
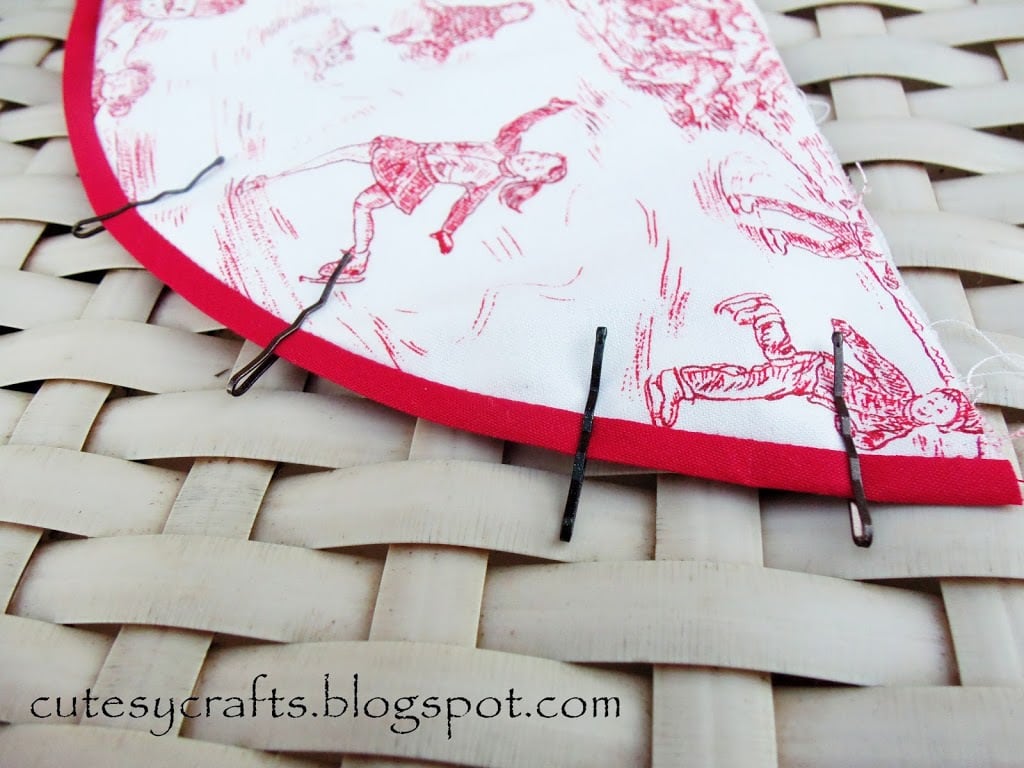
Fold the bias tape over the edge of your cuff pieces and pin or clip in place. I found some mini bobby pins laying around that worked perfectly to keep the bias tape in place. Putting pins in it did not seem like an option since it’s so small.
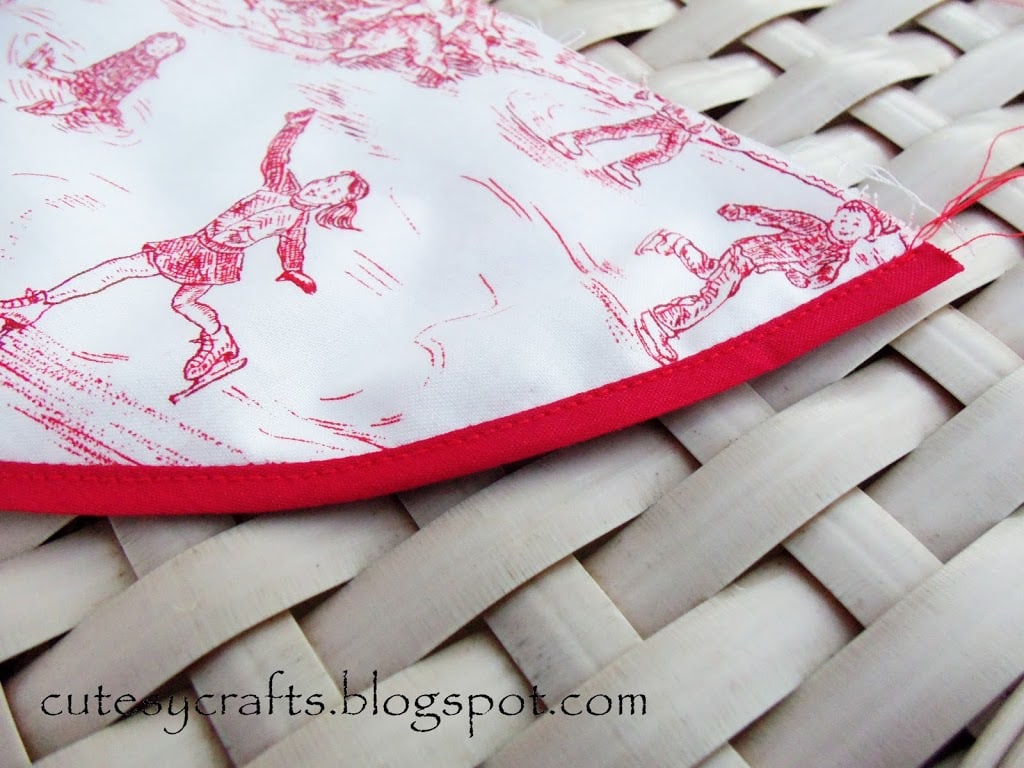
Stitch the bias tape on getting as close to the left edge as possible.
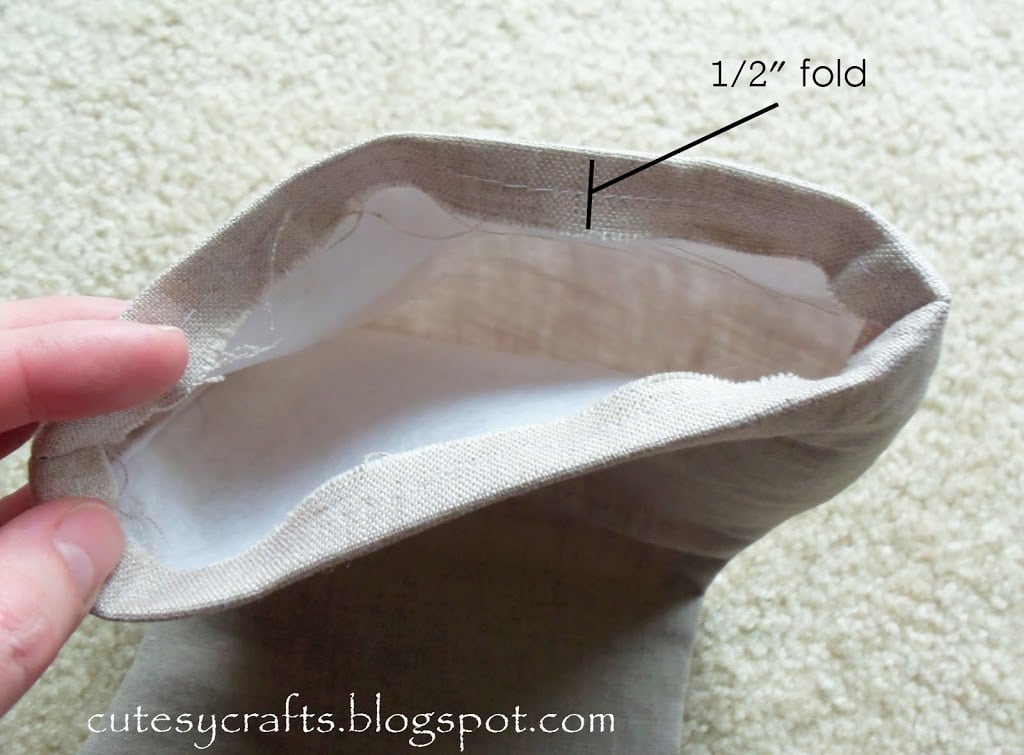
Now heat up your iron and press open the seams on the main linen and cotton lining parts of the stocking. Turn the linen part of your stocking right side out and iron the top part in a 1/2″. While you are at it, iron the whole linen part of the stocking to make everything nice and straight.
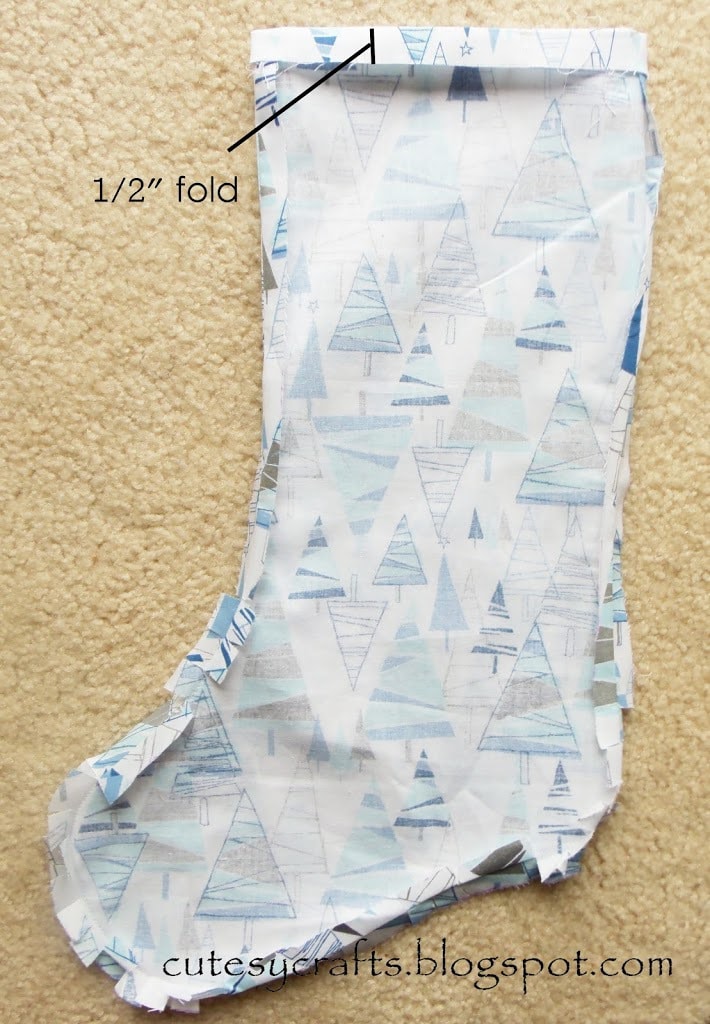
Iron the top part of your cotton lining out 1/2″.
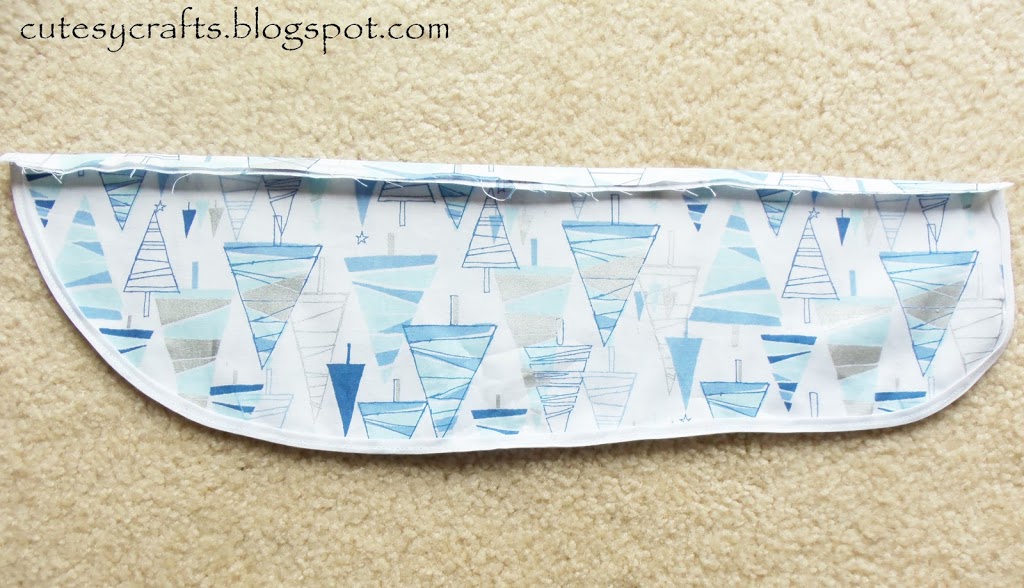
Iron the top part of your cuff down 1/2″ on the underside.
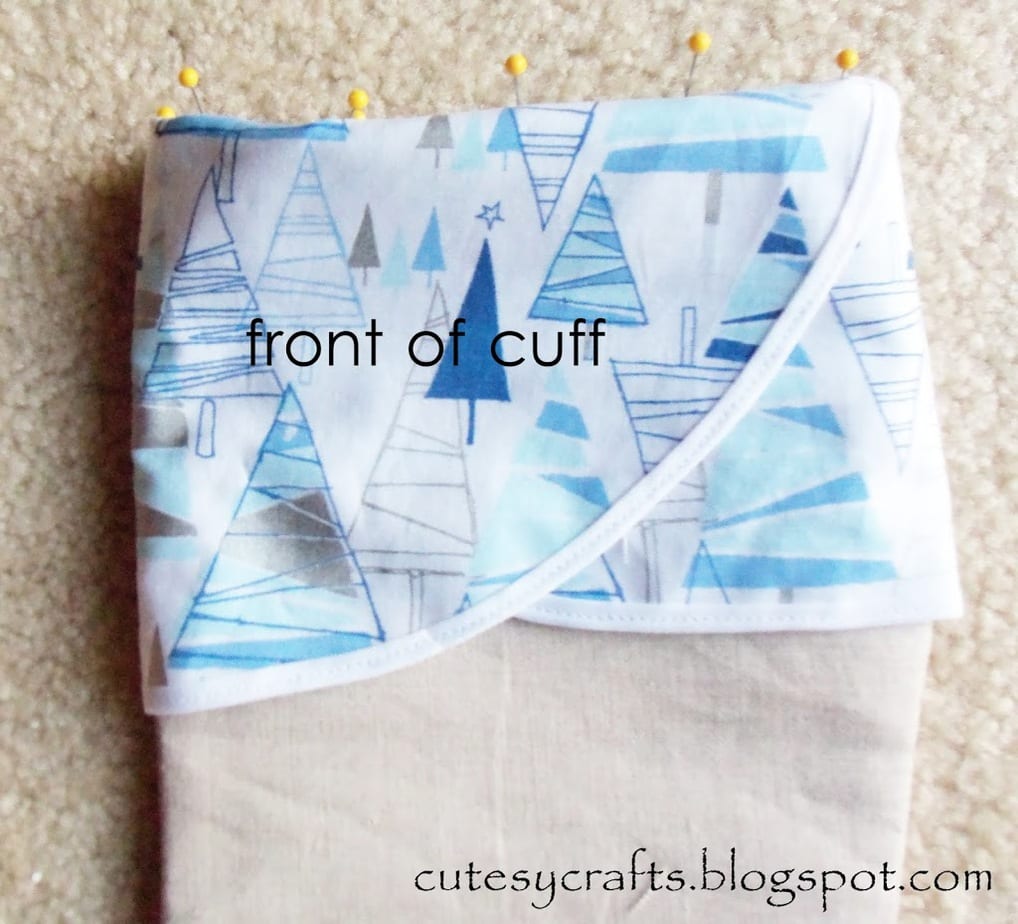
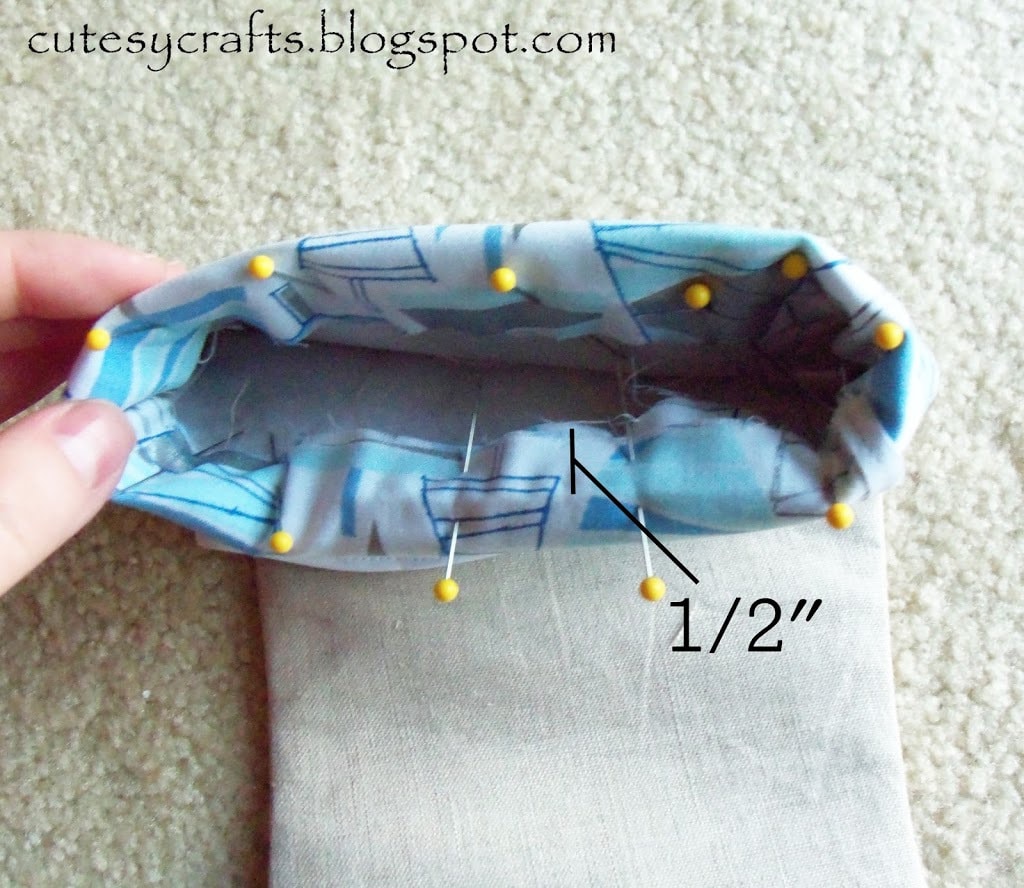
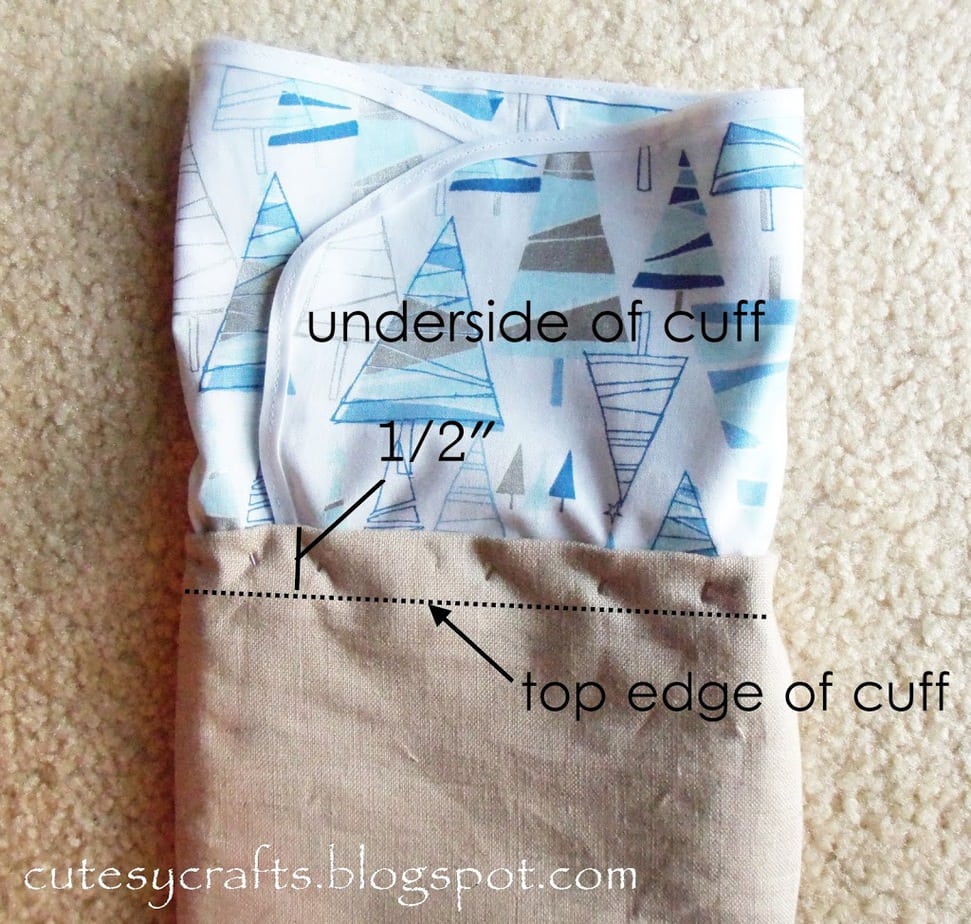
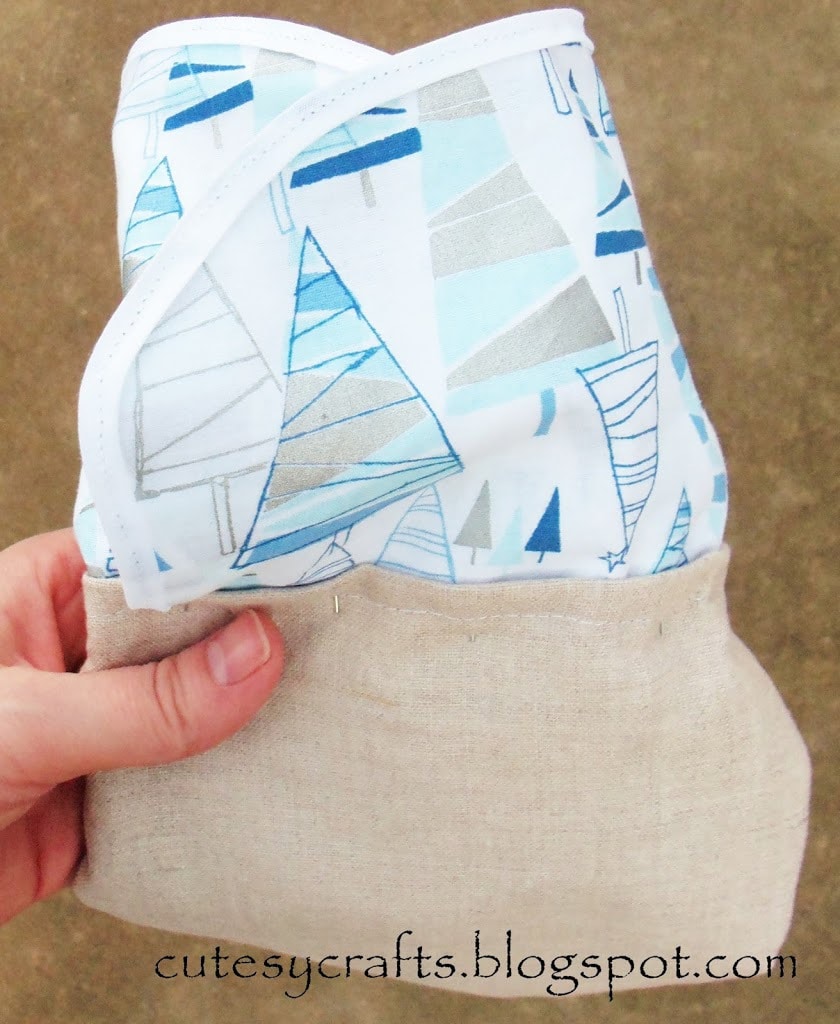
Now this is the part where things get a little tricky. Position and pin your cuff onto the top part of your stocking. The top part of your cuff should line up with the 1/2″ fold of the top of the stocking. Do not pin through the front of the cuff. The pins should be on the inside. See the photos below.
Lift the cuff up to expose the top of the linen stocking like the photo below.
Open up the top of the stocking and carefully position the presser foot over the part where the cuff and the linen stocking overlap.

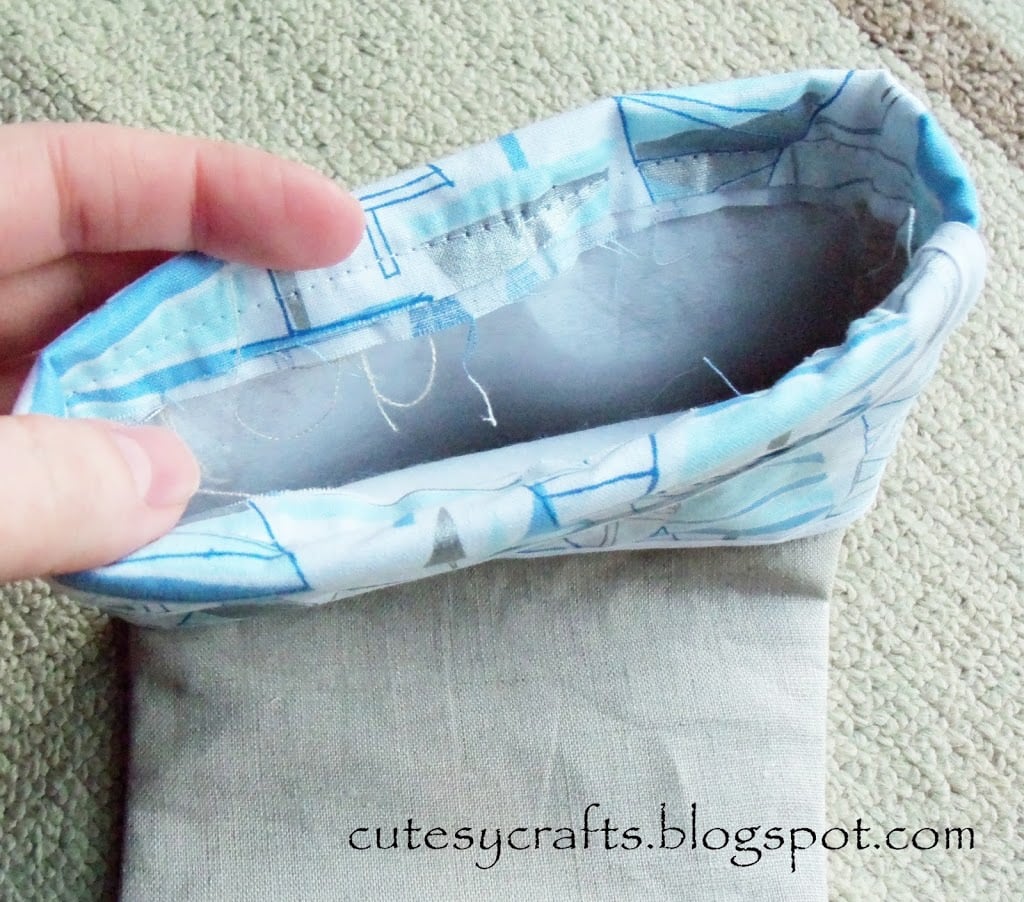
Slowly sew around the inside of the stocking 1/4″ in to attach the cuff to the top of the stocking.
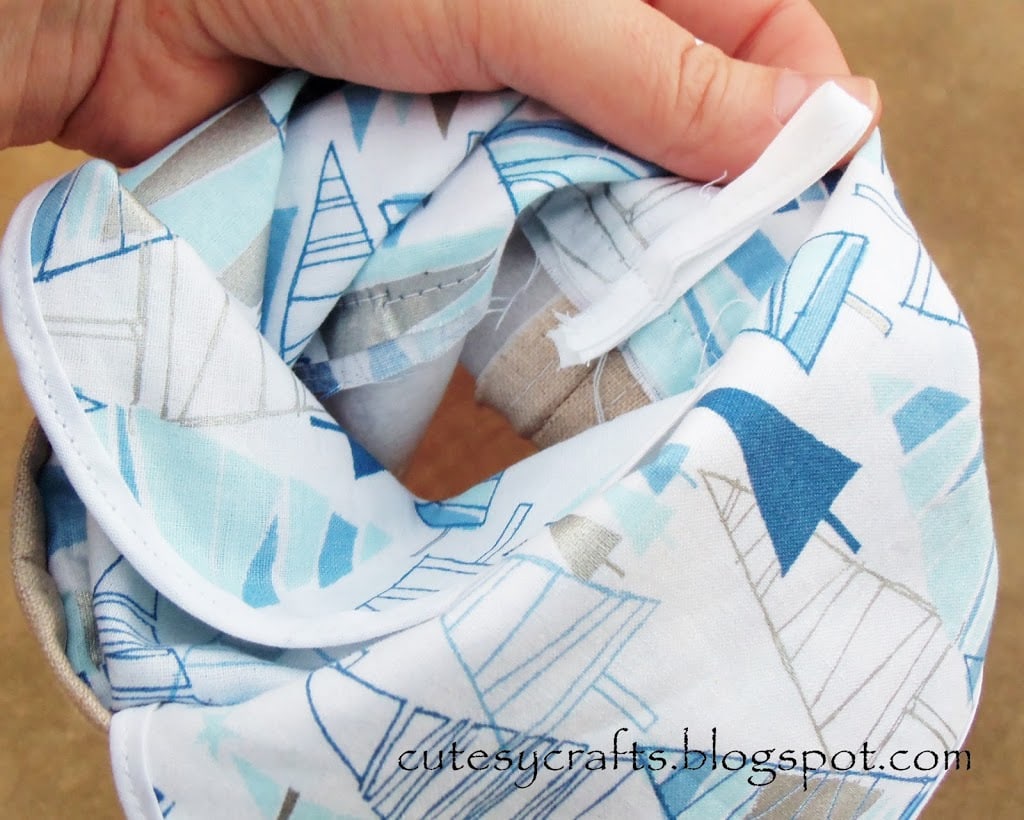
Take a 5″ piece of your bias tape and sew it shut. Fold the bias tape in half to make a loop. Pin and sew it to the right side of the stocking along the same seam that you made when you sewed the cuff on. Make sure your cuff is still up so you do not sew through the front of it.
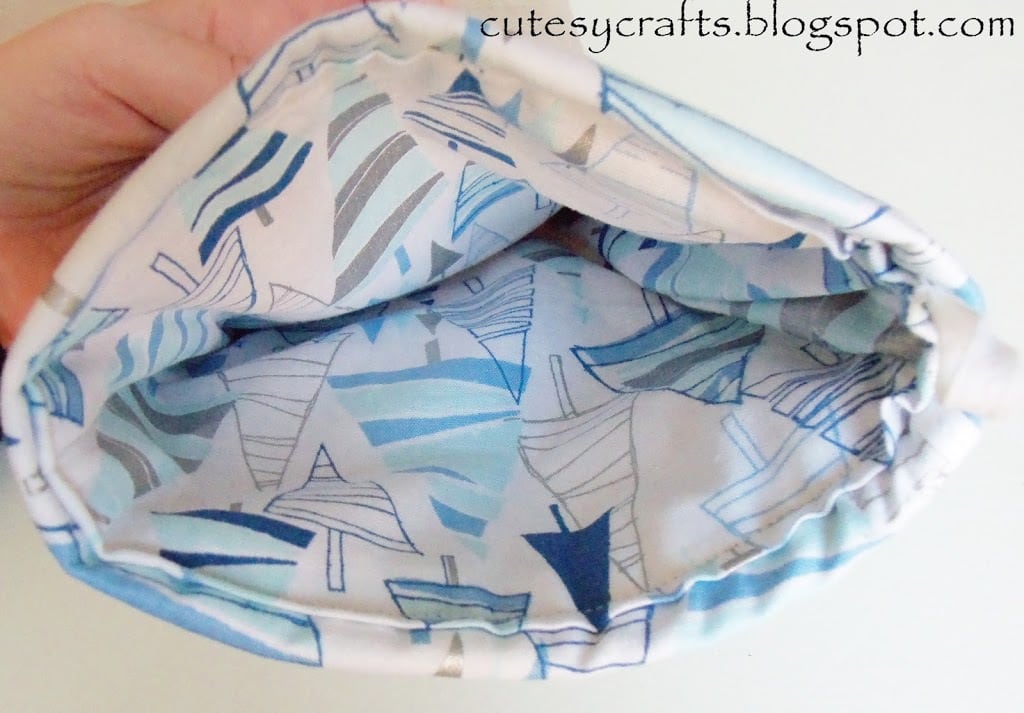
Now get your cotton lining and push it into the inside of the stocking.
Straighten everything up and line up the seams of the lining with the seams of the main linen stocking. With the cuff up, pin the lining to the inside of the stocking.

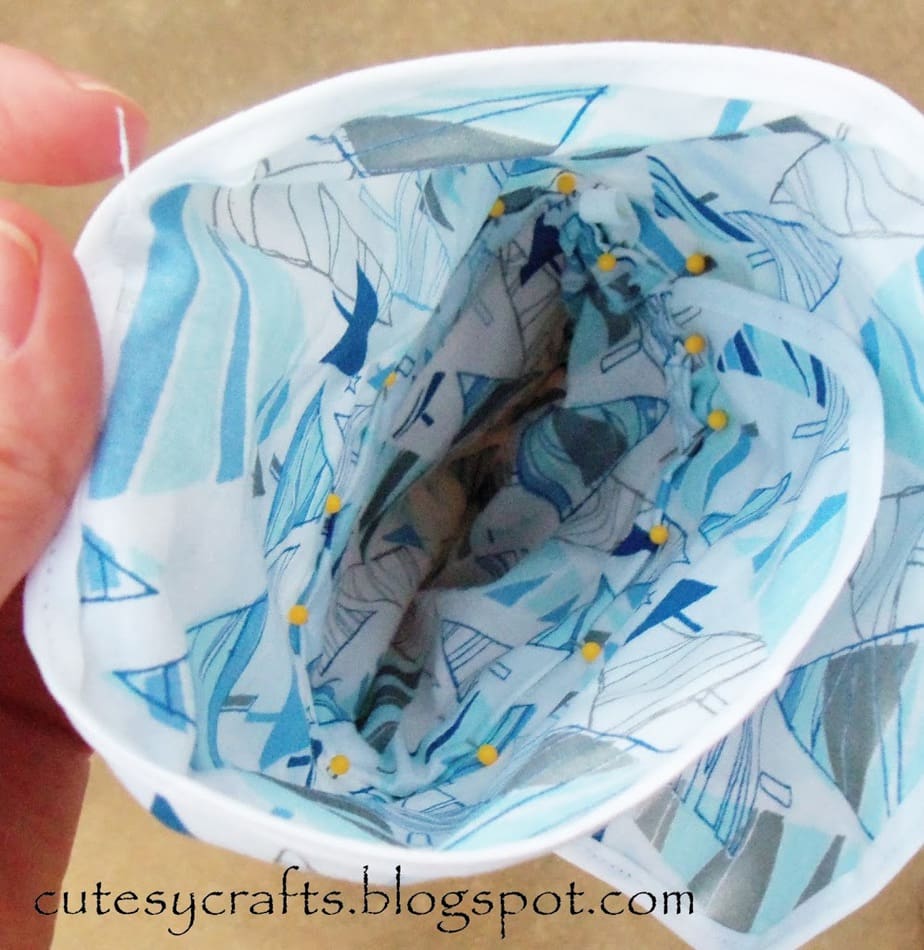
Just like before, open up the top of the stocking and sew close to the top edge of your lining, making sure that you are still sewing through the top of the linen underneath.
If you are still a bit confused, here’s a little diagram of how everything goes together.
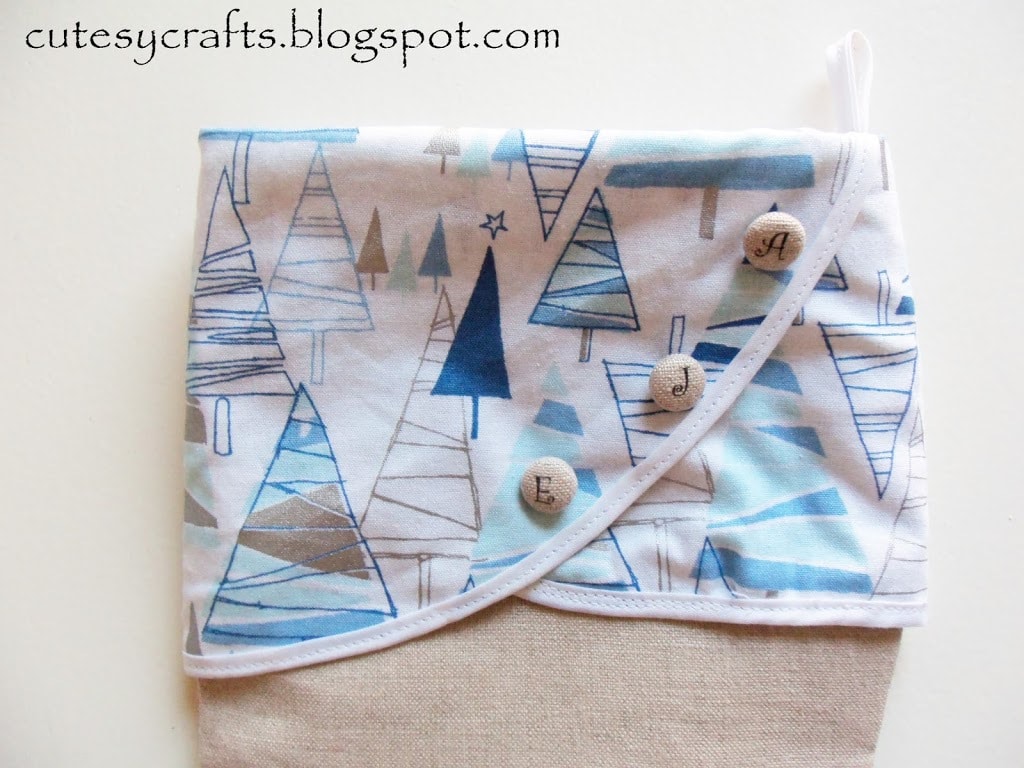
Congratulations! You are done! Now you can leave it like it is or embellish with a few buttons or a monogram.
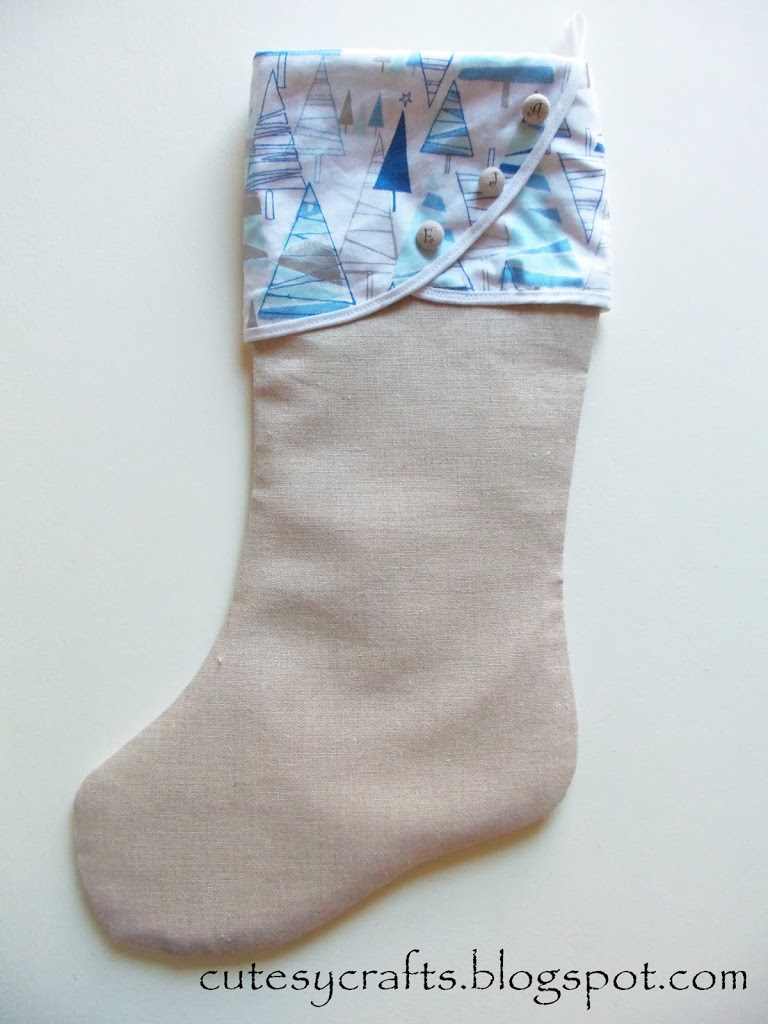
I made some letter buttons to put my kid’s initials on each stocking. I’ll have the tutorial for those up in a few days. I printed the letters with my home printer!!! **Edit: see the letter button tutorial here**
PS Just a couple of tips for ironing. I’ve discovered that linen REALLY likes to hold onto wrinkles. Pull out the lining of your stocking (kind of like when the inside your pockets get pulled out). Put your iron on the hottest setting for cotton and linen. Wet the linen down using the squirt thingy on your iron or with a spray bottle and iron it dry until it’s dry. Leave the stocking flat until it cools completely and you should be good to go.
Oh, and I almost forgot! We have a giveaway winner to announce today.

Congratulations comment #4, Jessica Lozada! I will be contacting you shortly to mail your birthday crown!
Cutesycrafts is a participant in the Amazon Services LLC Associates Program, an affiliate advertising program designed to provide a means for sites to earn advertising fees by advertising and linking to amazon.com.


Oh my…I think I have to redo my stockings. These are adorable! I just made stockings last year, but I love the linen. It’s neutral with a pop of color. Thanks for the tutorial!
Thank you! I really love linen. Much better than scratchy burlap!