
Sail Away Summer Outfit
I’m seeing the light at the end of the tunnel with just a few more projects left on So You Think You’re Crafty. Ten weeks is a really long time! The good thing is that it’s helped me push my creative boundaries and do things that I normally wouldn’t. I made it through to the next round with the “Sail Away” Summer Ruffle Outfit that I made for Audrey.
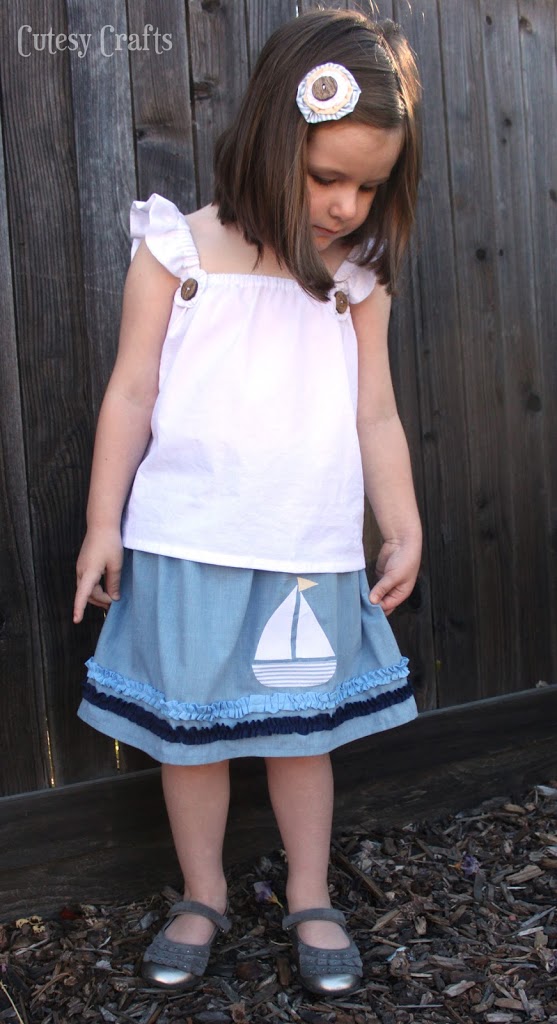
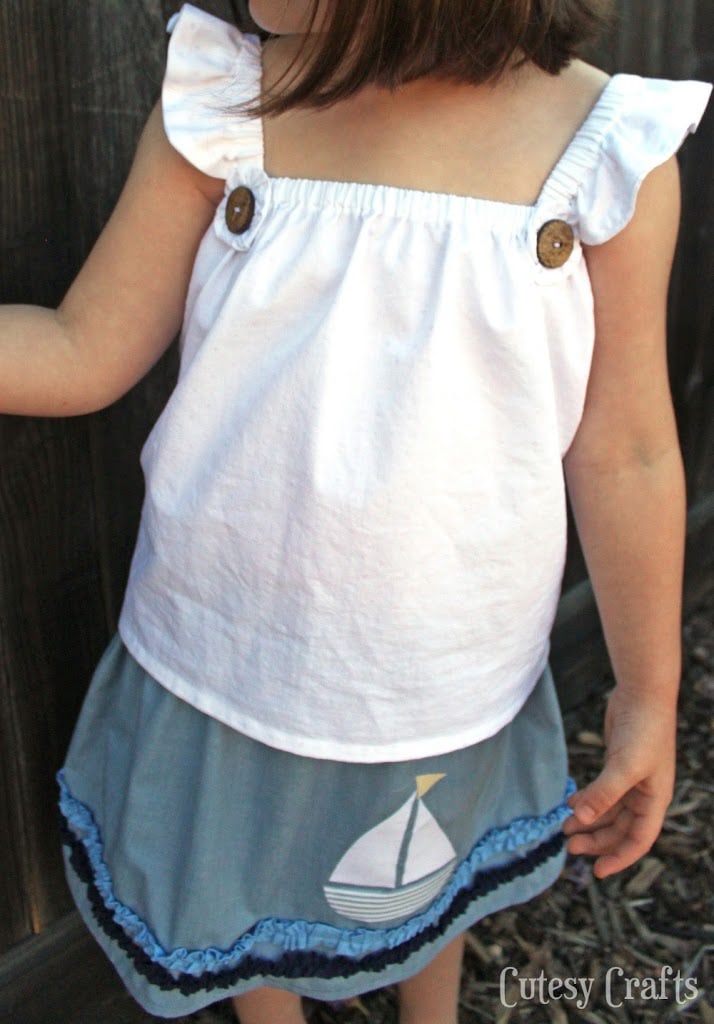
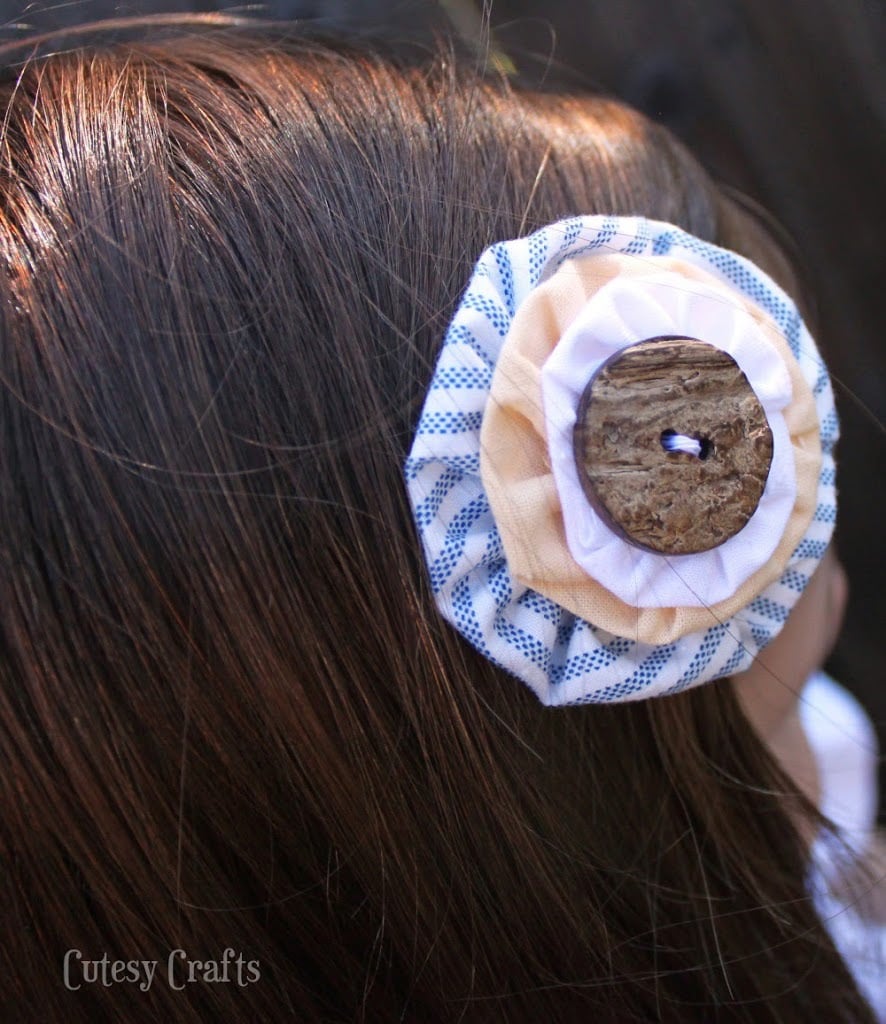
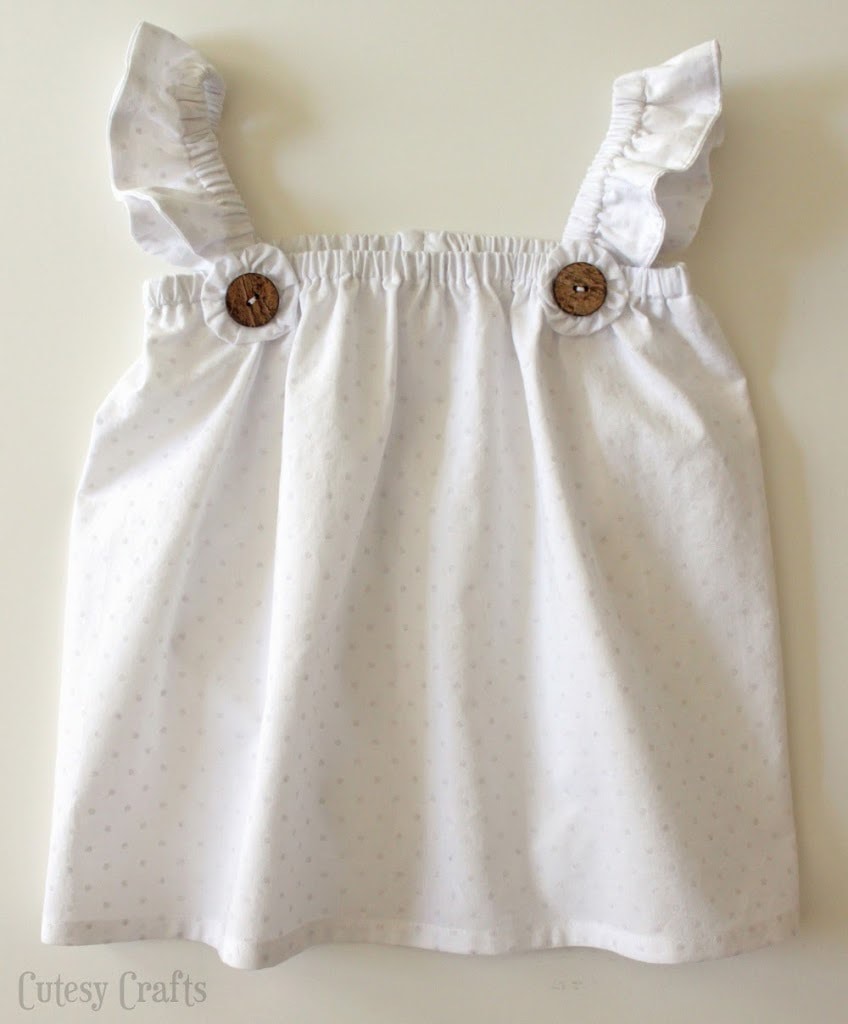
The outfit is complete with a ruffle ocean around the skirt, ruffle sleeves, and ruffle pinwheels behind the buttons and on the hair clip.

I just LOVE the white fabric that I found for the shirt! It has a very faint polka dot texture (seen better on the photo above). Super cute and feminine. Rustic wooden buttons are sewn onto the front as a decoration and sort of look like driftwood to match our theme.

The hair clip ties the whole outfit together using all of the fabrics from the sailboat and the same wooden button as the shirt.
I used a couple different tutorials to construct the outfit. I wanted needed it to be easy because I’m not much of a seamstress. To make the shirt, I just used the tutorial here at Sparkle Power. Audrey’s chest measures 23.5″ and she wears a size 6. I thought that I should add some inches to compensate, so I made hers with a 37 x 18 rectangle. And… then I ended up cutting fabric off because it was way too big, and it needed to be shorter to look ok with the skirt. So, my measurements are no help, but here’s a photo of what I did.
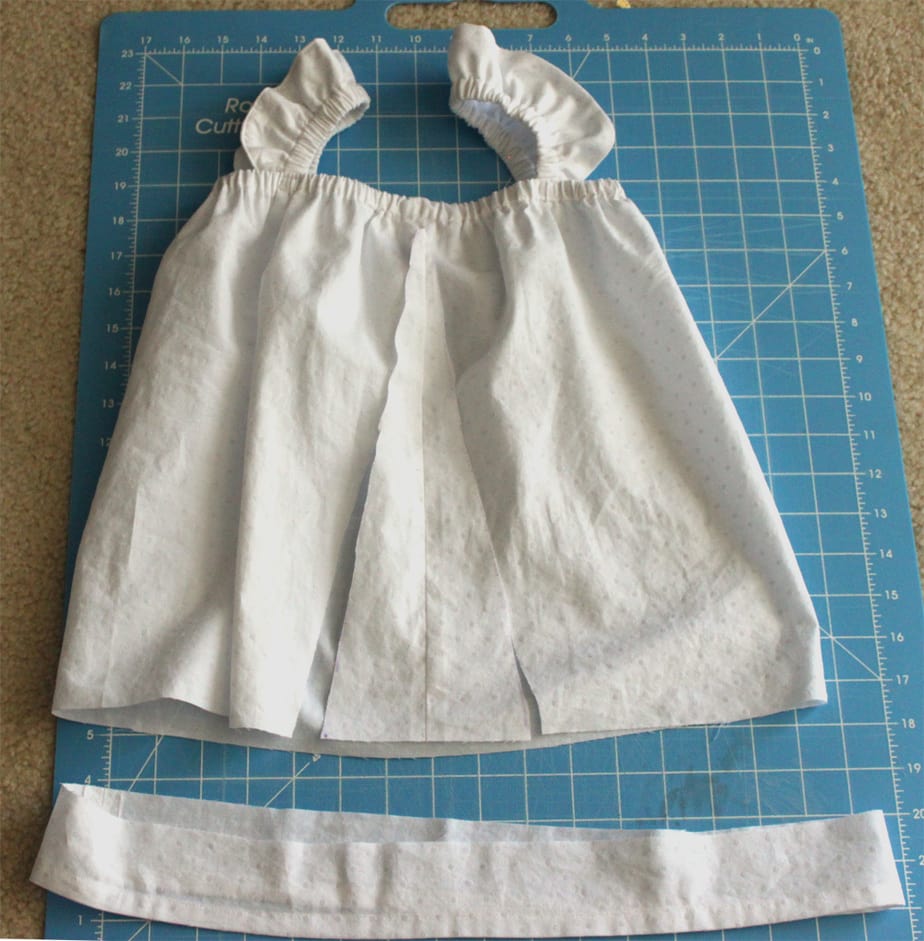
I ended up cutting two inches off the already hemmed bottom. Then I measured two inches from seam on both sides and cut at an angle towards the top. I didn’t want to have to take the whole thing apart at the top, so this worked.
I made the skirt using this free pattern/tutorial from oliver + s. Instead of adding a ribbon, I hemmed the bottom before adding the elastic at the top. Super easy. To make the ruffles, I cut 2″ wide strips of fabric that were 2.5 times longer than the circumference of the skirt. When you make the skirt you cut from selvedge edge selvedge edge, so you just cut 2.5 strips from selvedge to selvedge.
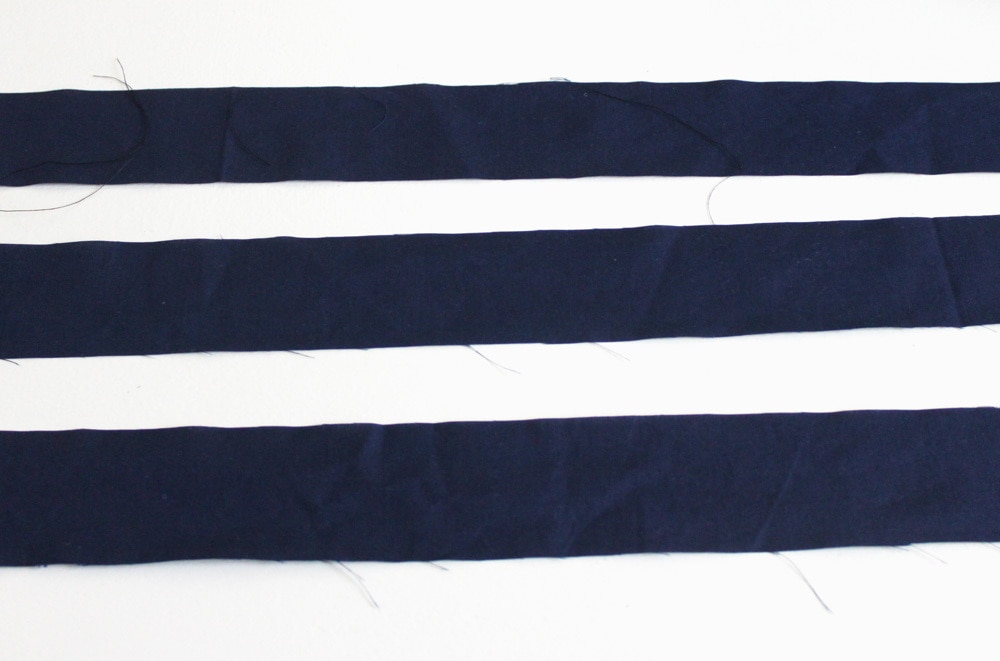
Sew the three strips together to make one long strip. Iron open your seams.

Fold and iron the strip in half right sides together (you want the seams that you made before on the outside). Sew a 1/4″ seam all the way down the strip to make a tube. Insert a safety pin into one end and push it through the opening to turn the whole thing right side out.

Now you should have a long tube.
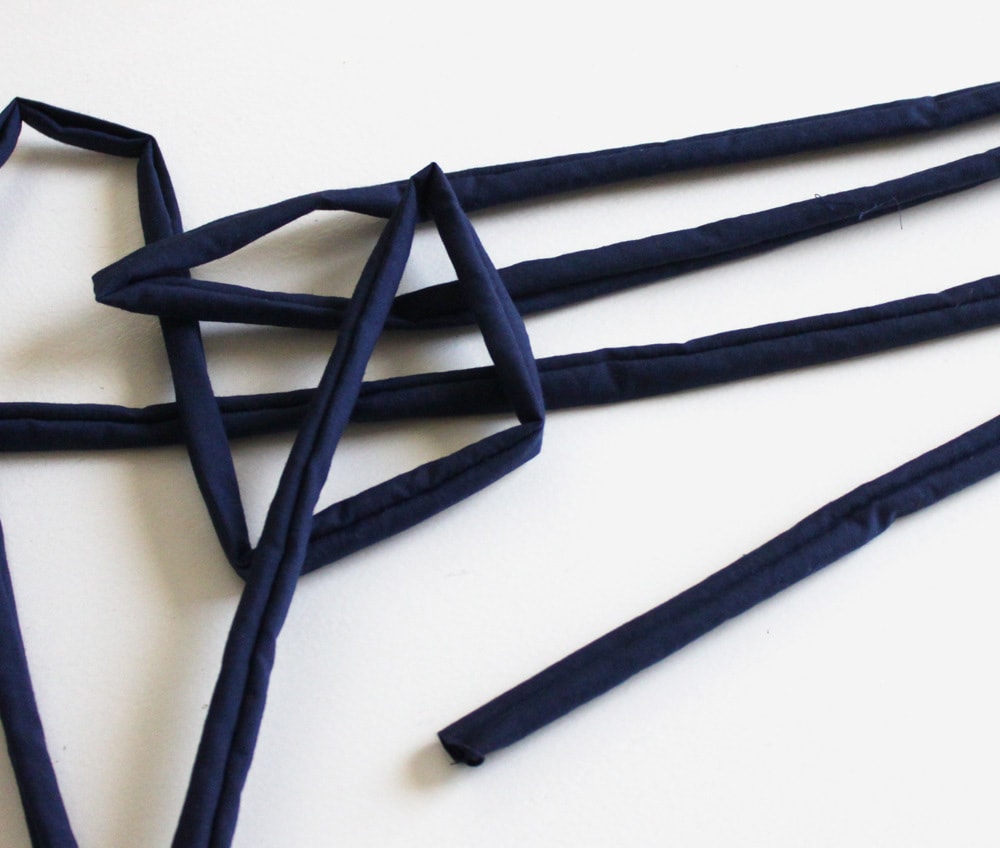
Iron the tube flat with the seam in the middle. Baste (long stitch) down the middle of the seam, stopping at each seam that you made to attach the three strips together. If you don’t stop and start at these points, you won’t be able to to do the next step.
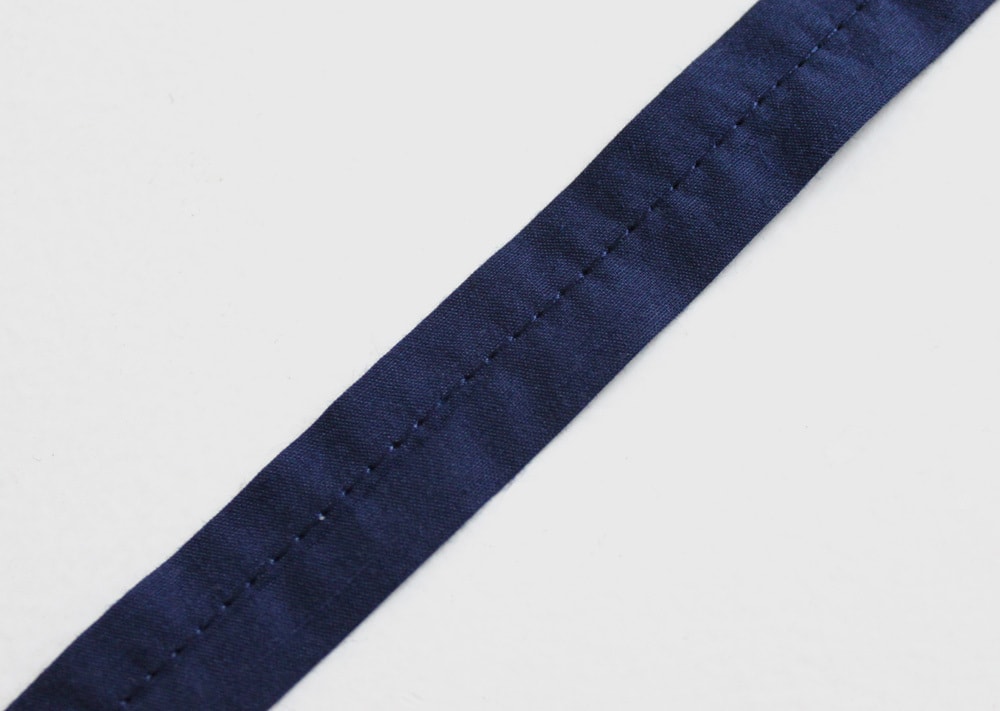
Take your bobbin threads and gently pull them to ruffle the entire strip. I broke my thread a couple times, which is probably why you are supposed to do two threads when you make a ruffle, but I was being lazy. It’s pretty easy to just go back over the spot that broke and sew another line.
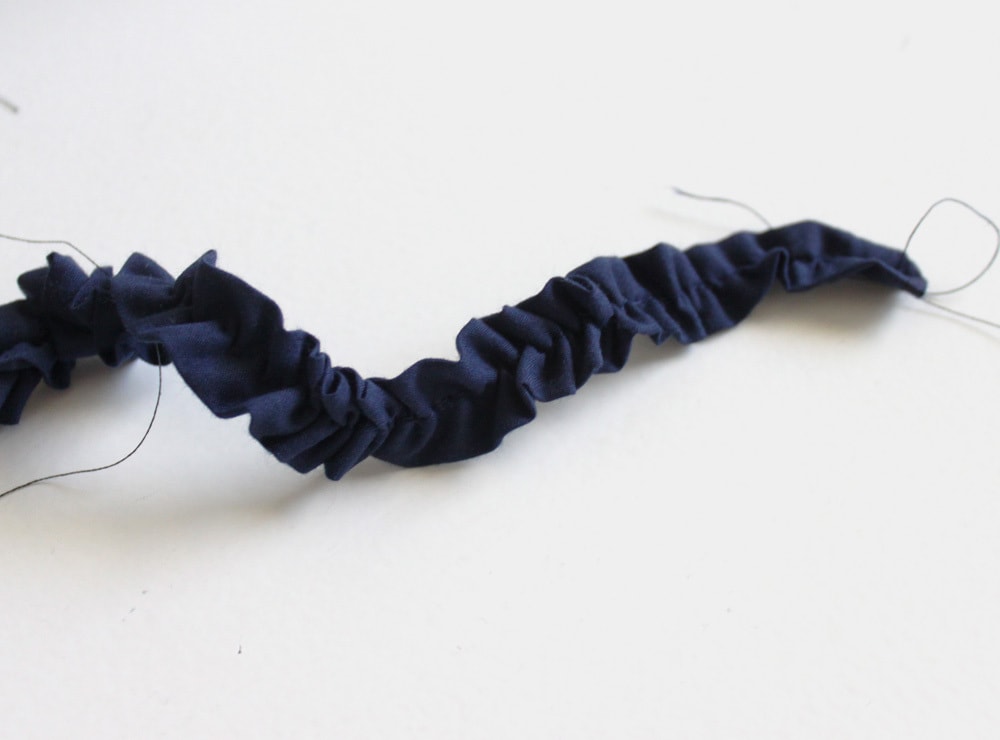
I added the ruffle before adding the elastic to the top of the skirt. That makes it easier to keep things flat. Start at the back seam of the skirt, turn the end of your ruffle in, and pin with lots and lots of pins. Take it over to your machine, and sew the ruffle down in the middle.

I drew the sailboat applique. You can download that for free here. I’m not going to do the applique or hair bow tutorial right now, but look for those soon. I’ll add the links to the post as soon as they are up. **edit: check out the hair clip tutorial**


That’s it for today. Next week’s theme is Summer! I hate Summer. My pale skin and AC bill do not care for the 100 degree weather. Of course for some reason that is the theme that I suggested to Missy when she was asking for ideas for the season. Haha. Should be fun!


I love this tutorial and made an outfit for my daughter! It’s ADORABLE on her! Thank you!
Oh yay! Thanks for coming back to tell me. So glad you were able to use it!
The skirt is really cute, you are invited to share this with Show Your Stuff:
http://www.treasuresmadefromyarn.com/2013/07/show-your-stuff.html
Oh my heck! This skirt is so cute! I would love it if you would come and link this up at my link party
Dandelion Wishes Wednesday
Adorable outfit! I love it! That sailboat on the skirt is too cute! Nice top too!
Navy Wifey Peters @ Submarine Sunday Link Party
LOVE this!! The ruffle waves are awesome! Im thinking of making a dress with the inspiration of that shirt for my niece. She would look so darling!
This is so adorable! Love the boat aplication and the waves so pretty! Thanks for sharing.
Have a fabulous Summer!
Hugs from Portugal,
Ana Love Craft
http://www.lovecraft2012.blogspot.com
SOOO cute! I love the skirt… the ruffles are adorable… i love the way you did them… will have to keep that in mind. Emily @ nap-timecreations.com
Thanks, Emily! Yeah, I wanted a way to not have to hem the sides. It worked great!
I love the top!! So cute!! I don’t care for the heat of summer either. Me and my kids sunburn is showing that today but we did enjoy the pool.
Thanks, Sheena! It was really easy to make…like a skirt with sleeves. 🙂 Ugh! The sun!