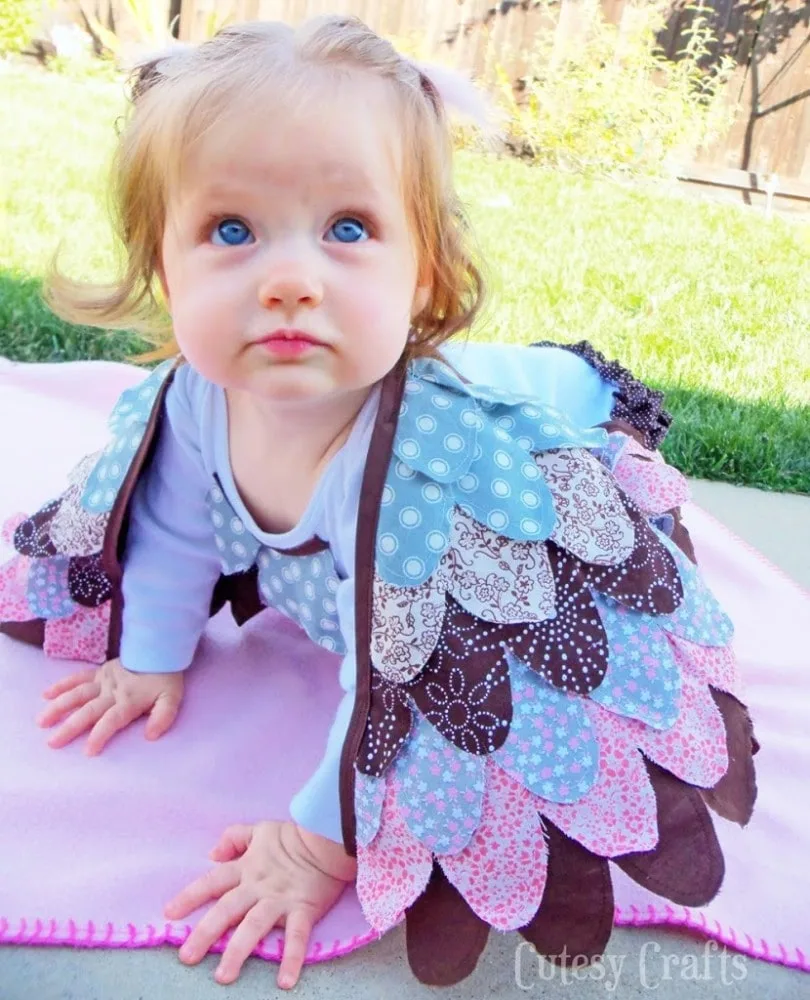
After much deliberation, I finally decided that Leah was going to be an owl for Halloween this year. I threw around lots of different ideas until I finally came up with this baby owl costume. Follow this tutorial to make your own!
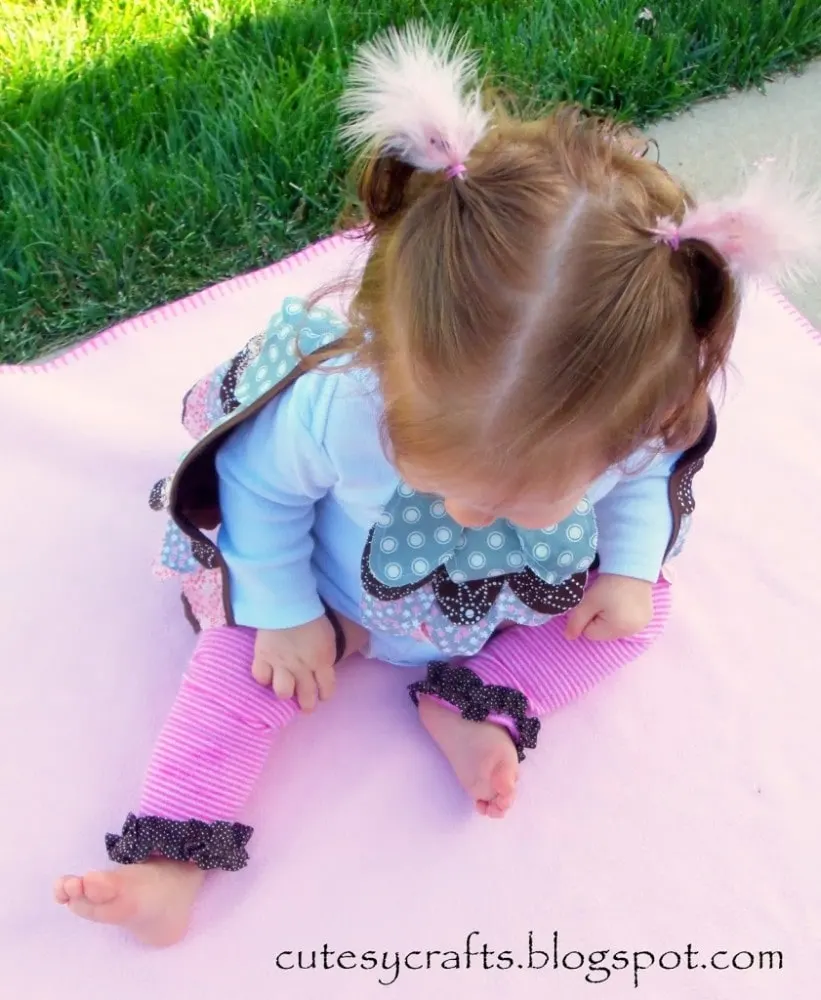
Doesn’t she look adorable?!
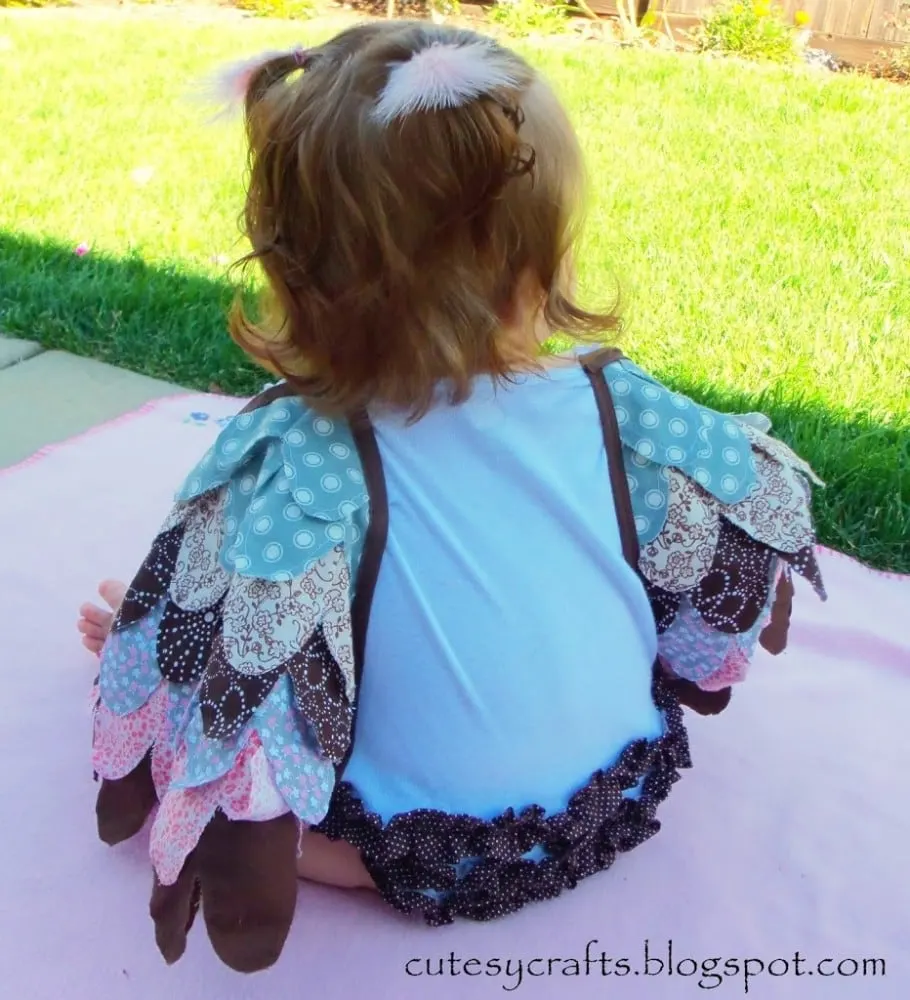
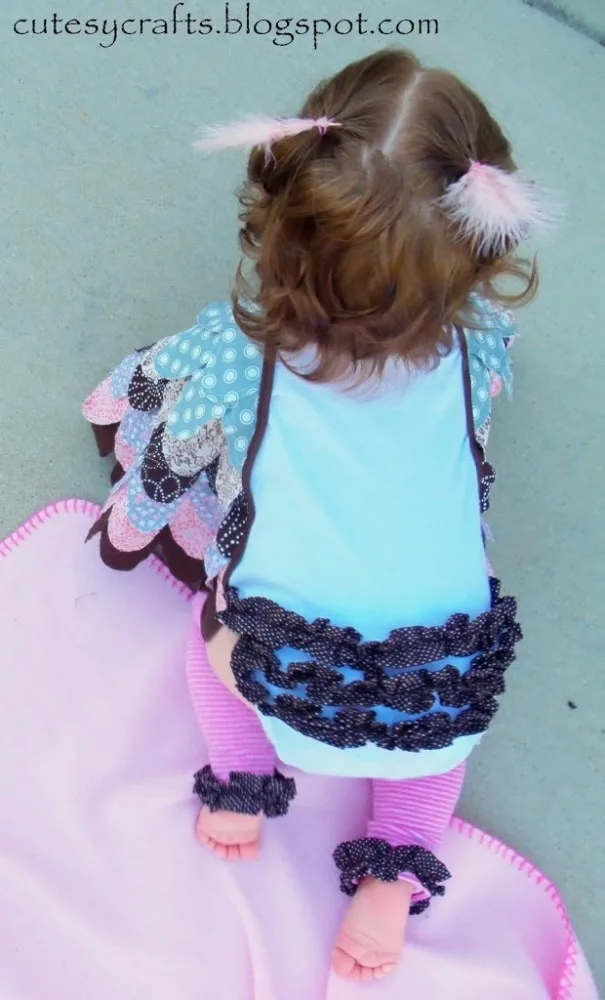
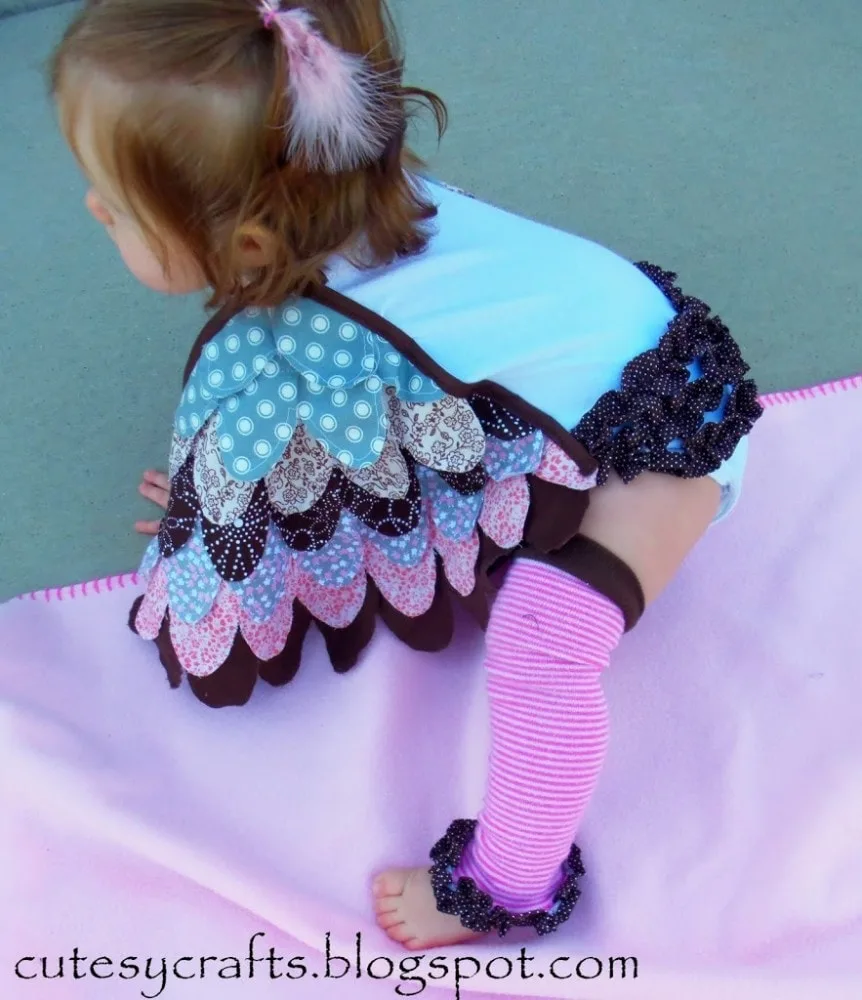
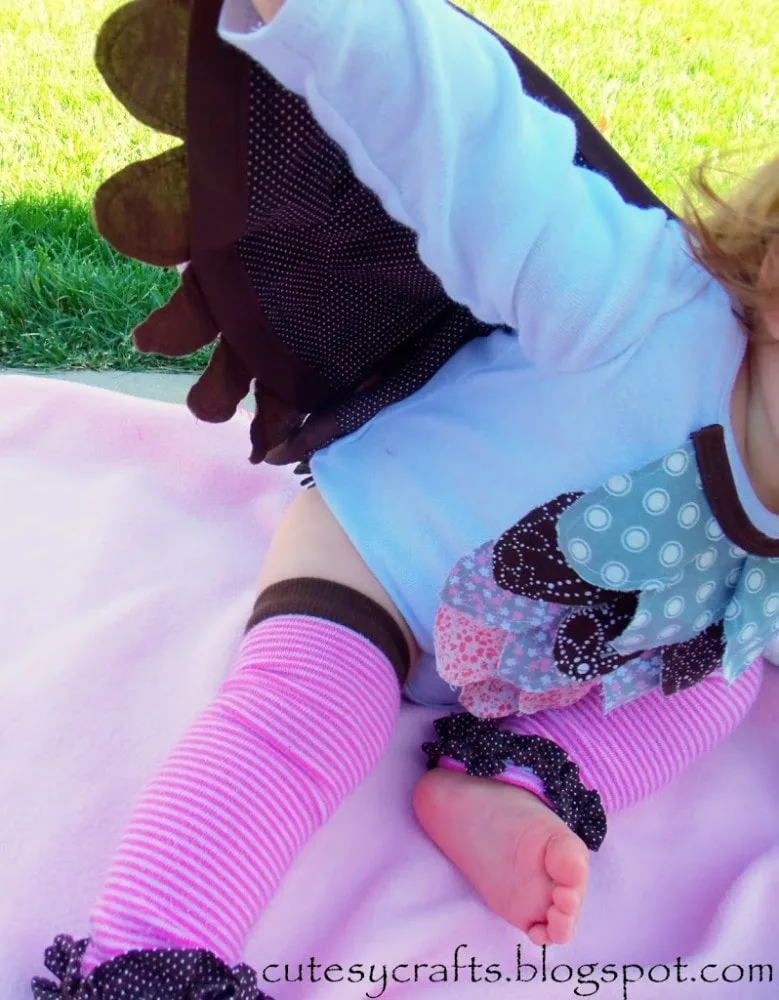
She’s got fabric scalloped wings, scallops on her chest, a ruffle butt, and legwarmers to match!
I wanted a costume that she could move and crawl around in. The wings are sewn onto the onesie, and they didn’t bother her one bit! That’s saying a lot for a crawling, put everything in her mouth eight month old!
I wasn’t sure if she would tolerate a hat, so we experimented with some pink feathers in her hair. Eventually, I did decide to whip up a little fleece owl hat for her to wear. Check back soon to see that. **EDIT: Go here to see the hat.**
The idea for the fabric scalloped wings came from this post here on Llevo el Invierno. Go look at it! I just love the way her wings look! My challenge was making them so that my baby could wear them without having to tie anything around her neck. It worked out great, so I’m gonna show you how. I know it’s late for Halloween this year, but pin it and save it for later!
To make this owl costume you are going to need:
- A long sleeve onesie
- double fold bias tape
- a large piece of cotton fabric for the main wing and ruffles (size will depend on size of onesie you are using)
- 1/8 yard of cotton fabric for each print that you want for the scallops/feathers. (For the scallops that go along the bottom edge of the wing, get a fabric that is the same color on both sides. I’ll explain later.)
- You will also want to print out the scallop pattern here.
Now for the tutorial!
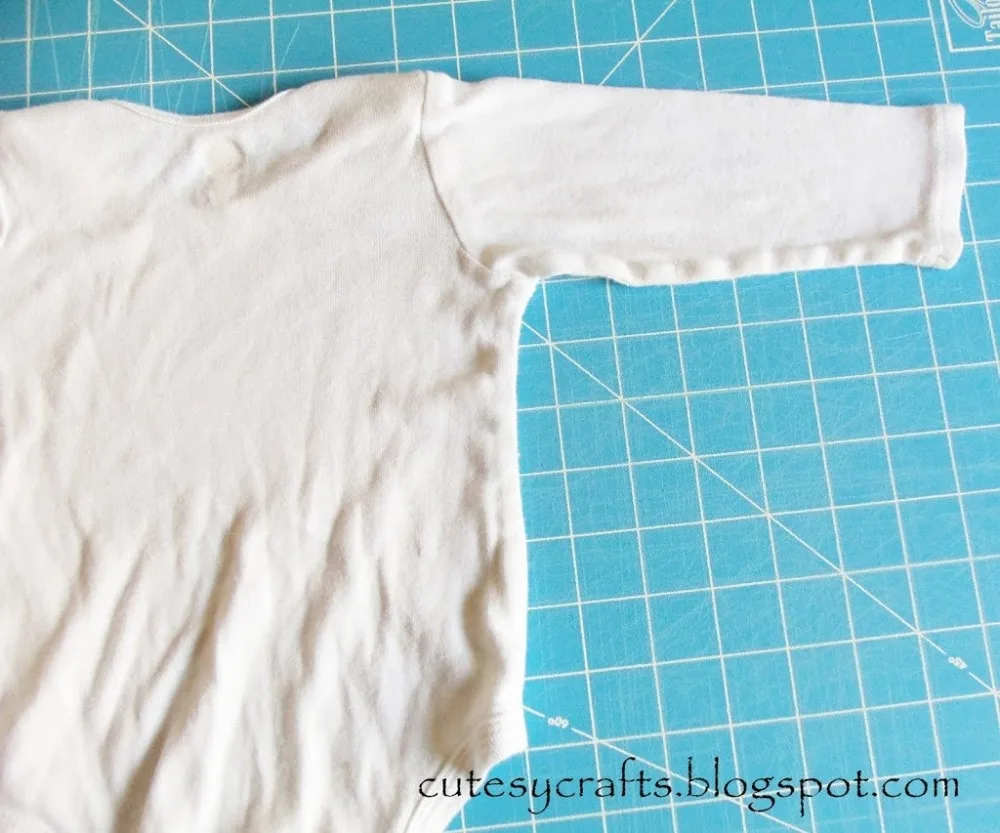
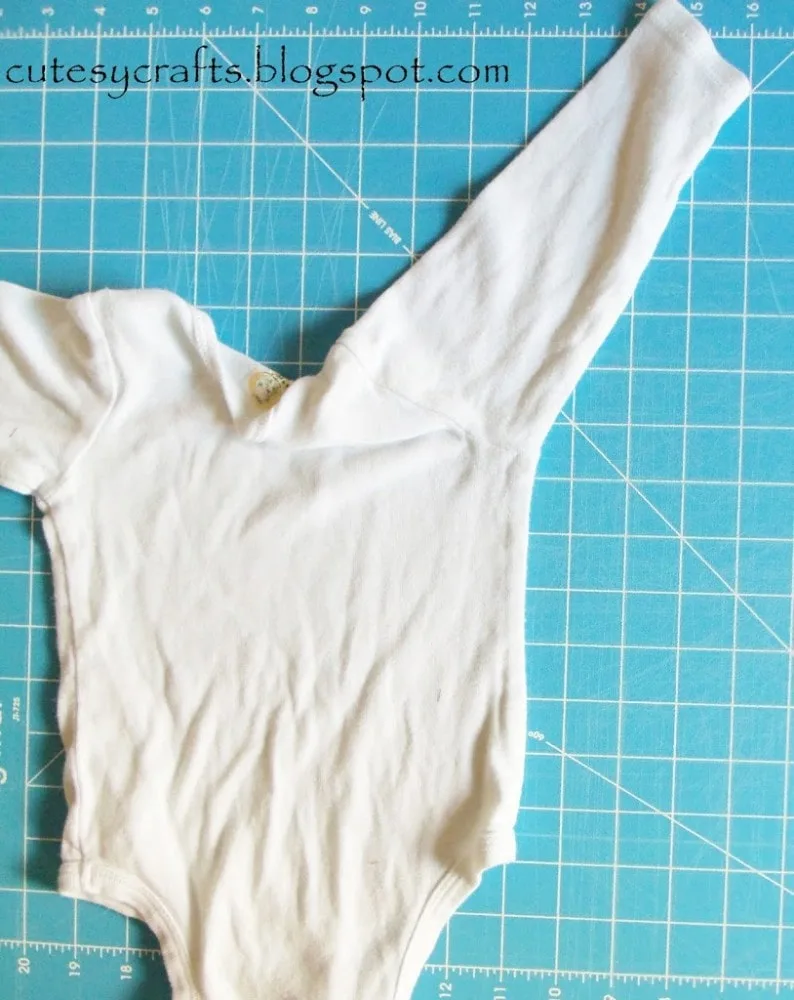
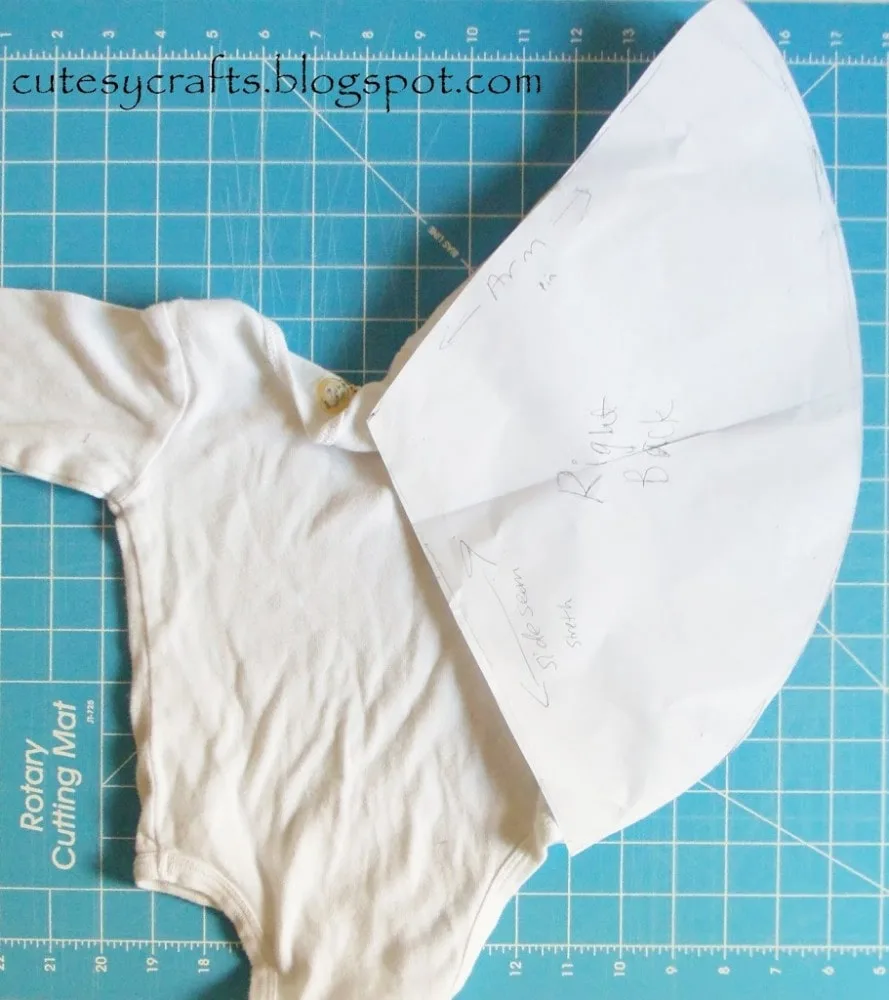
First thing you need to do is make a template for the wing itself. I taped two pieces of computer paper together to make it big enough. Take your onesie and lay it flat with one arm out straight.
This is going to be the horizontal length of your template.
Now take the onesie and put the arm up at an angle. This will make it so that your baby can move their arms and crawl around.
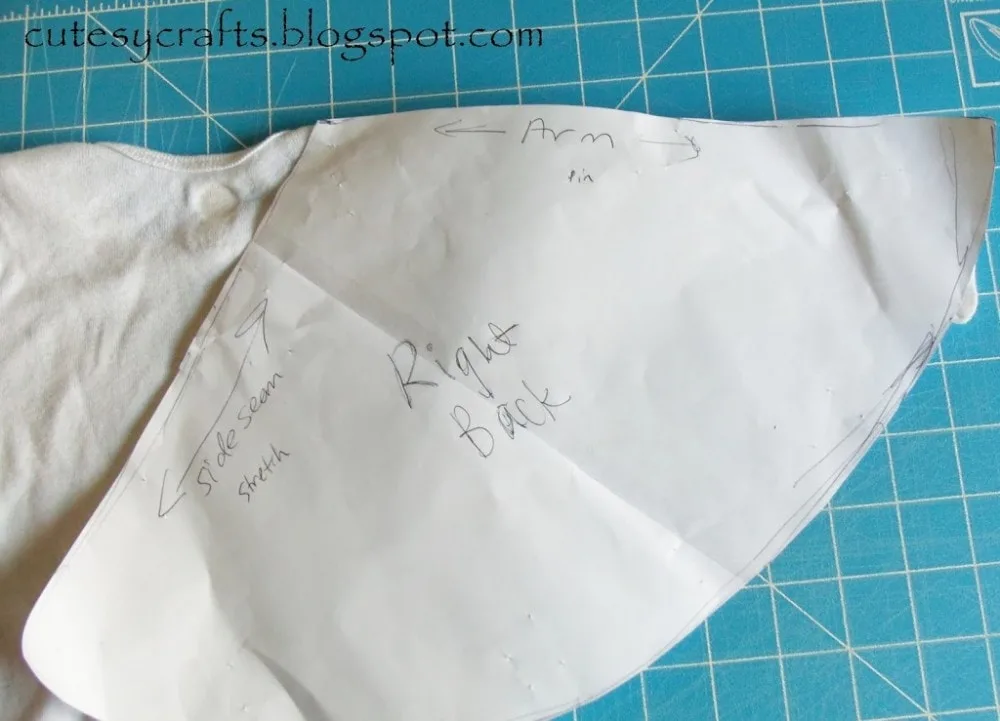
The vertical length of your template will be from the shoulder point diagonal down to the point just above the onesie leg hole. Draw a curved line to connect the two ends and you are done. Hopefully the photos help!
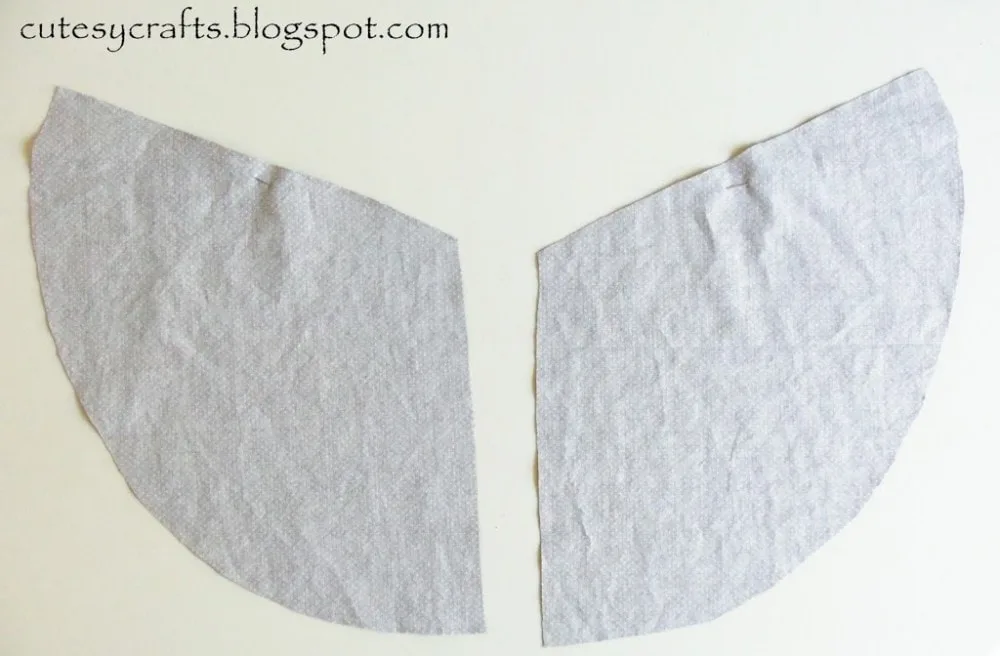
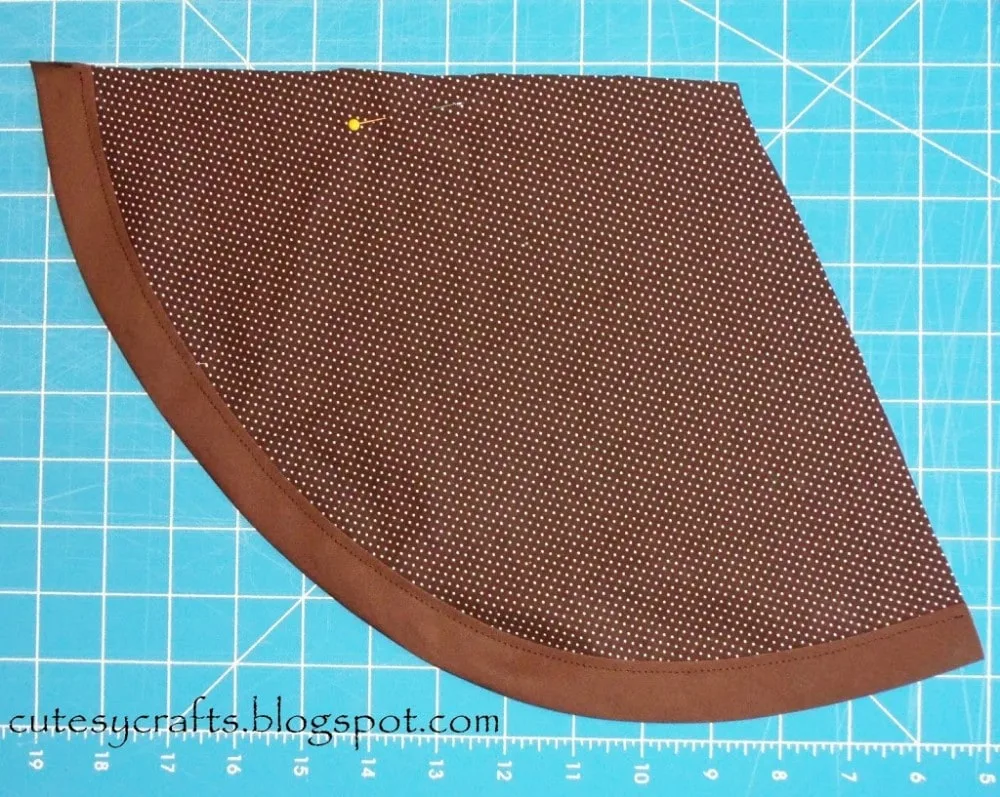
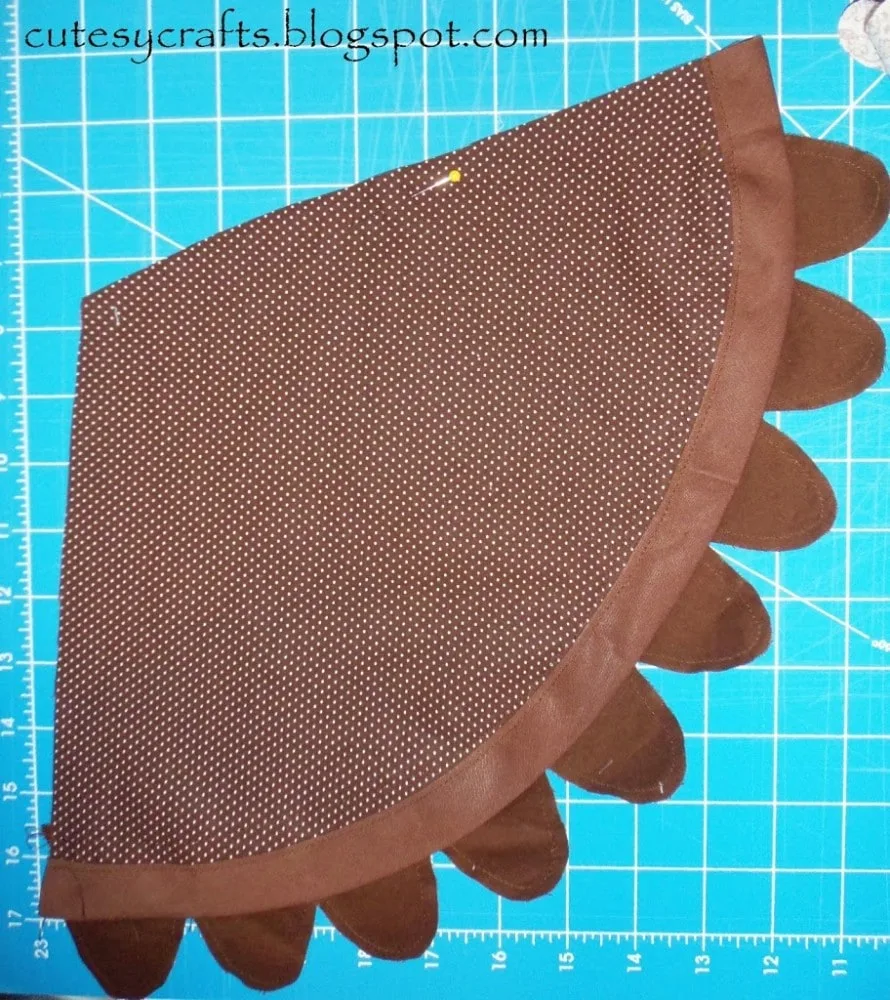
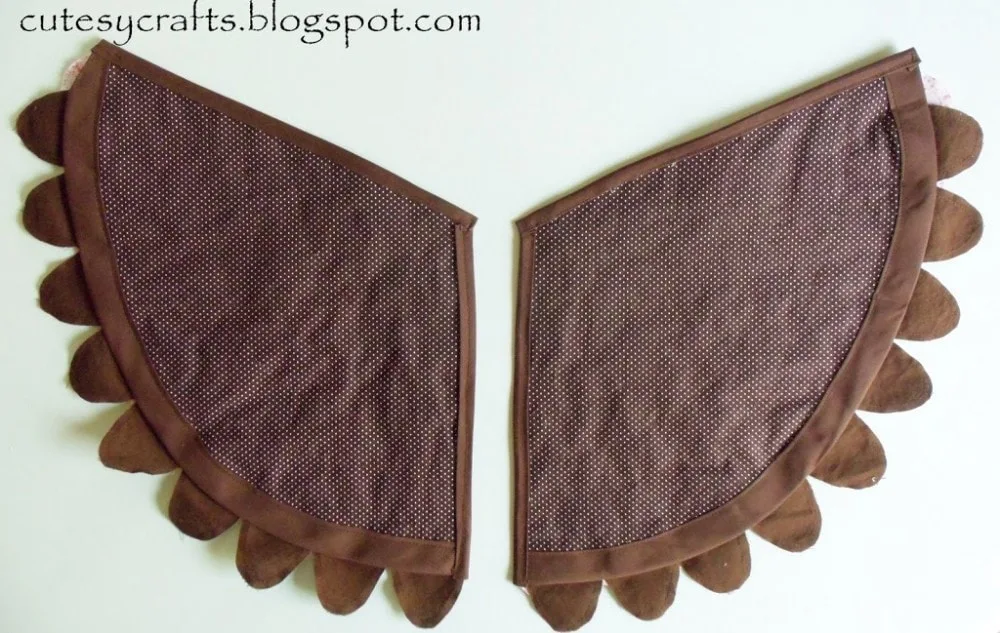
Use your template to cut out two wing pieces. I cut my fabric with the stretch going along the vertical length of the template because I thought it would be good to have some stretch down the back of the onesie. Be sure to flip it over to cut the second so that they are opposite. I marked the top of my fabric wings with a pin just so I could stay oriented.
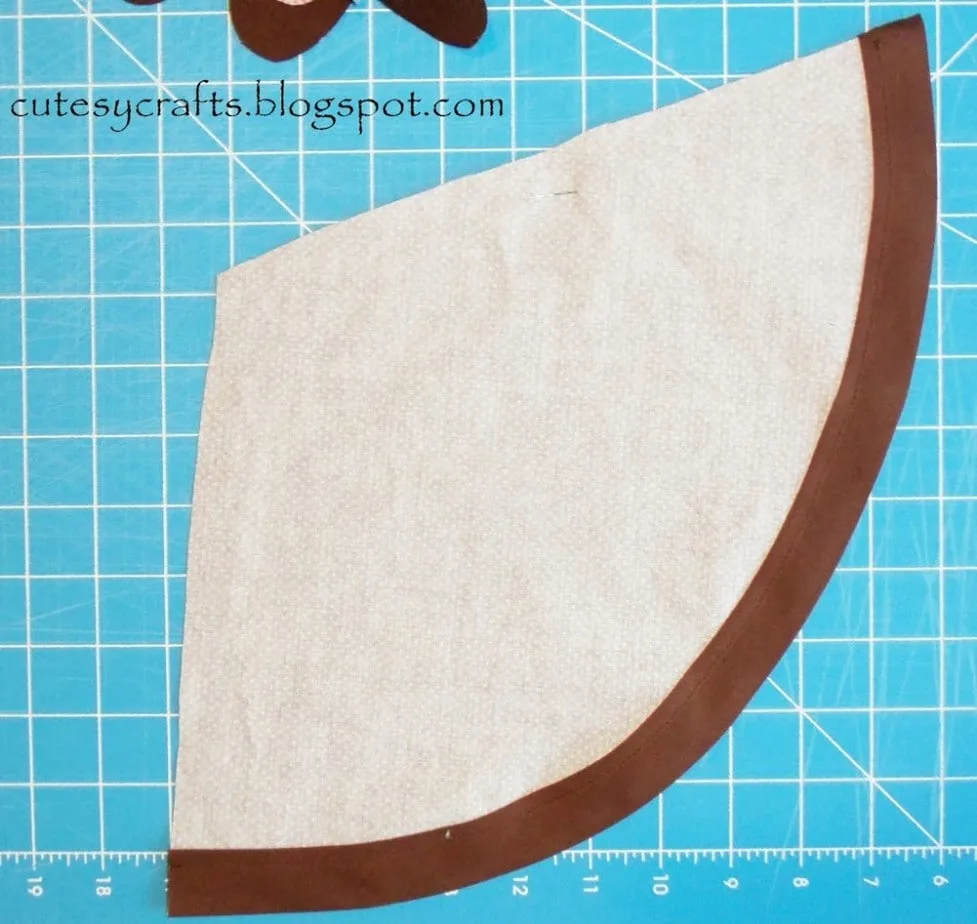
For this step, I bought too wide of bias tape. I think this was a one inch double fold. Get the thinner one. I think it’s 1/4 inch double fold. Get your bias tape and pin and sew it along the curved edges of the wings to finish the edge. We only want one layer of fabric for each wing to keep them as light as possible.
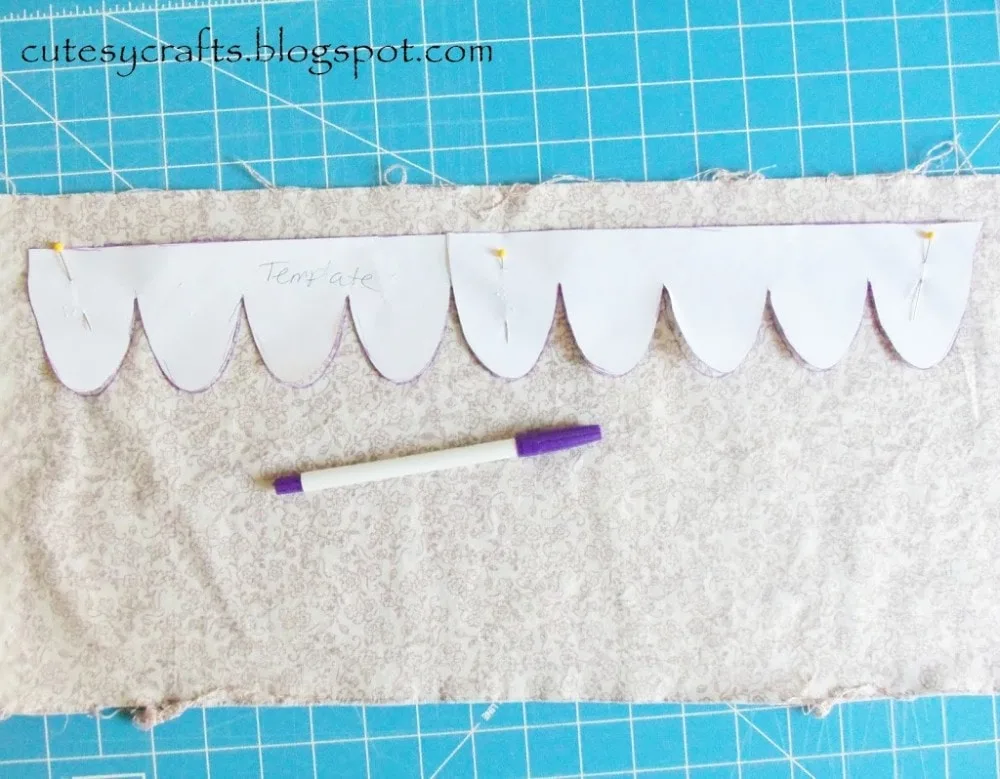
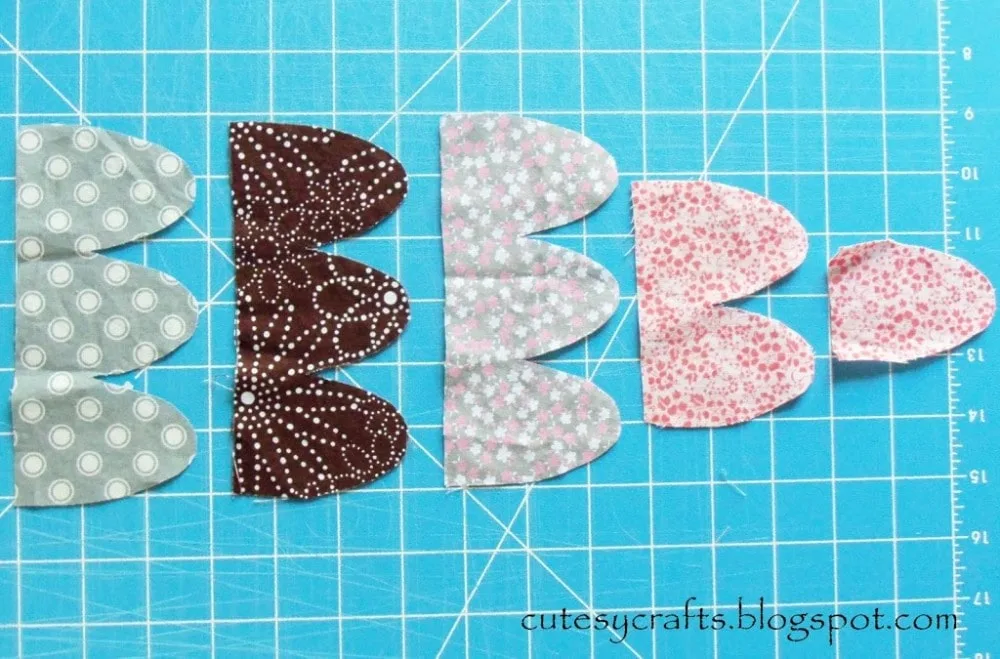
Now, use your scallop templates to trace and cut out your feathers. Overlap the templates to make them as long as needed.
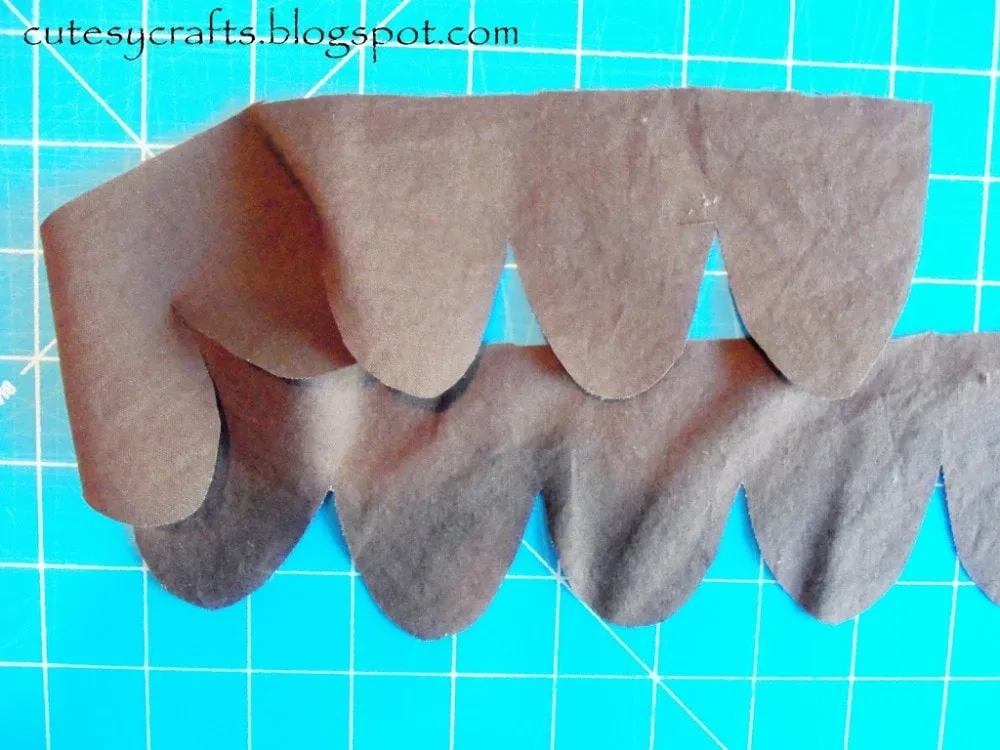
Earlier I said that you will need one fabric that is the same color on both sides. This is because the bottom scallop will show on both sides of the wing. You don’t want an ugly wrong side of a fabric showing on the front.
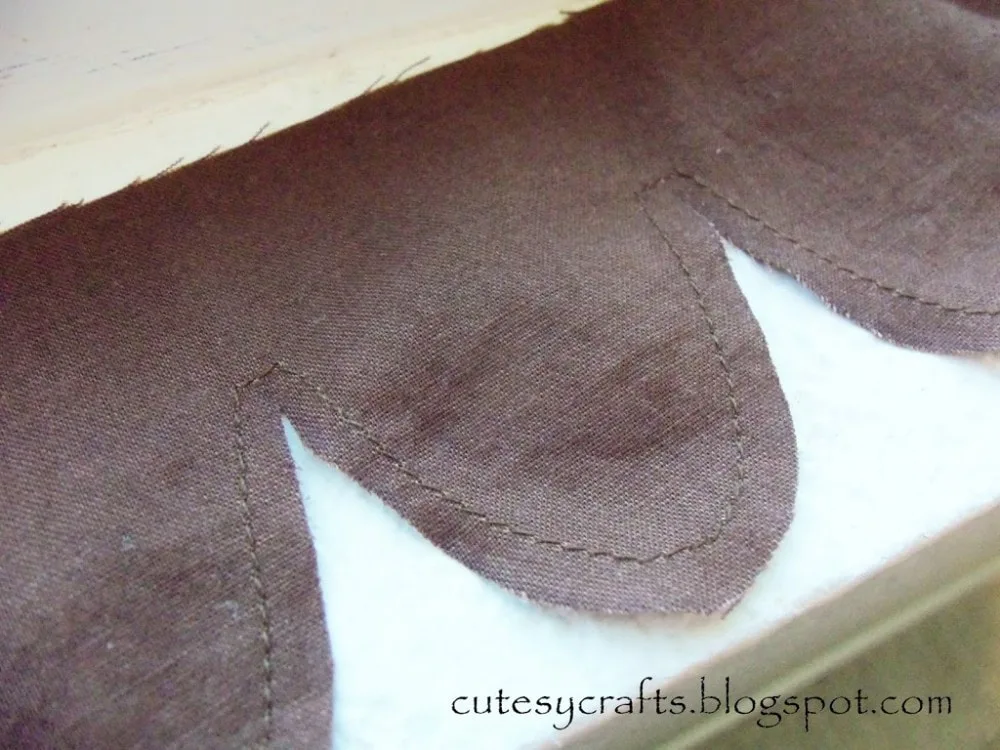
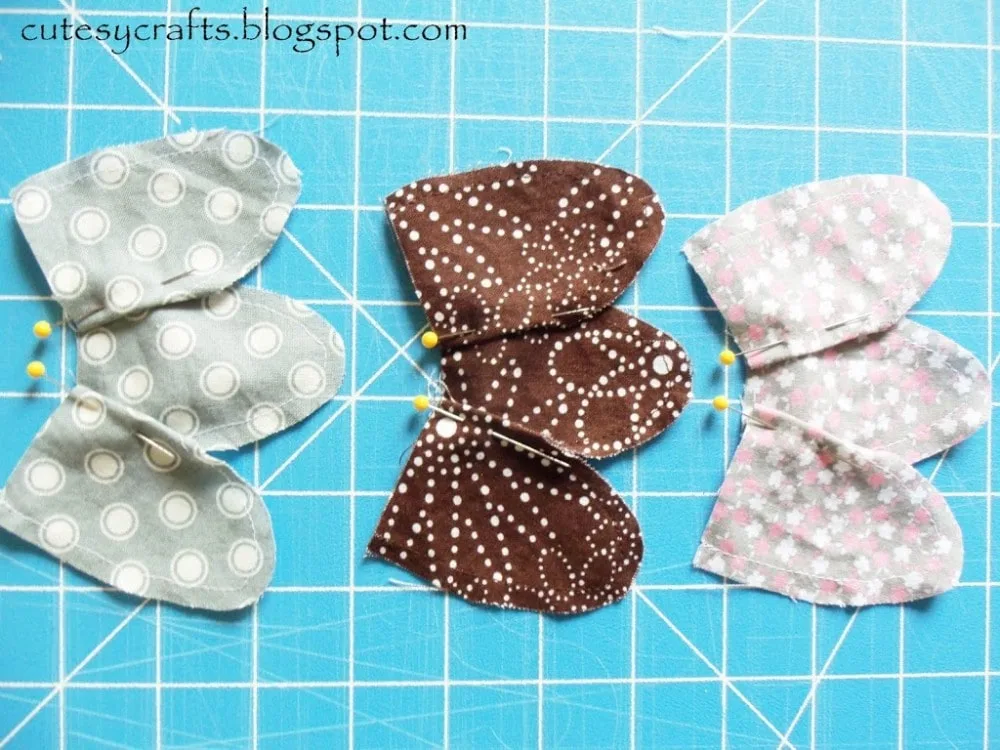
This part is optional, but recommended. I wanted the scallops to be able to fray a bit but not go crazy, so I stitched a straight stitch 1/4 inch away from the edge of all of the scallops. Don’t worry about stitching the straight edge along the top.
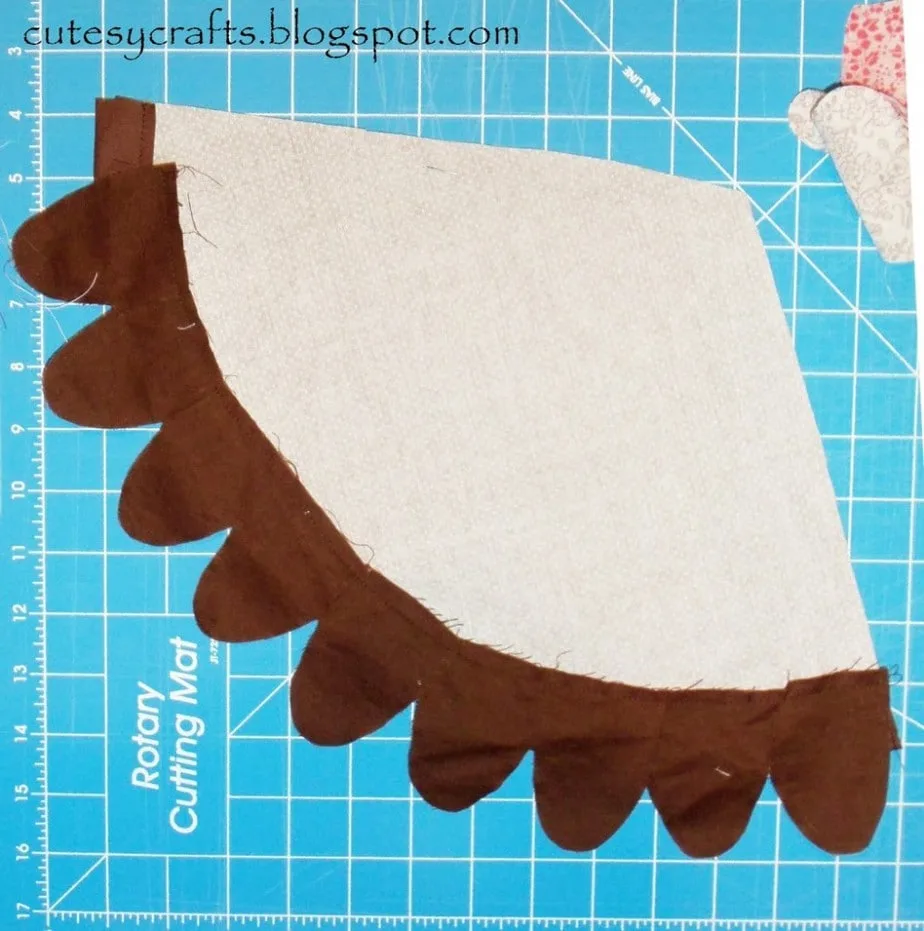
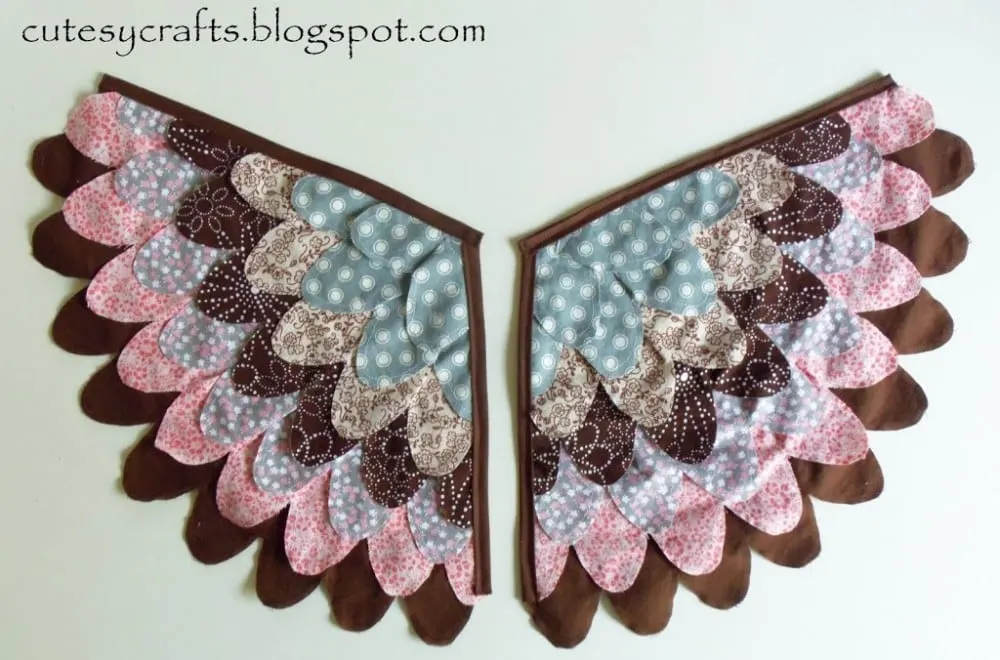
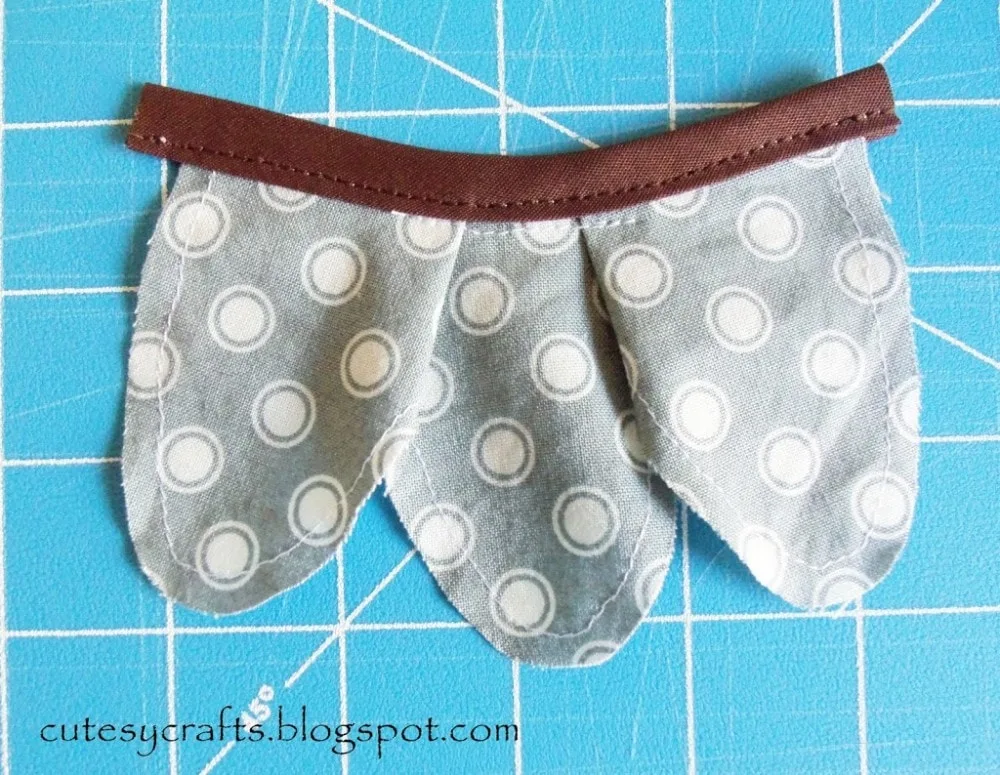
Take your first row of scallops and pin and sew it along the curved edge of the wing on the wrong side (side with no print) of the fabric. If one last scallop is hanging over the edge of this row, cut the whole thing off like I did here. Notice how it doesn’t go all the way to the end.
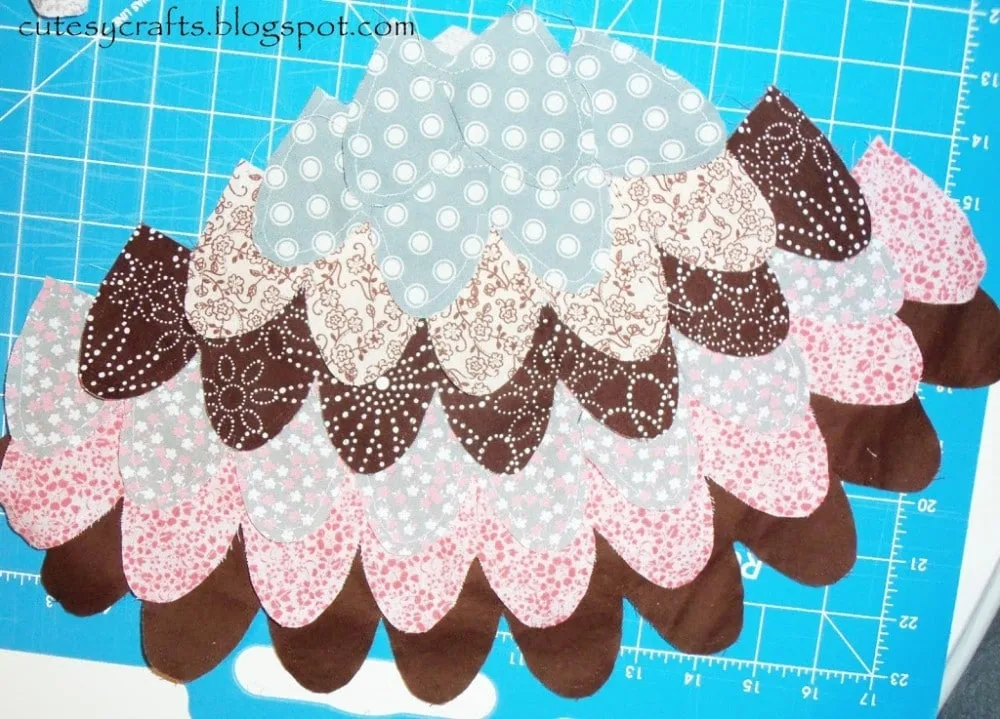
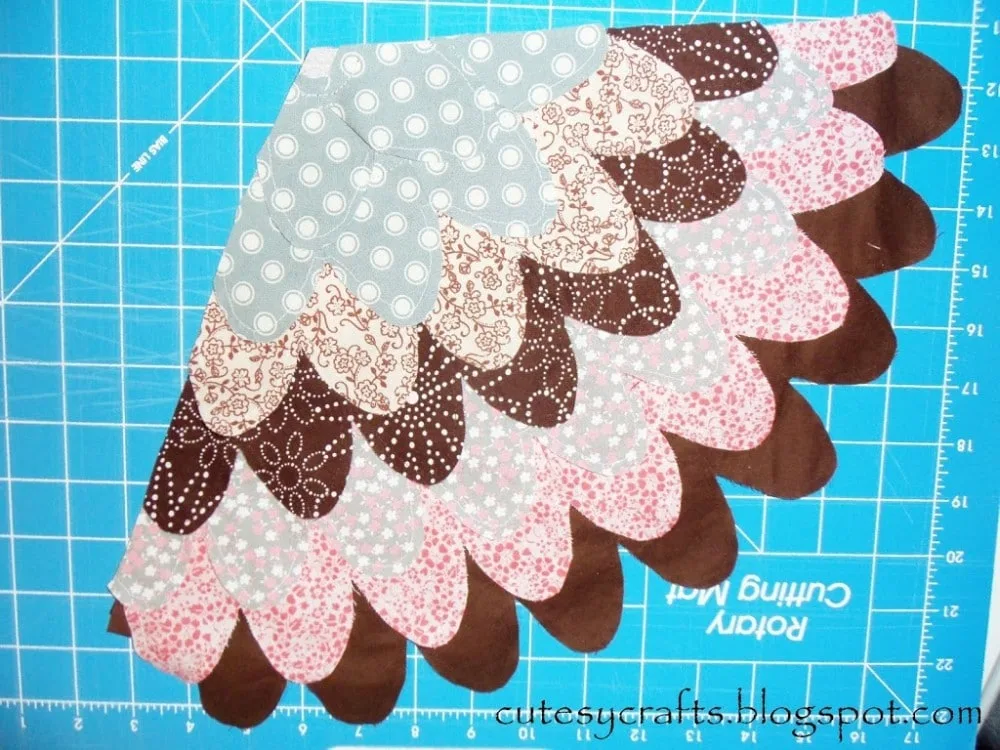
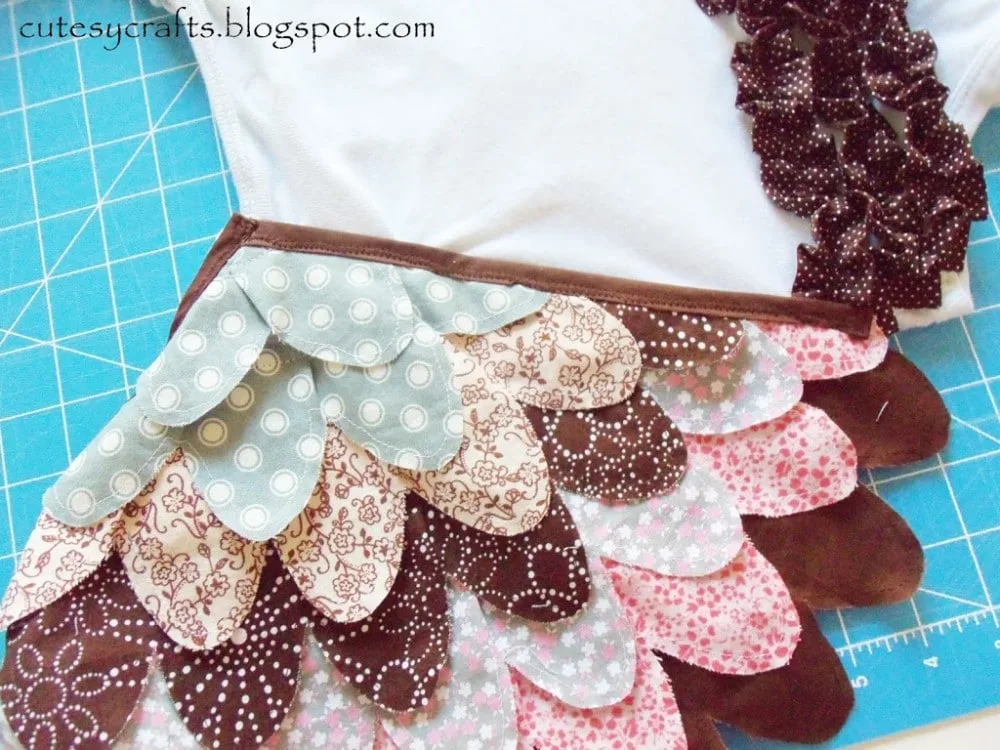
Layer and sew the rest of your scallops. When you get into the tighter curves, you will have to pleat or fold the fabric a little to get it to turn the right way. Let these rows hang over a bit past the edges.
Trim all of the scallops to line up with the main wing piece.
Now take your double fold bias tape again and line it up on the straight edges. Pin and sew it on. Make sure to turn the ends of the bias tape under so you don’t have any fraying.
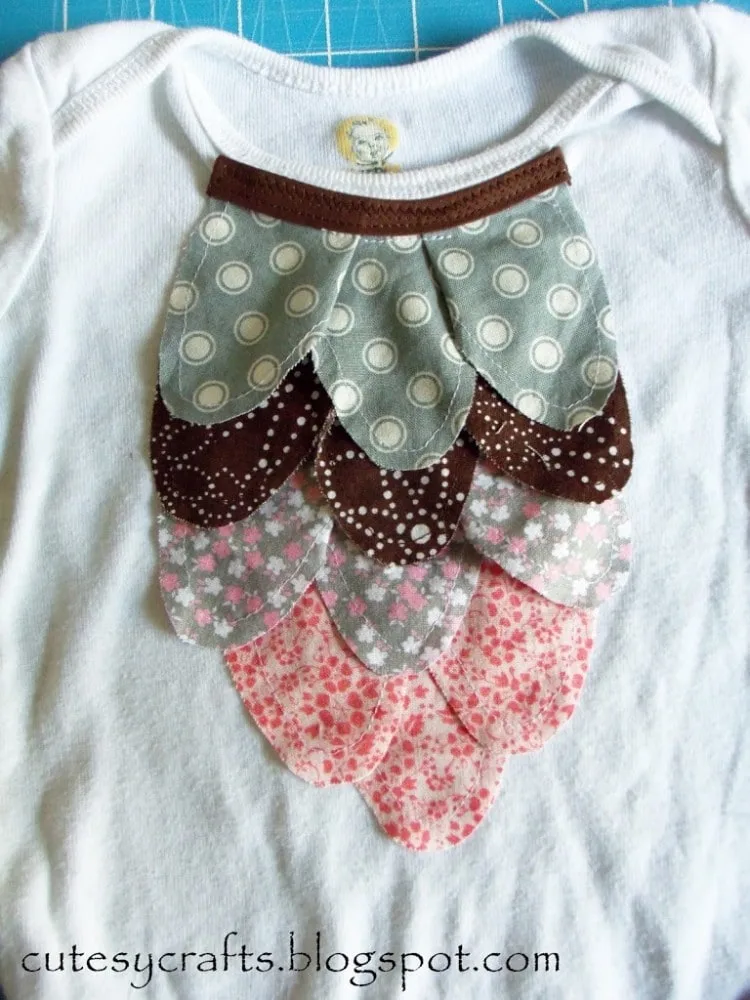
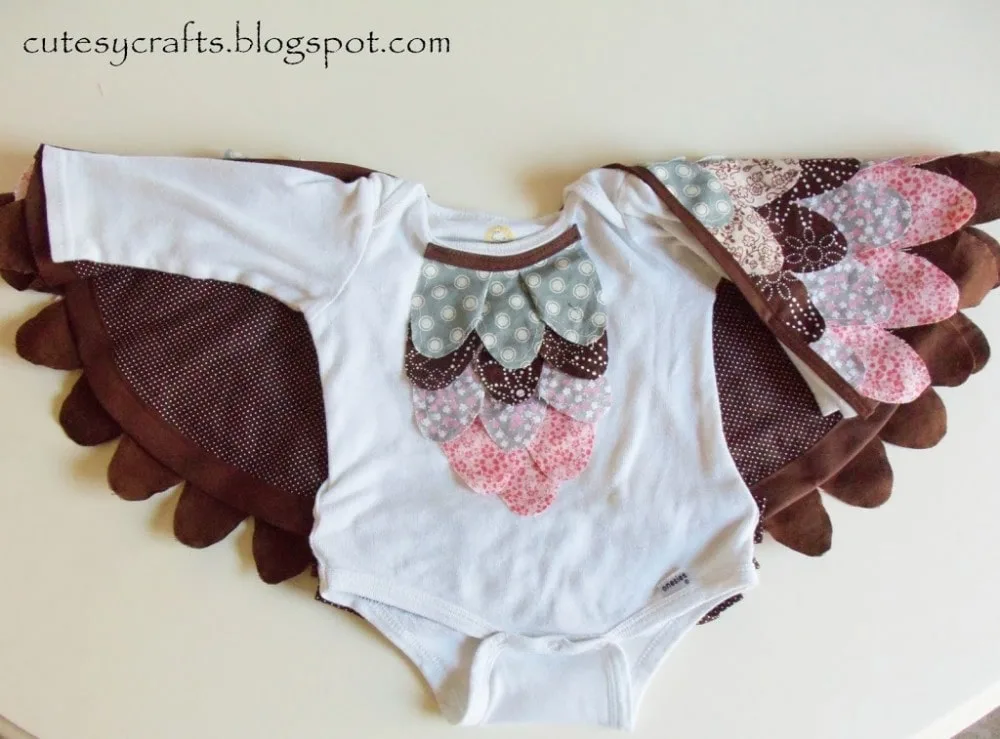
Don’t they look great?! Now set your wings aside and get your onesie back out. Cut out some more scallops in your favorite fabrics to go on the front of the onesie. See the photo below. Prep the bottom of the scallops to prevent fraying like you did with the ones on the wings.
Take the sets of three scallops and pleat/fold them to match the curve of the neck of the onesie.
Sew bias tape on the top of the highest set of scallops to finish the edge.
Layer and sew all of the scallops starting with the one on the bottom and working up. Use a wide zigzag or stretch stitch to sew them onto the onesie to keep everything stretchy.
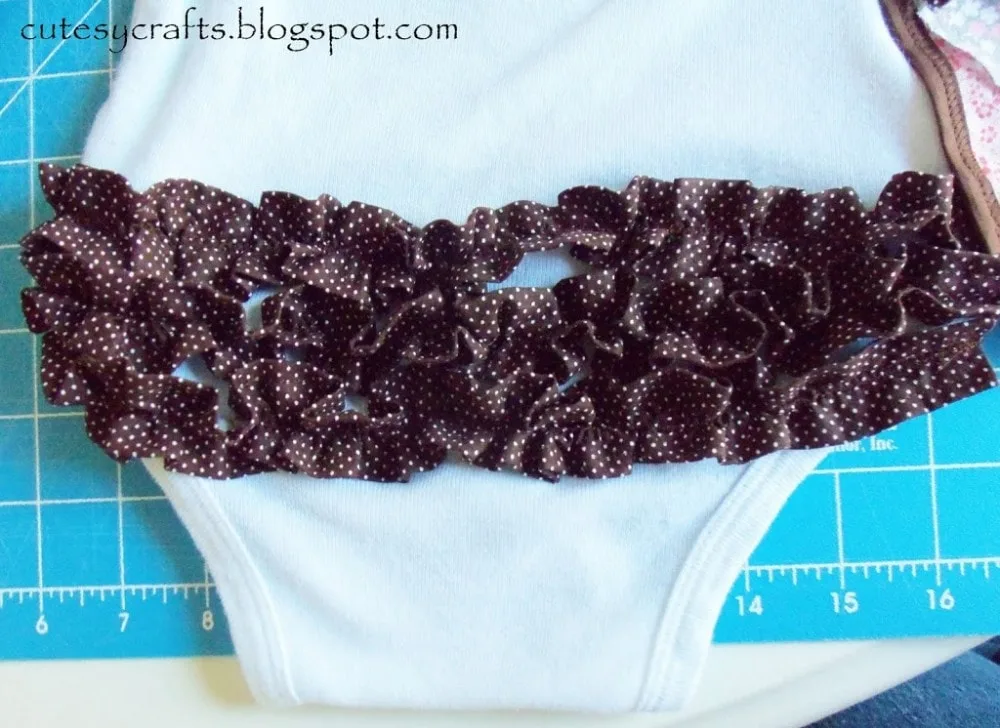
For the ruffle butt on the onesie, I just used this tutorial here by Crap I’ve Made. I opted to cut the strips a bit wider and hem the edges. I don’t have a serger, and we have enough fraying going on on the wings. Don’t need fraying ruffles. I also recommend sewing the ruffles onto the onesie with a zigzag or stretch stitch.
I used the same ruffles to sew onto the bottom of the legwarmers. There are TONS of different tutorials out there to make legwarmers. I just used an old pair of knit toddler tights.
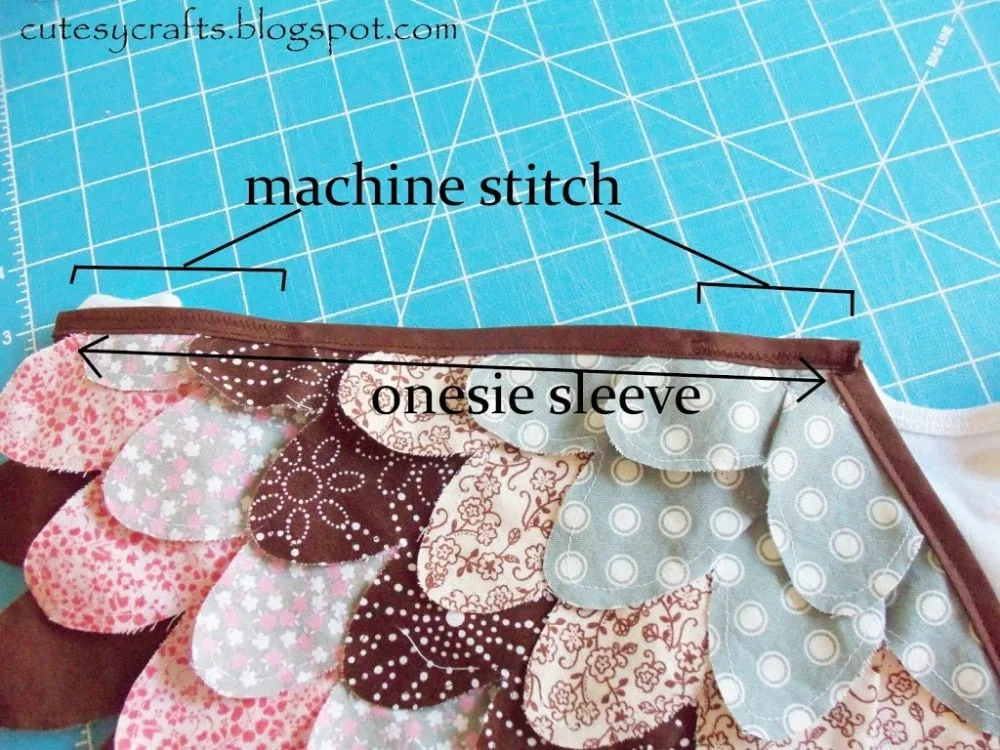
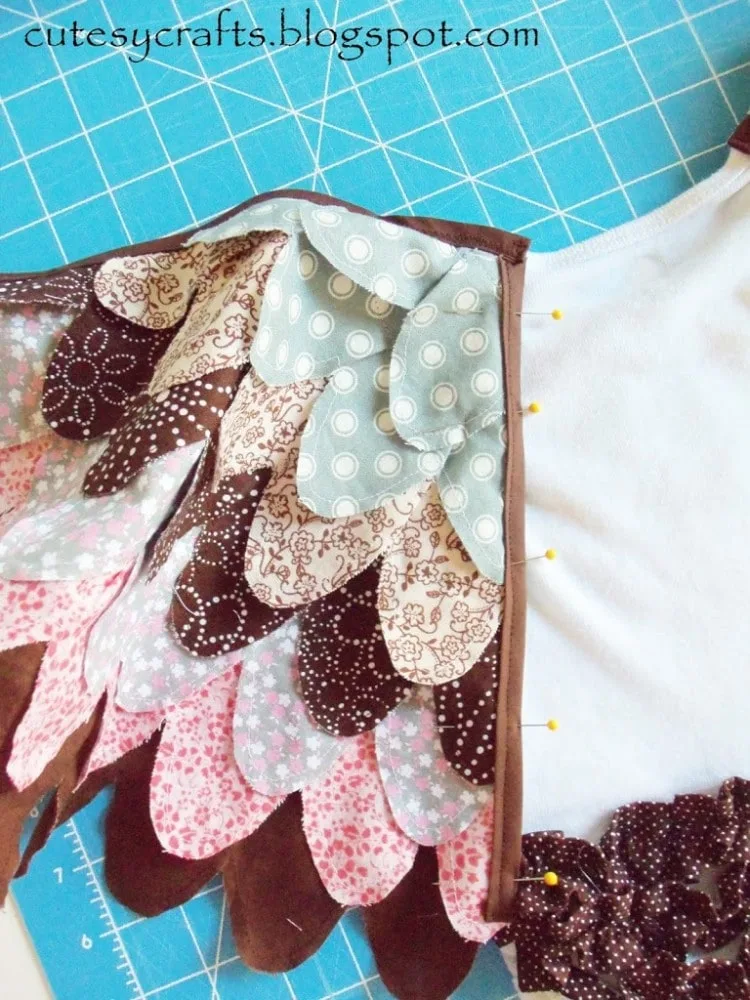
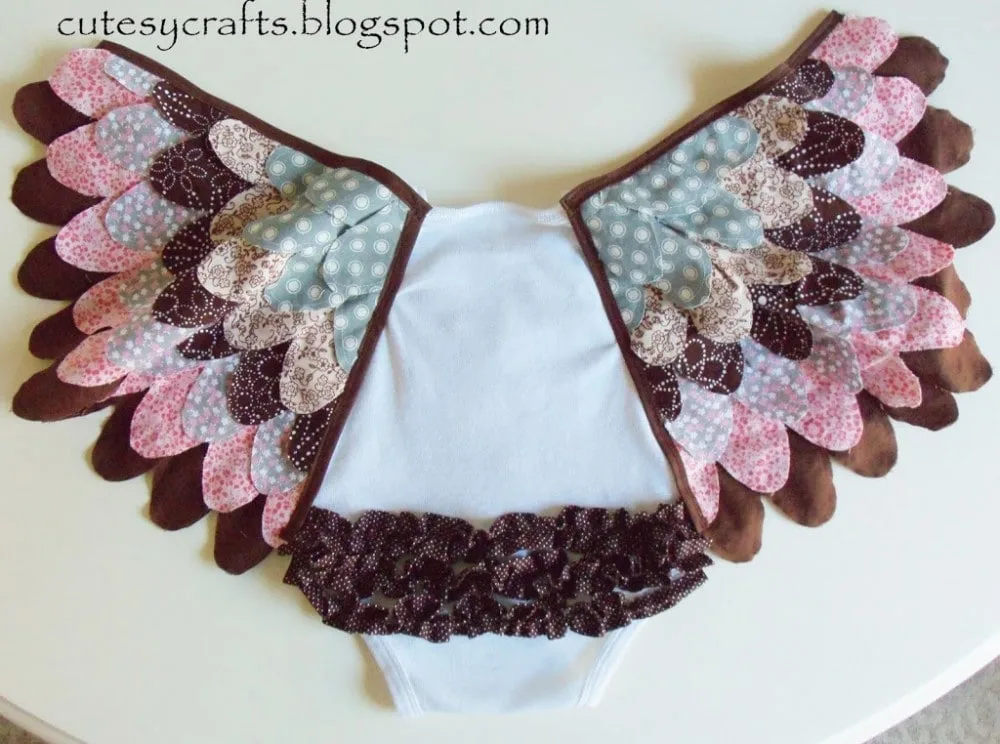
Now you finally get to sew the wings onto the onesie! Lay your onesie out straight again like you did when you made your template. Pin and sew (using a zigzag) where I have shown in the photo below. You can sew the rest by hand if you want, but it’s too hard to get in there with the machine. Be sure not to sew any part of the onesie shut!
Now kind of fold the wing up in the middle and pin and sew all the way down the back with a zigzag. You should end somewhere over the top ruffle on the butt of the onesie.
That’s it! Piece of cake right?! 😉 Please ask if you have any questions! Let me know if you like it and please subscribe!
Check back soon to see the hat that I made. **EDIT: Go here to see the hat.**
And I think you’ll also like this bee costume!
Check out these other cute baby costumes!
https://www.thescrapshoppeblog.com/happy-halloween-2011/
https://www.sewwhatalicia.com/diy-bumble-bee-costume-baby-toddlers/
https://www.unoriginalmom.com/baby-crayon-costume/
https://suburbanwifecitylife.com/good-plenty-costume-diy/
https://www.designdazzle.com/diy-halloween-onesie-costumes/
https://ithappensinablink.com/easy-diy-infant-bear-costume/
https://craftboxgirls.com/blogs/articles/no-sew-baby-mermaid-costume
https://www.triedandtrueblog.com/star-wars-princess-leia-halloween-baby-wig/
https://www.girllovesglam.com/no-sew-baby-owl-costume/
https://prettylifegirls.com/2018/09/diy-ice-cream-cone-costume.html


Andrea
Tuesday 2nd of October 2018
Thanks so much! Making this for my son this year! Got one wing complete and I’m super excited! Thanks for taking the time to post this! Super helpful!
Jessica @ Cutesy Crafts
Wednesday 3rd of October 2018
Yay! So glad you are getting good use out of my tutorial. He'll be one cute little owl!
Adela
Friday 9th of February 2018
It is beautiful! I was trying to find some good costume for my 10month old for the traditional carneval we have here in Czech. This is perfect! I'm gonna make it... I have a lot of colorful scrapes so she might turn out to be a parrot :)
Jessica @ Cutesy Crafts
Friday 9th of February 2018
Oh my gosh! That would be too cute!!!
Greta
Thursday 13th of October 2016
I'm trying to make this for Halloween this year, but I'm not very good at sewing yet. How did you sew the back seam of the wings? I'm not quite sure how to fit my onesie on my machine so that I have access to that seam. I have an old 6600 Singer. Is it impossible with these old machines, or is there a method to getting at these areas?
You do great work! This outfit is super cute!
Jessica @ Cutesy Crafts
Thursday 13th of October 2016
I think you should still be able to do it. Try opening up the bottom of the onesie and sewing halfway up the wing through that side. Then turn it around and sew the other half through the neck. If worse comes to worst, you can always stitch those parts by hand.
melynde
Monday 10th of October 2016
Can I ask a question about putting this wing together. You say to "Layer and sew the rest of your scallops" I assume you are layering one row of the scallops and then sewing it onto the big wing?? Doesn't that show through on the big wing? Am I missing something on how to layer and sew the scallops on the wing? Could help a desperate mom out?
Jessica @ Cutesy Crafts
Wednesday 12th of October 2016
Yes, it will show through the front of the wing, but if you change your lower bobbin thread to a color that is similar to your wing, the stitches won't be very noticeable. I could have put another layer of fabric on there, but I wanted them as lightweight as possible for baby. Hope that helps! Let me know if you have any other questions. I'm happy to help!
Dawn M. Andrews
Wednesday 28th of September 2016
how about a "no sew" way? I am trying to find a way to make a snowy owl (Hedwig) for my son (10 months). I do not have access to a sewing machine.
Jessica @ Cutesy Crafts
Wednesday 12th of October 2016
I suppose you could try some kind of adhesive or hem tape, although I don't know how well that stuff works.