
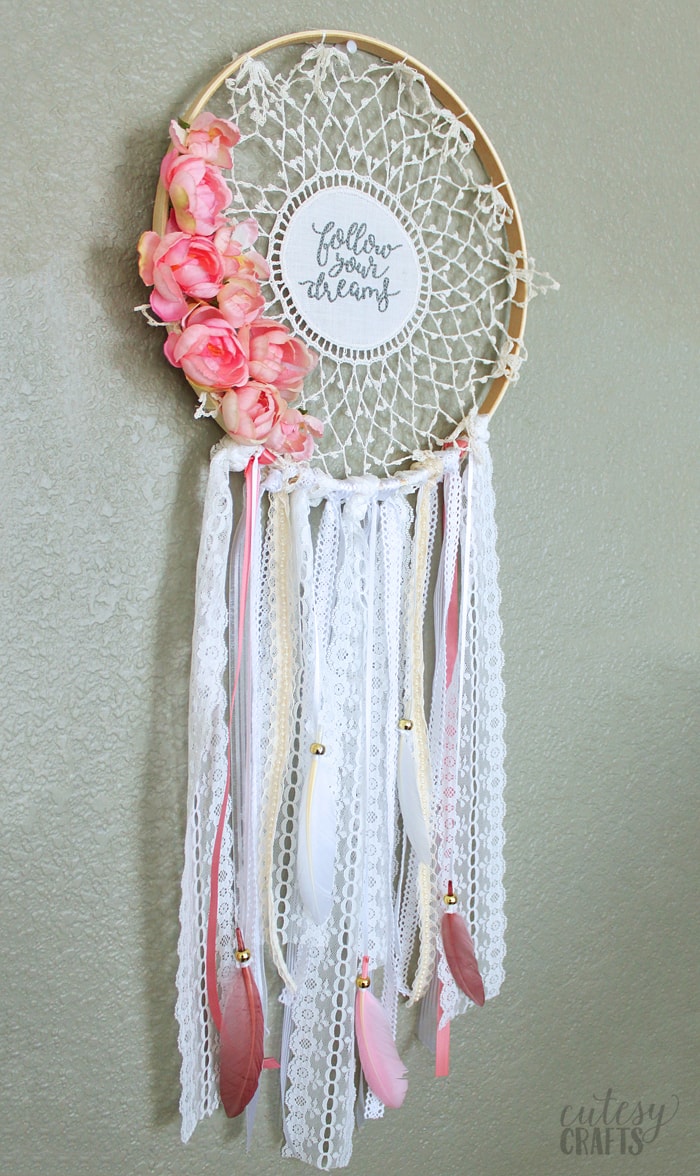
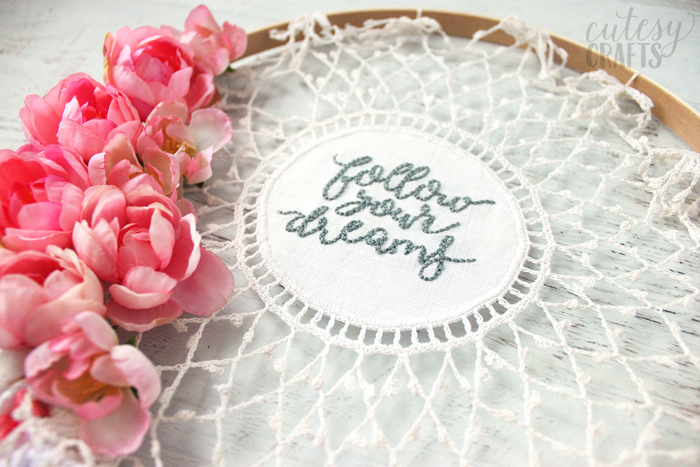
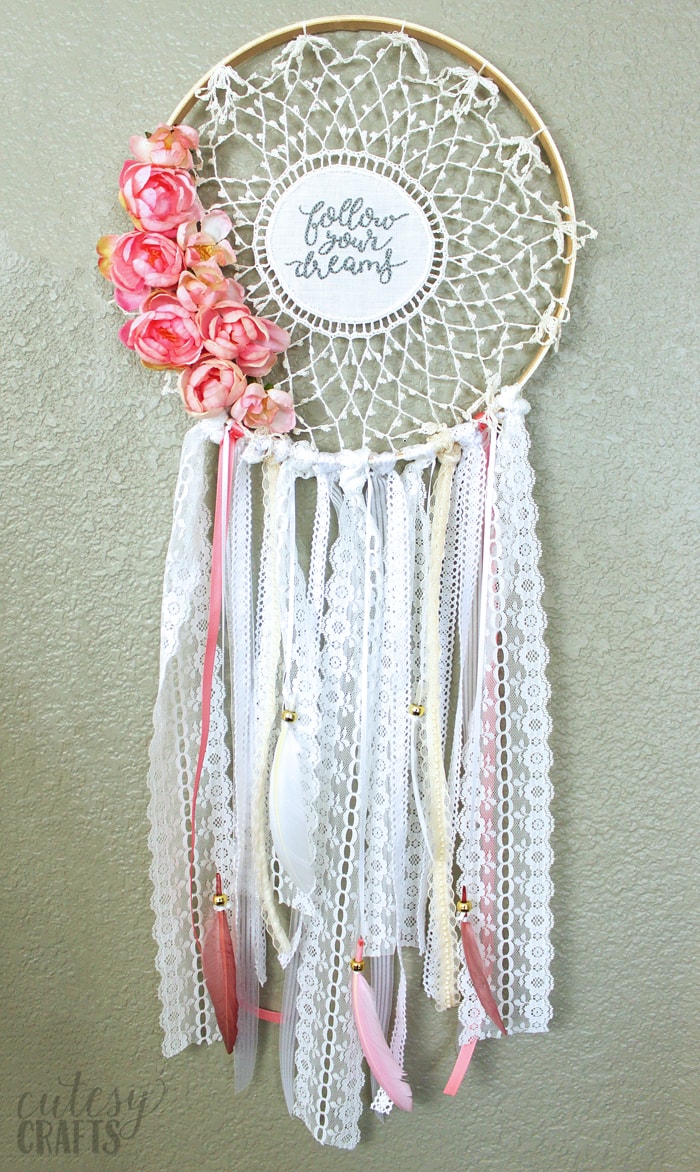
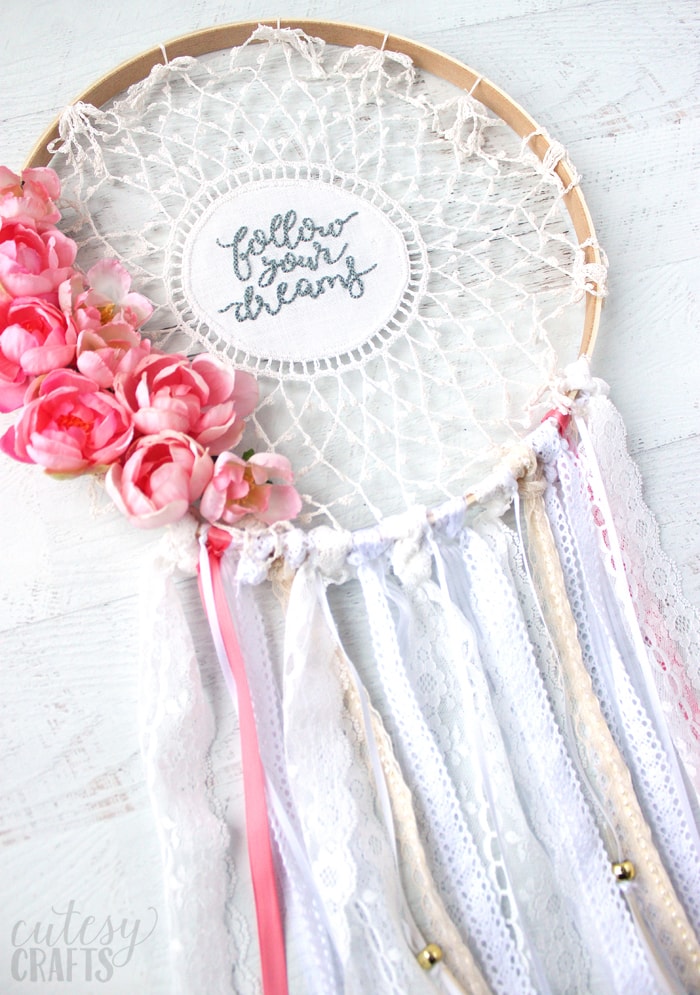
I was browsing around Instagram one day when I saw someone embroidering on some vintage doilies with a fabric circle in the middle. I had to get my hands on a doily like this to give it a try! When I thought about putting it in an embroidery hoop, I knew just what my doily needed to be, an embroidered doily dreamcatcher! Isn’t it pretty?!

(This post may contain affiliate links, which means I may receive a commission, at no extra cost to you, if you click a link and purchase something that I have recommended.)
For this embroidered doily dreamcatcher tutorial, you’ll need:
- “Follow Your Dreams” doily dreamcatcher embroidery pattern – instructions to download are at the bottom of this post
- doily with linen center – search “linen doily” on Etsy
- embroidery floss – DMC 169 and a color to match your doily
- embroidery hoop center
- thin ribbon
- different colors and textures of ribbon and lace ribbon
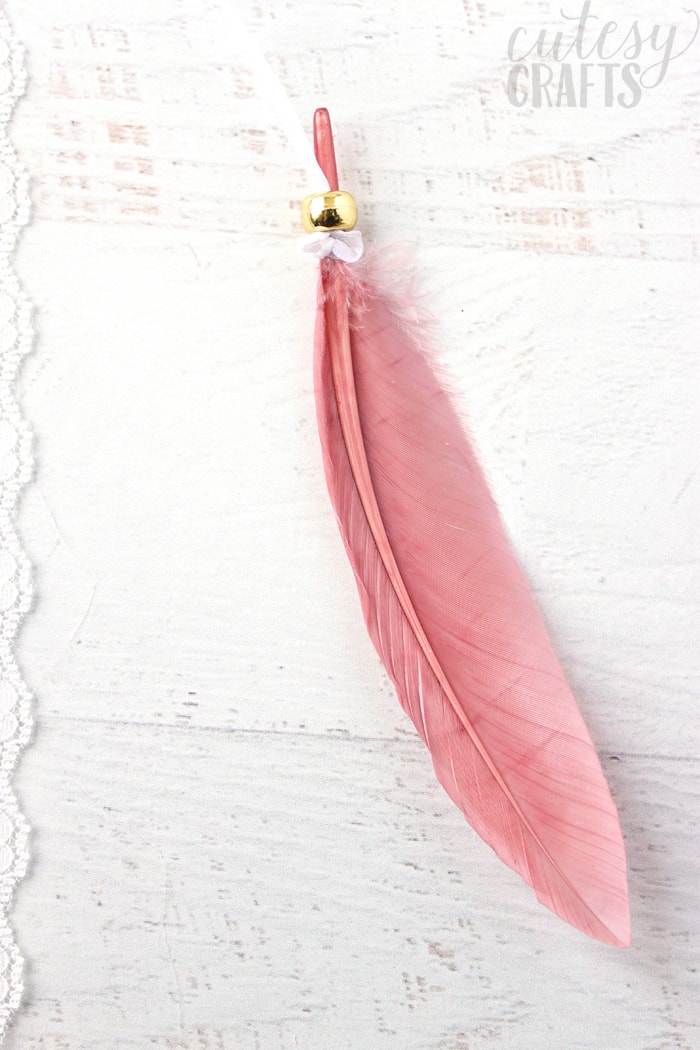
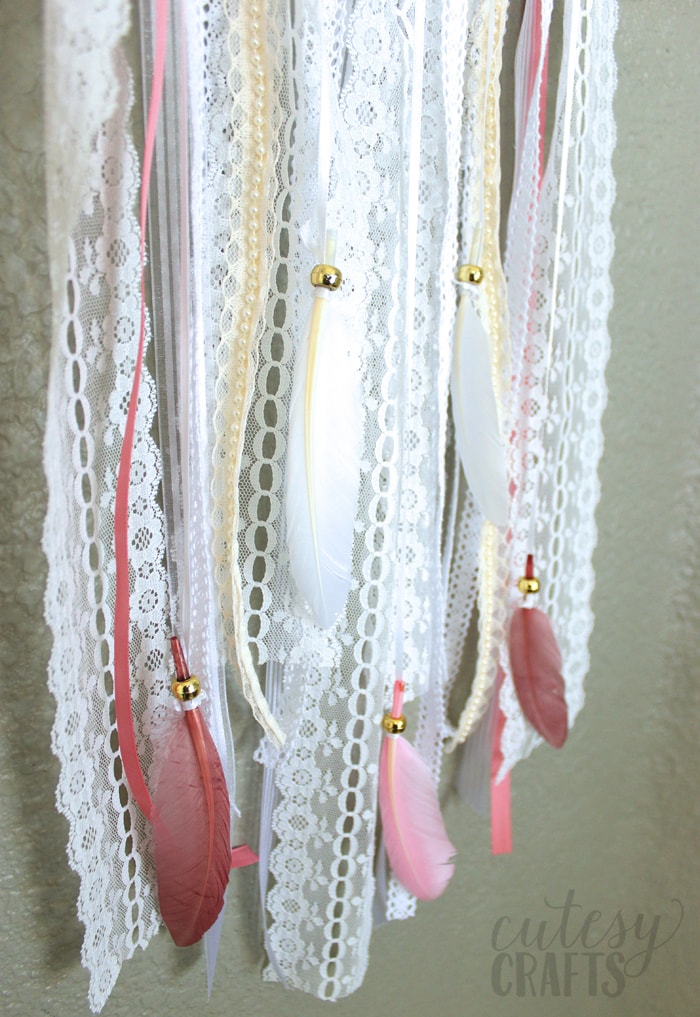
- feathers – 3 pink and 2 white
- gold pony beads
- artificial flowers
- hot glue gun and gluesticks
- transfer supplies – Learn how to transfer an embroidery pattern here.
Find a doily. For this project, you’ll want to get a doily that has linen fabric in the middle. There are lots of vintage ones on Etsy, but it might take a little searching to find one that you want. I went on Etsy and searched “linen doily” to find this one. If that doesn’t work, you can also just work your way through a search for “doilies.” Make sure you check the dimensions of the doily to see if it’s the size you want. The center of this one is 3.25 inches in diameter. The entire doily is about 9 or 10 inches. You can resize the pattern to fit whatever size doily you find.
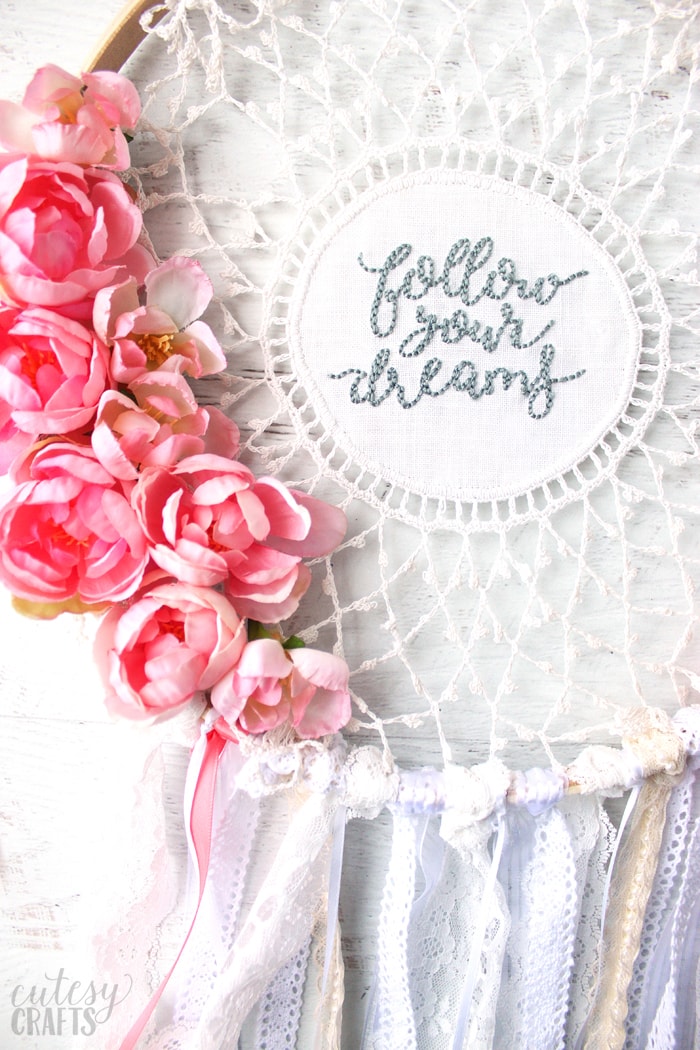
Embroider your design. I embroidered the letters using a back stitch and 6 strands of embroidery floss. If I had to do it over again, I would have used only 3 strands. It still looks nice, I just wish there was a little less bulk. You’ll want to use a small embroidery hoop just on the fabric part of the doily. Be prepared for the doily lace to get in the way. I can’t tell you how many times I stitched through the hanging doily and had to take out my stitch. Ugh! I have a video here that will show you how to embroider letters by hand.
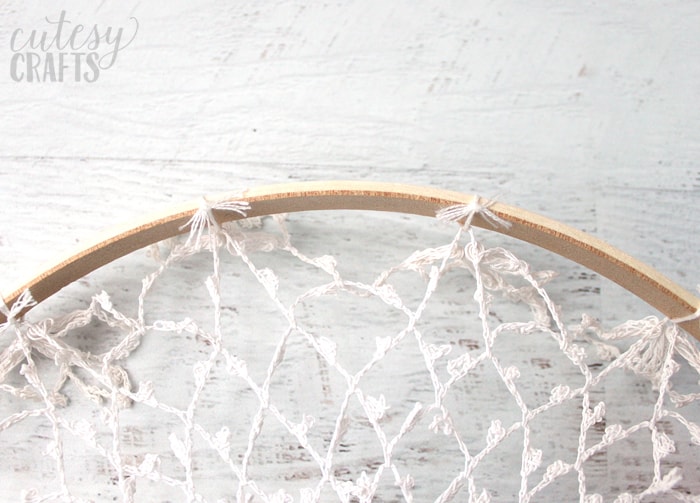
Choose an embroidery hoop that is slightly bigger or smaller than your doily. You will only be using the inner part of the hoop. Use pieces of embroidery floss that match your doily, thread them through the doily, and tie them onto the hoop with a double knot. Choose repeating spots on the doily to attach each part, all the way around. Make the spots you choose will hold the doily tight enough on the hoop, but not so tight that you distort it.

Trim your embroidery floss short so the tails won’t show as much in the front.
Tie a feather onto a long piece of thin ribbon. String a gold pony bead onto the ribbon and over the end of the feather. Use a little hot glue to secure if necessary. Do this for all of the feathers.
Time to cut some ribbon! I think I used 5 different kinds besides the thin ribbon for the feathers. I used more of some than others. Make the cuts a little longer than you think they need to be and then lay everything out before tying. You can always trim stuff if you need to. If you make them all about the same length, they will naturally get shorter as they go up the sides of the hoop.
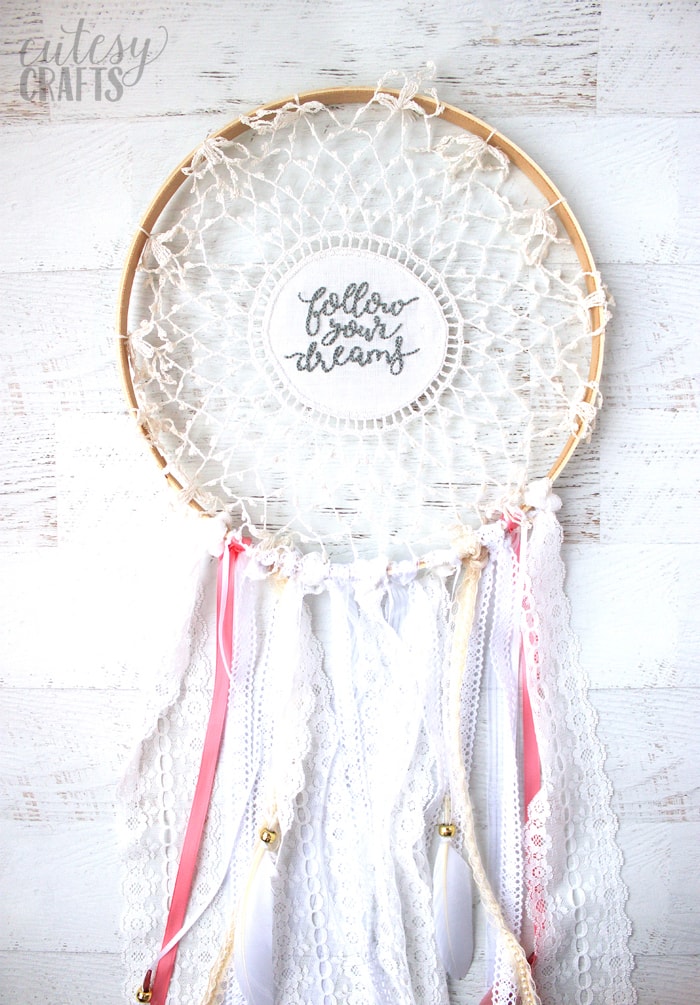
Tie each ribbon onto the bottom of the hoop, and try to keep the knots in the back. Keep everything symmetrical (if you tie a ribbon on one side, tie the same kind on the opposite side).
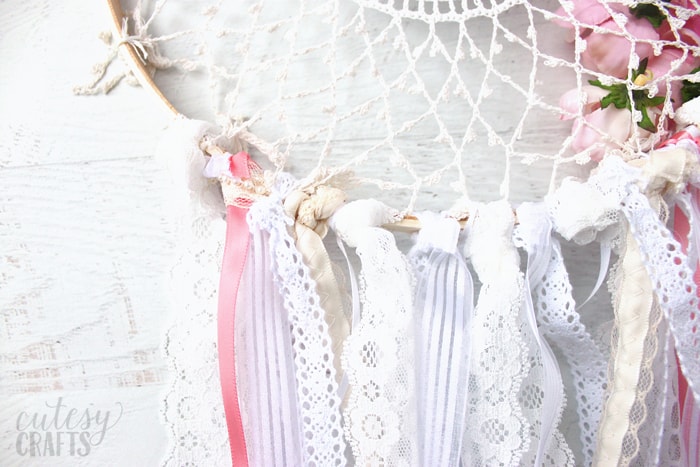
Tie the feathers on last so they will show in the front. You’ll notice I made the two white feather ribbons shorter than the others. Once everything is how you like it, hot glue the excess ribbon tails to the knots at the top. This will make them look neater. You might also want to use a lighter to burn the ends of any fraying ribbon.
Hot glue some pretty flowers onto the side of the hoop. There’s not a lot of doily surface for hot glue to hold onto, so start with the flowers on the left, and glue them to the wooden hoop. The flowers closer to the center just got glued to the other flowers.
Hang it up and enjoy your beautiful creation!
I thought I’d want to hang this in my girls’ room, but after I hung it in my office, I kind of want to keep it for myself. They have enough embroidery hoopy things in their room anyway. 🙂 I hope you enjoyed this doily dreamcatcher tutorial.
Get the free doily dreamcatcher embroidery pattern!
To get the password, enter your information in the form below to sign up for my free email newsletter. You will get an email with the password. Already subscribed but forgot the password? No need to subscribe again! Every email newsletter I send has the password in it, so check the latest one.