
I’ve always loved the idea of having an old upright piano in my house. So when my brother and sister-in-law were moving, and couldn’t take their 100 year old piano with them, I jumped at the chance to have it. My husband and step-dad hooked up a trailer and hauled the old thing back to my house. I was so excited!
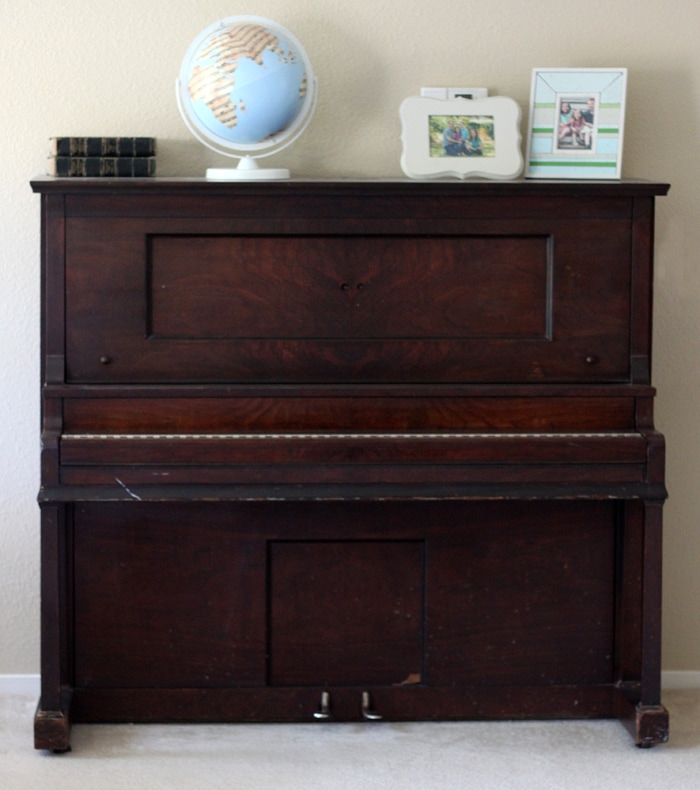
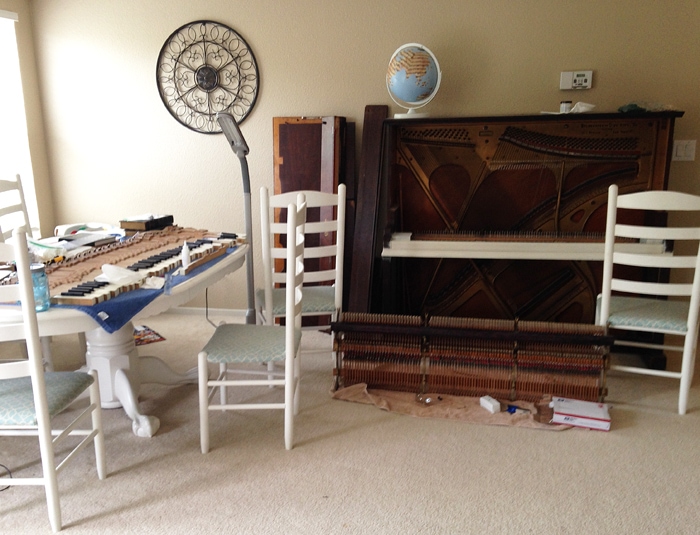
We’ve had it for about 2-3 years now, and I finally decided to take the plunge, try some DIY repairs, and give this piano a makeover. That was four months ago. I didn’t know it at the time, but I was getting in WAY over my head. I finally finished it about a month ago. It’s definitely better than it was before, but it’s still not great. Was it worth it? My dining area looked like this for months! I could have spent a little bit of money, gotten a newer (used) piano, and had one that worked much better. Sure, it wouldn’t have had the charm and aesthetics of an old upright piano, but a piano should be more about the functionality than how it looks.
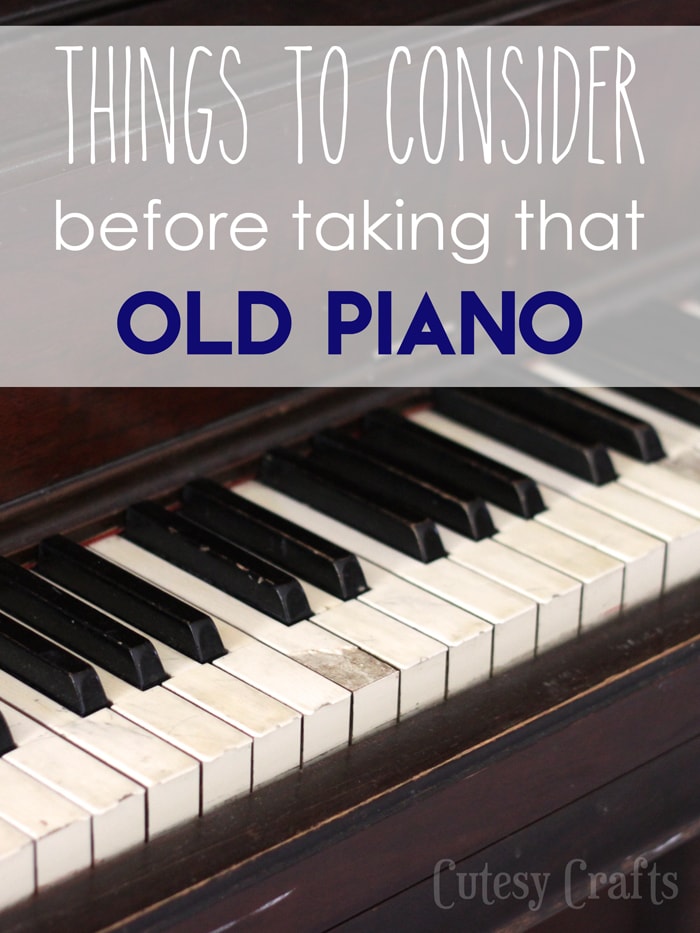
Four things to consider before taking that old piano.
First things first, I’m not an expert by any means, so I know there are other things that probably need to be taken into consideration (see the videos I linked to at the end for that). Take this post for what it is… just the things that I wish I would have known before I decided to take the piano.
1. How old is the piano? Let me just talk you out of this right now. Strings and other parts of the piano get old and worn. Without a lot of money for parts, special tools, and lots and lots and LOTS of time/experience, you aren’t going to be able to make it perfect. It’s never going to sound like a nice, new piano again. There’s always going to be that key that clicks or does something weird. Is it worth it? Or should you just find something newer?
2. Does it work? This sounds like a simple enough question, but you need to check everything. Play all of the keys. Are there one or two that are acting up or is it more like twenty? If it’s on the higher end, you might want to reconsider. Each and every one of those keys has a ton of moving parts that are a pain to repair. Look inside. Does anything look broken? Are there any missing pieces? Play all of the keys with it open and watch the action work. Are all of the keys consistent or do some look a little funny?
3. How are the keys? Are a lot of them chipped and broken?
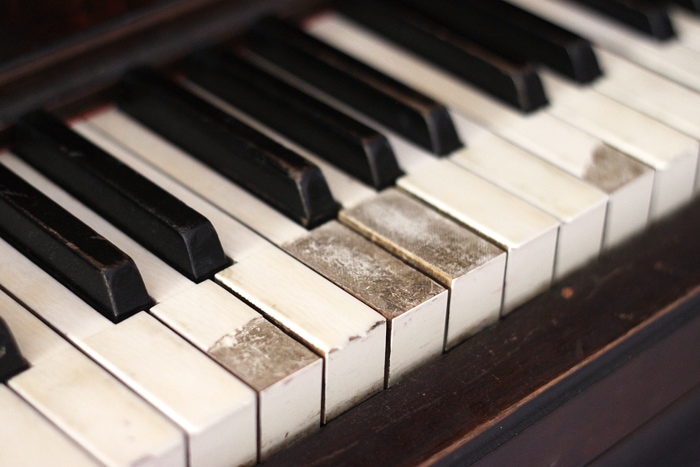
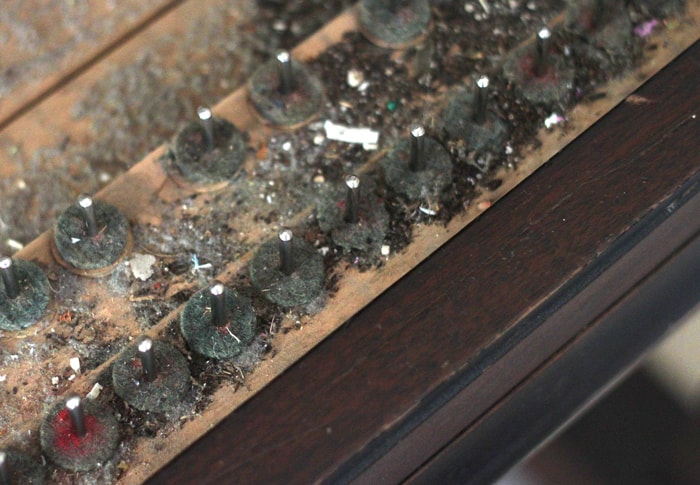
Replacing a few keytops is not a big deal, but replacing all of them is a TON of work. I never realized how many keys were on a piano until I had to scrape, sand, glue and file 52 keytops. I can’t even explain to you how much of a pain it was!
Bend down and get the keyboard at eye level. Are the keys fairly even? Some slight uneven keys can be remedied with piano regulation, but if they are really off, that could mean that things are too warped for you to repair on your own. My keys ended up slightly uneven, and it irks me a little. I could probably fix it if I had the right tools, but I’m not planning on being a piano repair woman, and the tools are expensive.
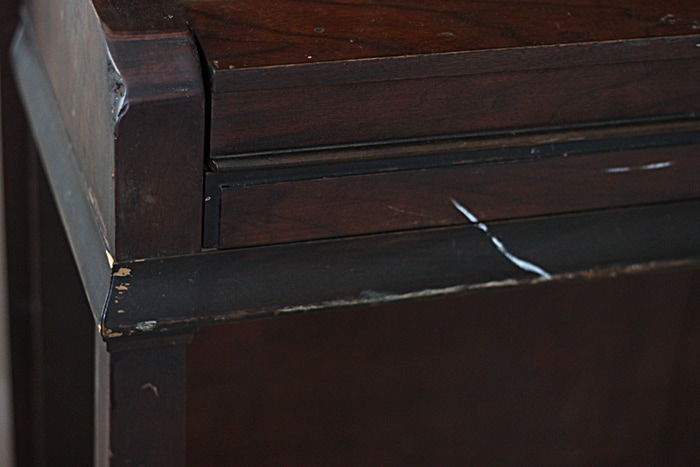
4. How’s the finish? If you are up for a painting project, this doesn’t have to be a deal breaker. Just know that it’s going to take a LOT of time. Where are you going to put the piano while you are painting it? If you want to refinish the wood, that’s going to be a lot of harsh chemicals to strip and redo it. I ended up painting mine, which came with its own trials, but more on that when I reveal the piano makeover in part two of this post.
If you DO decide to dive in and try making some piano repairs, here are a few tips from the trenches.
Check out these YouTube videos from Howard Piano Industries. He’s got one for pretty much everything from buying a used piano, to repairing and tuning your piano. I learned a lot, and he even responded to a question that I had. I bought parts from him as well.
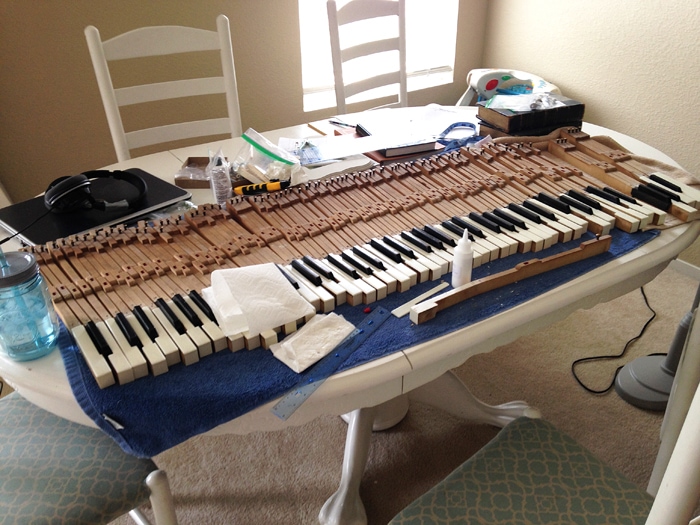
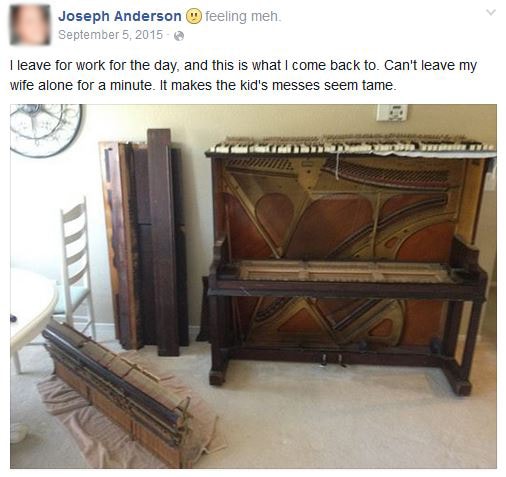
Only take out the action if you really need to, and get help doing it. After watching the videos, I was all gung ho to get this piano makeover started. I took apart the piano case, and took out the action. First of all, it was WAY too heavy for me to be doing on my own. I should have waited for my husband to get home and help me. This was his Facebook status update that day. Haha! I just have this problem where I get an idea in my head and can’t wait to get it done.
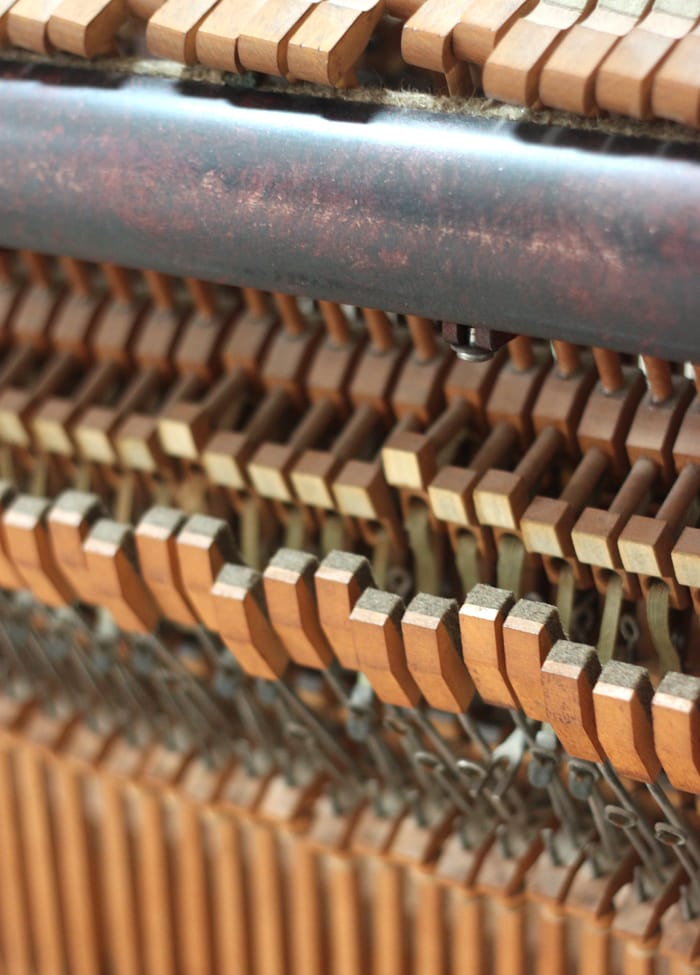
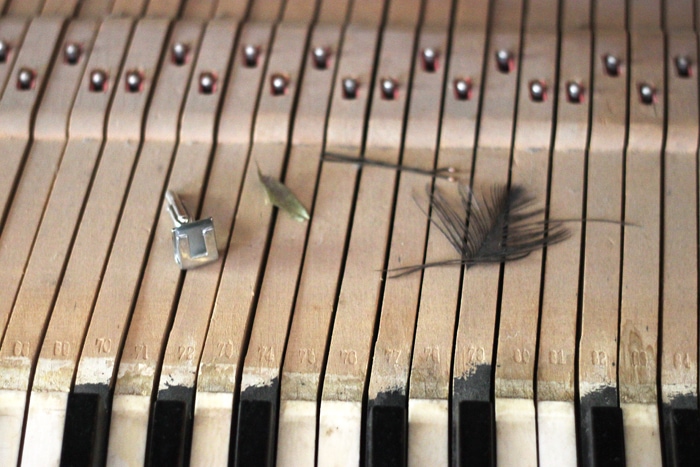
After all was said and done, I probably could have made the repairs without taking the action out. I wouldn’t have been able to clean it as easily though, so that was nice. There was a ton of gunk inside there. Like really REALLY disgusting! Just be glad this photo is out of focus. That’s 100 years worth of dirt that was under those piano keys!
Also, to whoever owned this piano some time before me… I found your missing cuff link (along with some other treasures).
If you decide to take the action out, just be careful where you set it. I’m super clumsy and ended up tripping over it and breaking a hammer. I literally almost cried, I was so mad at myself! I’m telling you, this project was a nightmare! Luckily it wasn’t too bad of a repair, but it could have been easily avoided.
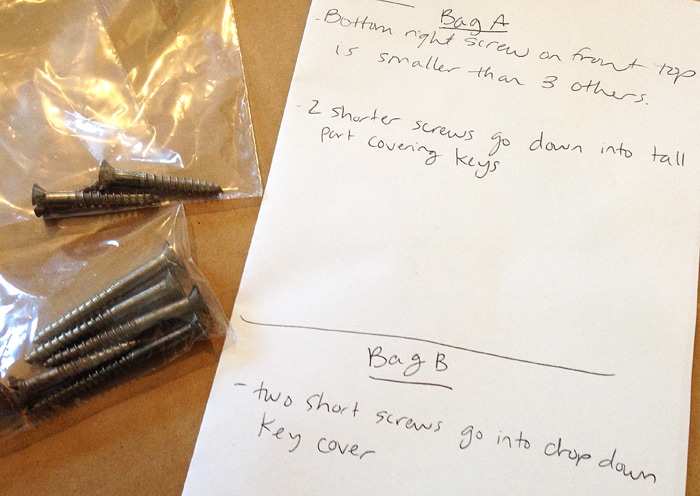
Label all of your screws and take pictures of how everything goes back together. I separated everything into little bags, labeled the bags, and made notes on a piece of paper to remind me where everything went. I even took some pictures with my phone along the way. I’m SO happy that I did this. Oftentimes I overestimate my memory and think that I will be able to remember where everything goes. By the time I was ready to put everything back together, so much time had gone by, that I couldn’t remember a thing. Thankfully the notes and labels helped me put everything back together without a hitch.
The bottom line.
If you are okay with a piano that is never going to sound perfect, you love the style and history of an old piano, and you have some extra time for a big project like this, then go for it.
But…
If you want something that is going to be more playable, I’d go with a newer piano (probably at least 80s or 90s era). You can still make it look pretty by giving the outside a makeover, without having to worry about intricate repairs that might be needed on the inside.
I wish I would have gone the newer route. I mean, I love the way my piano looks on the outside now, but it’s killing me that it doesn’t play perfectly. The piano was already in my house though, so I didn’t have many options. Hopefully you are reading this before you decide to take that old piano that someone offers you.
Have any experience with and old piano? I’d love to hear your thoughts in the comments below. Be sure to check out part 2 of this piano makeover, where I reveal what it looks like now.
Mary C
Sunday 21st of May 2023
I’m crazy piano lady, too. Am paying a crazy amount of money to have a “free”1882 Chickering piano from the fire pit. You can look up history of these pianos and I just felt it had to be saved as part of Americana music. BUT cost for total restoration ranged from $25k-$35! I’m trying to find ANYONE who wants to take this treasure because like you—I know this is not a DIY project. If anyone is interested, please feel free to contact me at: mbees51@yahoo.com.
Veleska Pritchard
Sunday 15th of May 2016
Very ambitious project. But I'm sure the end result is worth it and I can't wait to see it!! :)
Pam Foster
Monday 4th of January 2016
Oh my goodness what a challenge, well done for persevering and looking forward to seeing the finished result:)
Jessica @ Cutesy Crafts
Friday 15th of January 2016
Thanks Pam! It was definitely a lot of work, but totally worth it!
Dorothy
Monday 4th of January 2016
I think I have the twin to your piano! From the pictures there seem to be only very slight differences. Mine has an additional piece of carved wood. I don't know the names of the parts to give its location, but if you are sitting on the bench to play it is right above your lap. It is attached to the bottom of the part that is under the keys. Mine still has part of the controls from when it used to be a player piano hidden in the board in front of the keys. It is hard to open and I don"t remember how I discovered it. I'm looking forward to seeing how you repaired the keytops.
Jessica @ Cutesy Crafts
Friday 15th of January 2016
How funny! Neat that it still has some of the player piano parts. It was so cool to open this one up and see all of the old labels and stuff. I found a business card from the 60s for a piano tuner as well. Haha!